Insulation of the walls of the balcony and the entire area of the room

What walls of the loggia should be insulated and how to do this we will consider today. After all, warming is a complex of works and only then warming will give a positive result. If you finish the walls alone, there will be no effect.
All these questions we will consider. After studying the material, you can do it yourself and the price of finishing you will be equal to the cost of components.
The content of the article
Rules for warming the balcony
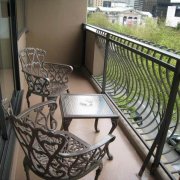
Many people want to have a warm balcony, but you must immediately understand that the balcony has a lot of areas through which cold air enters.
Let's consider what needs to be insulated in principle and further instructions will be given on how to do this and what to apply:
 Floor Balcony floor | Here it is necessary to pay attention to the fact that balconies usually have drains for water. These are the holes that must be closed. You can leave the drain yourself, but at the same time raise the floor. The bottom line is, when raising the floor, it is divided with concrete by an air gap and then the penetration of cold air will be minimal. |
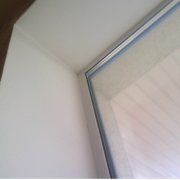
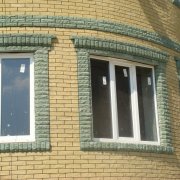
 Walls Walls on the balcony | In this regard, we need to prevent the entry of cold air from the vertical joints of the plates. So that the joints of the cladding will need to be sealed. To do this, use sealants. |
 Ceiling Balcony ceiling | If the neighbor even has a balcony insulated, the stove will still freeze from the end. Therefore, warming will need to be done. There should be especially high-quality joint sealing on the street side. Indeed, it is from this side that dampness will penetrate most strongly. |
 Parapet Parapet on the balcony | This is often the most prone to cold penetration. It should be glazed on the top. To do this, you can use wooden and plastic frames. But the parapet itself is worth insulating. And to make not just an air gap, it is necessary to place a heater with a thickness of at least 5 cm. |
Warming of balcony walls
Warming of the walls of the balcony begins with the preparation of a work plan. If you decide to do without the help of specialists and do it yourself, this article will help you cope. Below is an instruction for performing these works, even a beginner can handle it.
Preparing for installation work
Before starting work, it is necessary to calculate the area of the balcony, choose the material taking into account the budget, prepare the tools.
You will need the following tools and equipment:

- Polyfoam (as the main element) or mineral wool, penofol, as a supplement;
- Euroruberoid or other waterproofing material;
- Construction cement glue;
- Polyurethane foam;
- Reiki made of wood;
- The expansion bolt shield for polyfoam (there are special with caps);
- Construction stapler with brackets 10 mm;
- Self-tapping screws and nails;
- Metal corners;
- Screwdriver, hammer, drill;
- Leveling mixtures (cement, sand) or ready-made;
- Any measuring materials (ruler, meter tape);
- Foil adhesive tape.
Useful Tips
Before buying materials, think carefully about how you imagine your updated balcony, because of the type of finishing balcony trim the choice of insulation components will depend.
Attention: When buying materials for insulation, you need to focus not so much on the cost of production, but on its quality.Materials that are too cheap will not last as long as we would like.
So:
- Consult with the seller, he will be able to pick up good quality material according to your budget. Also, choosing this or that material, be guided by the characteristics of moisture transmission, if a heater is selected that allows moisture to pass through, then additional materials for waterproofing will be required.
- Once you have calculated the area of your balcony and purchased all the necessary tools, you need to prepare the balcony itself for installation. To do this, remove all unnecessary debris from the balcony and clean all its surfaces - floor, ceiling, walls.
- Old frames need to be dismantled, the railing and all partitions should be left in place - during installation they will serve as a good addition and fastening to the insulation, they can be trimmed with plastic if desired (see.Plastic balcony decoration: do it right) or other material. If the housing space in front of the balcony is tiled, it is better to remove it near the balcony, after finishing work everything can be put in place.
Floor preparation and insulation
It depends on the floor whether the balcony will be warm. Through the floor, the bulk of the heat easily goes outside, so it is best to start warming from the floor. From the floor, which after installation will be about a level higher, you can already easily navigate the insulation of the walls.

To prepare the floor for insulation, you need to do the following:
- Clean the floor surface from old coatings;
- Carefully view and tap the base of the plate;
- Close up empty gaps and gaps with a solution;
Caution: To prevent mold deposits on the base, the floor must be covered with primer.
Now the floor surface is ready and you can proceed with installation.
If you plan to lay tiles in the fine finish, then the algorithm for actions to insulate the floor is as follows:
- Put a waterproofing agent on the prepared floor surface (oilcloth is suitable);
- Cut foam tiles according to pre-calculated sizes, as tight as possible, lay on oilcloth;
- Pour the resulting flooring with a mixture of cement and sand to a thickness of 5 cm;
- Wait a little while the surface of the cement thickens and you can begin to finish the floor.
Useful tips and getting things done
When performing this work, the following should be considered:
- Foam tiles are better to take the brand "Styrofoam - 25", where 25 denotes its density and a thickness of 5 centimeters.
- To fill the surface of the flooring, you can take different mixtures: ready-made, self-leveling surfaces - but such a mixture will cost a lot. To save money, you can prepare yourself a mixture of cement and sand.
- If you plan to make the floor simply wooden, then mineral wool is well suited as an insulating component. Despite the low price, the material will last for many years.
- At the beginning of the work, you need to lay a waterproofing layer throughout the floor: either hydroisol or euroroofing material is used here. It is not recommended to lay the whole bitumen canvas, it is better to cut it into pieces of the same size.
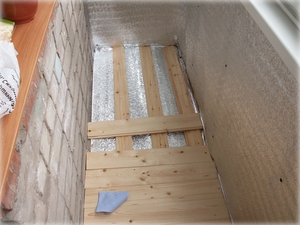
The algorithm of actions is as follows:
- It is necessary to lay sheets of roofing material "overlap" on the entire surface of the floor (so it does not rise, but will lie close to the floor);
- Place a wooden crate over the layers of roofing material to a height of 5 cm, it should be a crossed timber;

- Fix the crate on concrete and level it;
- Fix the crate using long, roofing screws (for such screws the head should be in the form of a bolt);
- Fill with foam for installation all the cracks throughout the balcony, especially in those places where the grille fits snugly against the walls;
- It is necessary to lay the insulation elements between the crossed bars as densely as possible (there should be no gaps!);

- After all the cotton wool has been laid, on top of it, on the crate, fix the plastic film using a construction stapler and staples;
- On top of the polyethylene on the crate, you can optionally fill plywood or boards.

Helpful advice:
- If it so happens that there are gaps between the insulation and the structure - you can fill up empty places and joints at the mounting foam. When using a foam gun, make it as small as possible.
- Then you can proceed to the final finish - to cover the floor with carpet, linoleum or other material (seeFloor finish: types of material).
Attention: This method of insulation is suitable for latitudes with warm and not severe winters. For areas where severe cold and frost are raging, such a method will be insufficient.
Wooden bars in the crate have the ability to transmit heat, in contrast to the insulation element. Thus, the heat quickly goes down and there are cool gaps on the floor, which quickly spread throughout the floor surface.
Wall insulation
Installation of the walls of the balcony with insulation will depend on the final finish. The best option for processing the walls of the balcony will be foam tile. Consider in detail how to do it yourself.
We perform the following actions:
- To begin with, we fasten the beam along the perimeter of the walls. The tree is most often used for this;

- Apply glue to the foam tile around its edge and attach to the balcony wall;
- For greater reliability, fix the tile with dowel nails with wide hats (first you need to drill a hole, insert the dowel there and then hammer the nail in);

- Fix with the help of liquid nails (reinforced glue) an additional heat-insulating element - penofol;
- Seams after gluing penofol, so as not to disperse, need to be glued with foil tape;
- Fix on top of the penofol, slats, 3-5 cm thick, using metal corners and screws with dowel nails (one edge of the corner is fixed to the rail with a self-tapping screw, the other edge of the corner to the wall with a dowel with a nail).
Helpful hints:
- When working with a drill, use a winning tip, it makes the holes thinner and without unnecessary material consumption than a typical one.
- When driving dowel nails into polystyrene, try so that the cap slightly bends the surface of the tile inward, so the nail is unlikely to move back. Penofol is better to stick with whole layers, so it will be better to store heat.
- The slats should be mounted at such a distance from each other so that all subsequent trim elements are securely fixed.
Attention: In many Internet sources, when installing on a balcony surface, it is first proposed to build a crate, and only then to put insulation material between the crates. This embodiment is not correct, since the heat at the junction of the bars with the floor is quickly lost due to the high thermal conductivity of wooden products. The floor will rapidly lose heat and all the work done will be in vain.
If you plan to use only paint as a finishing finish, then you will not need a crate of walls. It is only necessary to level and prime the surface before painting.
To do this, do the following:
- Putty the tops of dowel nails with glue;
- Cut a piece of reinforcing mesh and stick it on top of the foam with the same adhesive composition in one layer;
- Smooth the surface of the mesh with a spatula from top to bottom;
- Apply a second layer of glue with a spatula and wait for it to dry;
- Putty the surface and let it dry a little;
- Primer and subsequent painting of the walls in the selected shade.
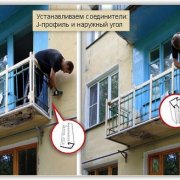
Parapet mounting
There are tricks to doing work. If you see a lot of voids between the plates, then you can close them with foam.If desired, the parapet can be strengthened with a foam block or block frame.

Useful advice: the parapet is constantly tested by the external environment, most often temperature surges, so you need to take insulation elements with maximum protection against heat loss.
Attention: If the parapet is made of metal, then it is better to put foam blocks of average thickness on the base during installation, and stick the Styrofoam tile on top.
Next, we act in this way:
- Make the crate surface of the parapet;
- Cut and prepare the tiles;
- Apply the tile and circle it with foam every time;
- Make a second crate, a little differently, so that when applying the bars do not coincide;
- Apply foam for installation on previously glued foam, and glue it on the second layer, while filling the void around the foam.
Installation of the main wall
Here, insulation is not always required, since the main wall partly absorbs the warmth of the house, especially if the rest of the balcony was well insulated and the windows were glazed before. If there is still a need for insulation, proceed in the same way as with the processing of balcony walls.
Ceiling mounting
The ceiling needs to be paid attention to when insulating no less.

You can insulate from the same foam, it is faster and more profitable, you can handle it yourself. You can work by analogy with the balcony walls.
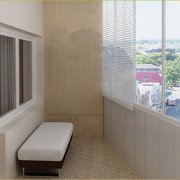
Fine finish
Here you need to take care not only of the beauty of the appearance of the balcony, but also of the protective functions of the finish. The balcony should be reliably protected from weather surprises, as well as to please a person with comfort and warmth.
Useful Finishing Tips:
- For the parapet, you can use corrugated board or siding, and one and the other element will look good outside, as well as reliably protect from external environmental influences.
- When installing the parapet frame, take the bars no thicker than 2 cm and fasten so that there is a gap between the ebb and the bar for the finishing material.
Use white sealant when processing joints.
The space inside the balcony surface is most often glued with polyvinyl chloride - panels. How to work with them correctly can be found in this article: - “How to attach PVC panels to the ceiling or wall correctly.”
At the request of the wall, ceiling, floor, you can simply paint, before that, well, putty well and after priming all surfaces. This method is simpler and faster, but not everyone may like it.
How to properly insulate the walls of the balcony you now know. After watching the video in this article, and the photo you can do it yourself without problems and this will be the key to the quality of work.