GKL wall decoration: proper work

Decoration of the GKL premises is quite popular in our time. And in this article we will talk about this material and its application to wall decoration.
This is not such a difficult job and you can completely do it yourself. And without resorting to outside help.
You will be offered a video on how to complete this work. The instruction will help to avoid improper execution by yourself and will not skip any details.
The content of the article
Start finishing
GCR finish begins with the right material. This should be determined from the media environment.
There are different rooms and therefore it is worth initially deciding:
- If wall decoration It is carried out in the heated room of the apartment, then an ordinary drywall is suitable for you. In such a room there is no increased humidity and temperature changes will not affect it.
In some cases, you can use the ceiling material, it is the thinnest and will take the minimum amount of usable area. But this is in those rooms where there will be no load on the walls; - If the walls are in a room with high humidity, for example in the bathroom. Or do you think to finish in the country, where there is no constant heating, then it is best to use waterproof sheets.
They use a finish at the production stage, which makes the material moisture resistant.
Surface preparation
After choosing and buying the right number of sheets, you can start decorating. Before mounting, we should prepare the surface.
So:
- To begin with, we completely clear the surface of the previous coating. We remove the wallpaper and whitewash;
- After that, we look at the plane and reveal the exfoliation of the old plaster. If there is one, then it’s just worth taking it away with a hammer and a chisel;
- Now it is best to treat the surface with an antifungal antiseptic, which are available on the market. It is worth doing even for the sake of prevention.
If the disease manifests itself after installation, then it will be too late to do anything; - Now apply a primer to the surface;
- We determine the level at which we need to apply a coating. We need a plane and its size.
This is even more important if you have a wall bearing and you need to do insulation. For this work, we use a simple fishing line, which must be pulled between the diagonals and put marks on the ceiling and floor of the location of the sheets;
Now we have a fully prepared plane for work.
Make the frame
The whole structure is attached to the frame, of course, you can install on the wall plane, only this is done on a completely flat plane, and if it is so even, then the installation of drywall disappears. With frame mounting, you can completely align the plane and make it the correct shape.
Attention: Two types of profiles can be used for installation. This is a metal structure and a wooden beam.
If you choose the second option, then it is worthwhile to make the treatment of the material with an antiseptic before installation. This will extend the life of the entire structure.
Do this in advance and let the materials dry completely. Make a purchase of the material so that its moisture content is not more than 12 percent.

So:
- We make a border around the perimeter of the wall. This is done along the lines drawn on the ceiling, floor and walls.
Cut the UD profile to the desired size and fasten it along the line. For a wooden coating, you can make fastening simple screws.
For concrete and brick, you should first make holes with a punch and connect using dowels;
Caution: Our system will have a weight and must be fastened firmly enough. Therefore, do not use simple sets of dowels.
Take plastic dummies at retail and to them self-tapping screws with a section a couple of mm larger from the hole in the plastic. Such a connection will be reliable and high quality.
- Now we need to make jumpers from the same profile. Drywall will be mounted on them.
Therefore, it is worth calculating the installation correctly. The sheet should not be weighed.
The connection is made only on a solid surface of the profile; - We cut the profile to the desired size and fasten. In this case, the flat and wide side of the profile is placed towards the room, and the edge is located against the wall.
We carry out the connection with self-tapping screws, which are specially designed for this, they have a special drill at the end, with which fasteners can be made quite simply; - We fix the first profile near the wall. It should provide a small gap of about five mm.
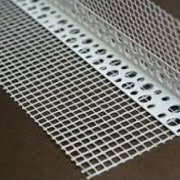
This will save you trouble during material expansion. We install all subsequent ones in increments of 60 cm. The last profile is fastened in exactly the same way as the first, right next to the wall; - There are special suspensions, they are perforated and make the mount more reliable. Rigidity ribs are provided in their design, which make the connection more rigid.
It should be bent and fixed along the transverse profile, so you will also adjust the height;
Attention: When installing the frame, take into account the size of the sheet, it happens in different sizes. And ate only a whole sheet will not fit on the wall, then you have to cut it.
Therefore, calculate and correctly install the transverse profile. So that was what to mount it on.
Now, if you are doing the finishing of the load-bearing wall, you can place a heater. Most importantly, remember, it is not worth it to deform.
Attach tightly, but do not pinch. Better allow for a small gap between the mats and drywall.
If you press the insulation, then it just loses its properties.
Attention: After manufacturing the frame, wiring should also be done. This is if you are changing something.
After full cladding, this will be difficult.
Sheet Installation
When we have a properly installed frame, you can begin to attach drywall sheets to it. This work is done according to certain principles and in the right sequence.
So:
- Wall decoration with sheets of gypsum plaster starts from the corner of the room. Before fastening, you should simply try on the sheet.
Check that all edges lie on the profile. A small chamfer should be removed along the edge of the sheets, it will make it possible to make the putty of the plane better after installation; - The screw is screwed strictly perpendicularly. If it went wrong, do not mount it in the same place.
Pull back a couple of see and make the connection, and the cap should be recessed a couple of mm in relation to the plane of the sheet;

- Never fasten sheets tightly to each other. It is necessary to make a gap of the order of 5 mm.
- In the process, you will need to make a cut sheet. This is done as follows.
We put the sheet on a flat surface, the table is also perfect, only its width should not be less than the width of the sheet. We apply the rail and make an incision with a sharp knife.
We shift the sheet in relation to the table by 5 mm. We apply the rail along the cut line and make a sharp press on the edge. The sheet breaks along the drawn line. After that, you just have to walk along the edge with a plane and make a flat plane, after that remove the chamfer.
The item is ready to install; - You will need to make sockets on the panel. To do this, attach the sheet and mark the output wires.
After that, we put it on a flat plane and make a hole with a drill and a crown, which should be purchased in advance and not make a mistake with the size, there are several types and are divided by diameter;
Caution: Do not press hard while making holes. Then the material will simply be pulled out and you will not get an even cut.
You must first press gently and slowly. When the initial groove is done, then just make a soft and even pressure and do not rush anywhere.
Putty Plane
GKL finish for painting or for wallpaper (seeDrywall decoration for wallpaper: do it right) is done after puttying the surface.
We perform this work in the following sequence:
- Pour the dry mixture into a container, a bucket from under the paint is perfect for this, it has a straight bottom and walls. Add water there and mix at the same time;
- After that, take a drill with a nozzle and make the mixture homogeneous. We bring it to a state of sour cream;
- After that, we take a spatula and process the seams, while using a sickle, which is attached with putty to the surface. It will make the seam more durable and will not allow putty to crack;
- Then we take a wide spatula and putty the entire plane. Drywall cannot be fixed perfectly smoothly.
It is necessary to smooth out all the bulges and irregularities; - Let the solution dry and then take a grater with a mesh and begin to erase irregularities in circular motions. So do the processing of the entire plane;
- We still have sinks. They should be repaired with putty again.
Let dry and grout again. So we achieve a complete finish of the plane; - After we have no sinks left, we change the grid to a shallow one. She will not leave any marks on the surface. Again we do surface treatment;
- Now we need to coat the prepared surface with a primer. And you can apply the paint after complete drying.
To do this, use a roller or apply paint with a compressor.
The price of such a finish is not high, but the surface will be perfectly flat. Drywall decoration can even be carried out in the bathroom (seePlasterboard bathroom decoration: work procedure).
You can see all this on video. The most important thing is not to rush and you will succeed.


May I have a closer look?
Great building tips
Fresh construction news)
Hello everyone! Cool site you have!
Tried to finish the walls of the GKL ... Year finished -) Hired the masters in the end. But their, sadness, sorrow, of a normal level for any price tag in the afternoon with fire - (