We build frame walls from drywall

When making repairs in their own home, people regularly encounter the problem of leveling the walls and building an interior or zoning partition. To solve these problems, the modern construction industry offers many options: from classic plaster and bricks to materials intended for the construction of lightweight frame false walls and partitions.
One of these materials is drywall, which we will talk about today. In the course of the article, we will learn: the scope of this material, describe its properties, and in theory we will also build walls and partitions from drywall. So let's go.
The content of the article
The history of drywall and its scope
In the preface, we will arrange a small educational program on the history of the appearance of this amazing material. The first drywall began to be released back in 1894. The author of such a useful invention is the American industrialist Augustine Sackett, who previously owned a paper mill.

Material evolution
And although the first samples were not similar to their modern counterparts, their scope and method of manufacture have not changed dramatically until now. The first sheets consisted of ten layers of cardboard, which were glued together using gypsum mortar (the thickness of such a product did not exceed 5 mm). Drywall was positioned as a material intended to replace sheets of plywood and chipboard in small houses, and the main argument for the sale was its low price, which allowed it to firmly occupy its niche in the consumer market.
Another American engineer, Stefan Kelly, in 1908 was able to improve the production process, and get a sample that we can see today in any hardware store. Now, the changed structure included two layers of cardboard with a gypsum core, but until its final appearance, the drywall had to take one more step. In 1910, Clarence Ustman, who worked as an engineer in a gypsum company, developed and patented the closed edge of such a sheet.

After long wanderings in European countries, starting in 1917, drywall reached Germany, where in 1932 mining engineers, Alphonse and Karl Knauf founded their own family company with a very long name, from which the world-famous Knauf company grew. It was this time that became a turning point in the construction industry.
What brought us the appearance of this material
If at the beginning of the XX century drywall was more exotic, today it is an integral part of almost any repair. It is used everywhere, from the banal alignment of the walls, and ending with the creation of the most complex curved structures, which is very popular with designers and architects.
-
- Drywall Walls: Pros and Cons
-
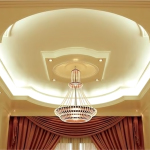
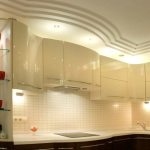
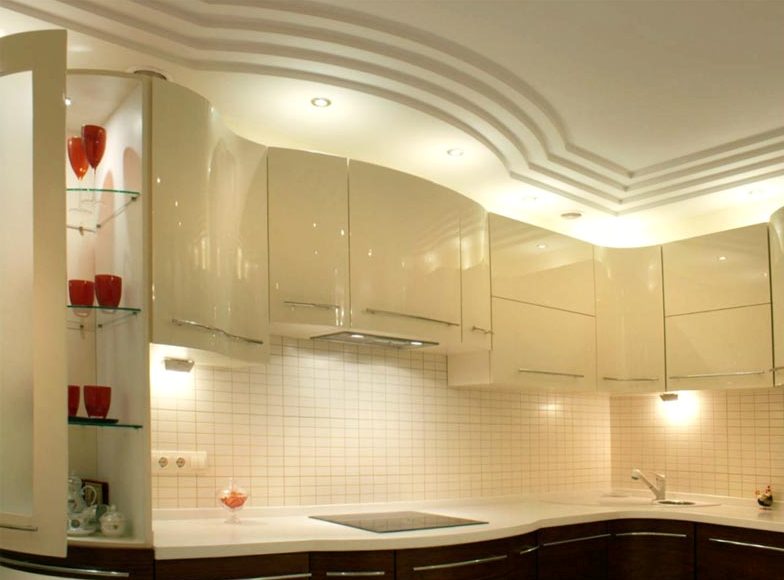
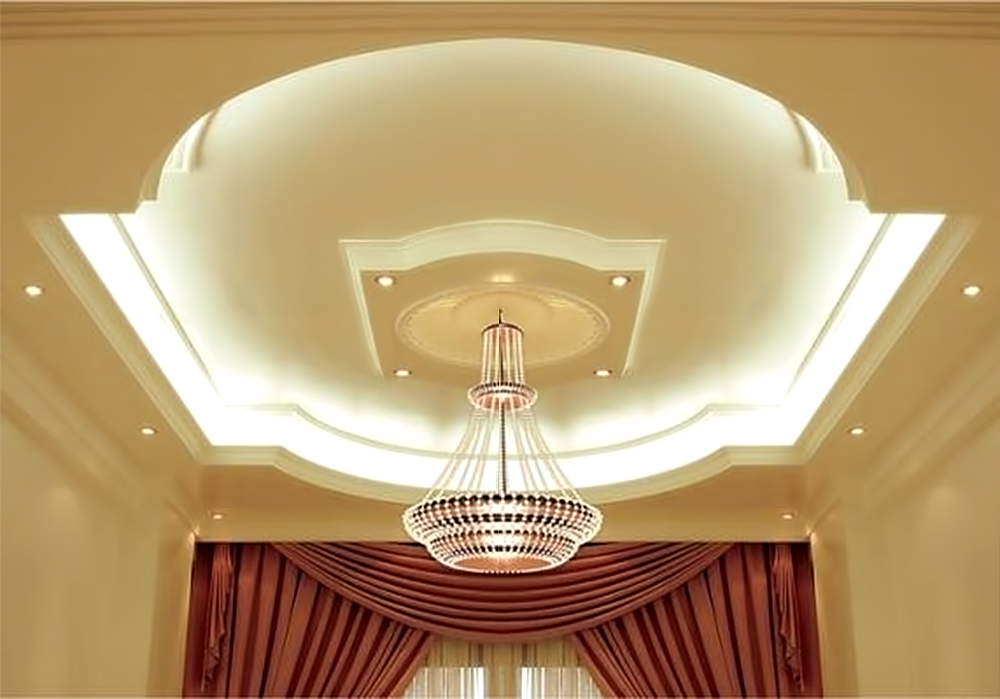
- Layered plasterboard ceiling
-
- Curved constructions in your home
-
- Drywall combined with other materials
-
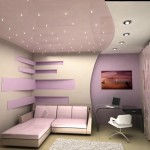
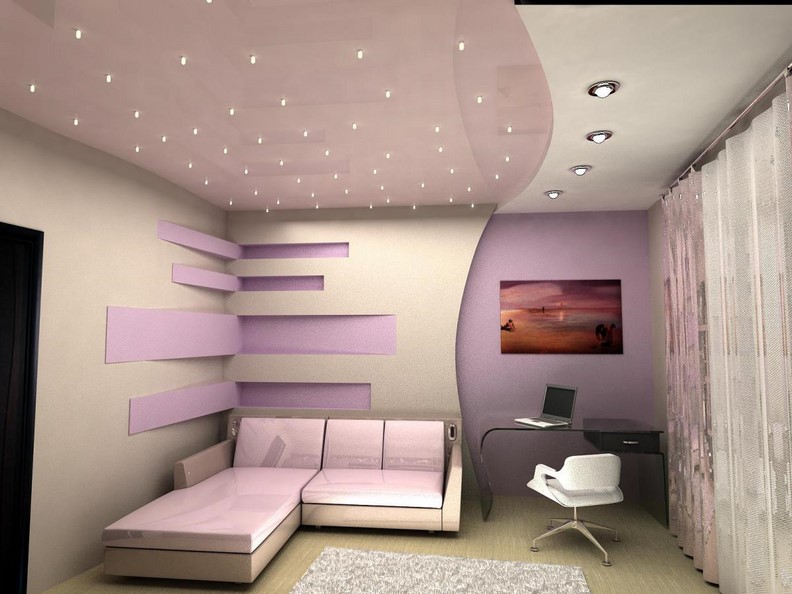
- Shelves and even cabinets are made of drywall

-
- Allocation of zones in the room
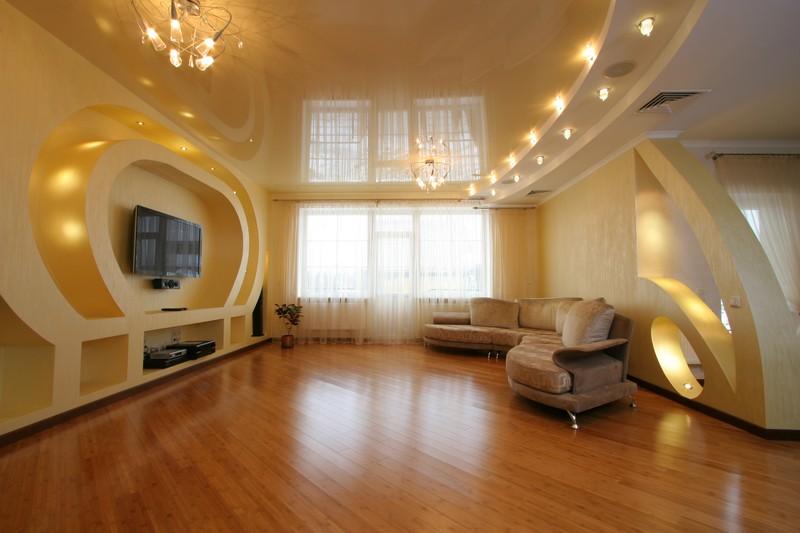
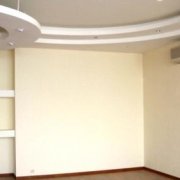
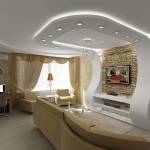
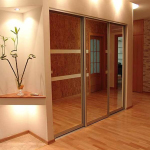
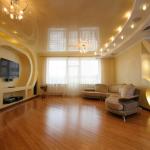
The photos in the gallery actually show the advantages of drywall constructions, namely:
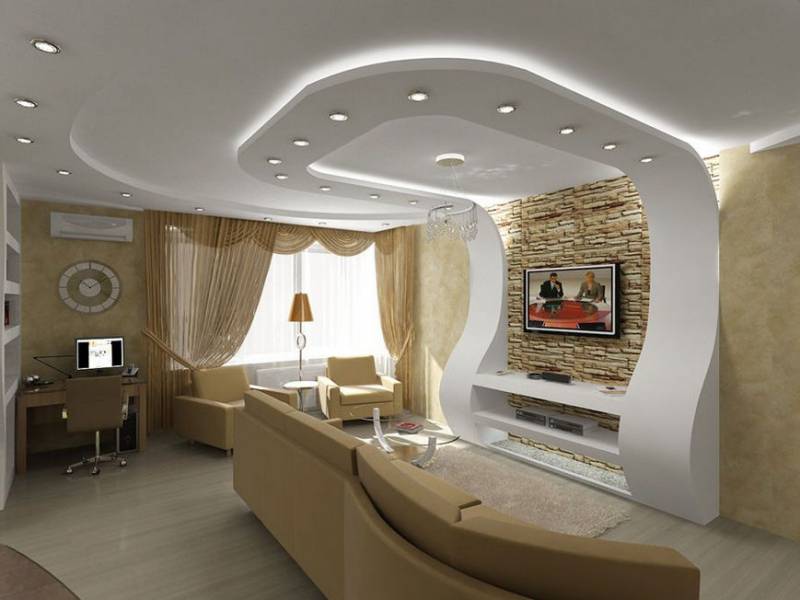
- Lightness of this material, allows you to create complex multi-level structures from it, not only on the walls, but also on the ceiling (seeFacing the ceiling with drywall: do it right)The only requirement for this is a solid foundation and full compliance with the installation technology, which will be discussed in the next chapter.
- To install drywall on the wall, the master does not require engineering knowledge and skills. Enough school geometry course, and compliance with the technology already mentioned.
- Drywall has the flexibility in order to make shapes with a small radius out of it. This allows you to create curved structures, even in small rooms.
- The rigidity of the metal frame is sufficient for the installation of suspended ceilings on it. Thanks to this, two materials can be combined, thus creating original design solutions.
- The strength of individual varieties of gyro enough to withstand static loads, the value of which the instruction will accurately tell. You can ask for it in the store, or find it by looking at the manufacturer’s website. This allows you to design built-in furniture, or shelves that can easily withstand your library.
- Fire resistance can also be attributed to significant advantages of this material. Although there are separate varieties with improved refractory qualities, even the most ordinary sheets without special additives can burn out only on one side, to the gypsum core.
- If you want to build plasterboard walls in your bathroom, then you have such an opportunity. It is enough to purchase a moisture-resistant sheet marked GKLV.
- And what attracts people the most in this material is the ability to hide communications under it.
Advice! When hiding wiring and water pipes in the walls, do not forget to install revision hatches in key nodes. Otherwise, you run the risk of making a do-it-yourself adventure with the dismantling of the entire finish, in an attempt to get to the emergency place.

From all the advantages, we smoothly move on to the shortcomings of this material:
- Drywall fragility is its weak point. GKL sheet is easily damaged during transportation, installation, and the worst thing is operation. Therefore, caution should be exercised when using this material. Also, it is not recommended for use on walls where high loads are expected. But if sheathing is necessary, then mount the sheets in two layers, which will give more strength.
- The next minus follows from the previous one - the surface of the plasterboard wall is not intended for hanging cabinets and equipment on it. Although this disadvantage can be attributed to the conditional, since it is eliminated with the help of special fasteners, or a preliminary arrangement in the frame of durable mortgages of a metal profile.
- Poor sound insulation, also inherent in this material.. To eliminate this inconvenience, mineral wool is used, which are laid inside the frame, which significantly adds to the cost of the entire structure.
In our opinion, with the right approach, all the disadvantages of drywall are easily eliminated. Yes, sometimes this requires additional costs, but do not forget: this or that disadvantage has any kind of finish, depending on the specific conditions.
We mount drywall
Before you start building walls made of drywall with your own hands, let's examine some technical information, as well as get acquainted with the main accessories that you will encounter.

Marking and sizes
Let's start by deciphering all the letters that mark the drywall sheets:
| Marking | Decrypted value |
| GKL | The first letters in the name are deciphered - a gypsum cardboard sheet. |
| GVL | Sheets with this designation belong to another class, where special fibers are used as reinforcing material instead of cardboard, giving more strength and increased resistance to moisture |
| "AT" | Gypsum is saturated with substances that reduce the penetration of moisture and inhibit the development of fungal flora. |
| "ABOUT" | The material has refractory properties and is recommended for installation in rooms with a high probability of fire and temperature. |
| "IN" | Indicates that the material has two of the above properties at the same time. |
| "PC (SK)" | Straight edge for seamless puttying. |
| "UK (AK)" | The sheet has a sophisticated edge, which is convenient when sealing joints. |
| ZK (RK) | Curved edge - puttying joints without reinforcing tape |
| PLC (HRK) | The edge of such a sheet is semicircular, which is almost identical to the ZK variant. |
| "PLUK (HRAK)" | A semicircular refined edge is the most convenient and common type of sheets, as it allows you to level the thickness of the screws in the frame, and it is more reliable to putty joints. |

Visually distinguish types of drywall is not difficult, just remember three colors: gray - standard sheet; green - moisture resistant leaf; and pink is a fireproof sheet.
The standard drywall sheet has the following dimensions: its length is 2.5 meters and its width is 1.2 meters. The thickness of the gyro is conventionally divided into two types: ceiling and wall. The first is 9.5 mm in thickness, and the second is 12.5 mm or more. The average weight of the ceiling sheet (3 m²) varies around 28 kilograms. The wall version has an average of 37.5 kilograms.

All this information is useful to you when designing a design. Very often you see how craftsmen install wall sheets on the ceiling, claiming that they achieve increased strength in this way. But in our opinion, all they achieve is an increase in the weight of the structure and the load on the frame.
Since the ceiling experiences only a static load of gravity, there is no need for such a reinforcement. In addition, 12.5 mm cardboard bends much worse, which complicates the process of creating curved structures.
Advice! When buying drywall, pay particular attention to the corners and edges. Inspect them for potholes, cardboard breaks and breaks. Even slight damage to the corner of the sheet may interfere with installation.
Materials for the frame
Despite the fact that this article deals specifically with the construction of a wall from drywall, we will add to the review also ceiling fittings, since in some cases it is best to build a wall frame from it.
 Wall profile | Guide profile PN 50x40 - designed for the main formation of the plane, attached directly to the walls. Since the thickness of the drywall wall is determined by this particular profile, wider options (75 - 100 mm) can be used. |
 Ceiling wall profile | An analogue of the previous profile, but intended for the ceiling. It has dimensions - 27x28 mm. |
") Main profile (rack) | The main profile of the software is 50x50 mm, giving the strength of the entire structure. It has curved stiffeners along the edges. |
 Main ceiling profile | Profile PP 60x27, has the same functions as the profile 50x50, but comes with the PN 27x28. |
 Direct suspension | The suspension is used to strengthen the frame. |
 Single level connector | This element is used for perpendicular connection of a profile of software 60x27. |
 Press washer screw | The photos on the left show two types of self-tapping screws, with which it is best to connect the nodes of the frame. |
 Profile cutter | Using this tool, the individual parts of the frame are interconnected without the use of screws (not applicable to all types of frame), which ensures a more even plane. |
 Metal anchor | Metal anchors are used to fasten ceiling frames to concrete. In other cases, ordinary dowel screws will suffice. |
 Metal screws | These screws are used to fix the drywall sheet to the metal frame.The length of the screw is 25 mm. |
To build a wall of drywall with your own hands, you will need the following tools:
- hammer drill;
- screwdriver;
- kapron thread;
- plumb line;
- square;
- construction level (preferably with a magnet) or a laser level;
- dyeing thread;
- roulette;
- mounting knife;
- marker and pencil;
- metal scissors or circular saw;
- hammer.
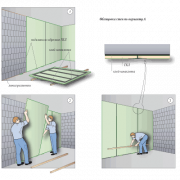
Frame erection and cladding
In this section, we will consider two types of frame, one of which is designed for partitions, and the other for false walls. However, note that the first type is equally suitable for both types of work. Which frame to give preference, we will analyze during the article.
Let's start with the partition. The first step is to accurately mark the future wall plane. If you have a laser level that can draw simultaneously in four directions, then you can not bother with this issue. Just turn on the device and nail the profile along perfectly drawn lines.
But do not rush to be upset if you do not have such a tool. It is enough to invite a friend and do the markup together to get the same result.
So:
- We start marking from the ceiling. Using a tape measure, we determine the boundaries of the drywall wall (marks are made simultaneously on the ceiling and walls). We stretch between the marks on the ceiling a painting lace, and beat off the line.
- Next, using a plumb line, lower the upper marks into the lower corner of the room. To do this, attach the thread to the mark and lower the sinker down, not reaching them to the floor.
- Due to the fact that the sinker has a volume (shape) that does not allow the thread to lie against the wall, an error in measurements may occur. The problem is solved by a square, which needs to be attached to the wall, align the second edge along the thread, and make a mark already on it. After we beat off the marks on the lines on the walls.
- If the partition has corners, then the plumb manipulation is repeated on each of them.
- With the floor it’s even easier - just connect the marks on the opposite walls. Do not forget to immediately determine the location of the doorway.
Advice! Remember that the width of the doorway should be 4 - 5 cm wider than the door frame and 2-2.5 cm high.

After marking, we fill the profile PN 50x40 around the entire perimeter, skipping the bottom of the doorway. The process is very simple - we drill a hole with a puncher (be careful in potential places of wiring), insert a dowel-screw into it, and twist it with a screwdriver. Make sure that during drilling the profile does not move from the marking lines.
- Next, using the software profile 50x50, we set the main verticals and horizontals (window and doorways) But it will be better to replace it with wooden bars, a section of 50x50. This will give additional rigidity when mounting the door. You will see such a reception in one of the photos below.
- Now let's talk about the mysterious technology, observing which we guarantee ourselves the strength of the wall in the end. The main difficulty lies in the exact observance of the indent from profile to profile, which should not exceed 60 cm.
- We make markings on the ceiling and floor guide profiles, strictly following the specified step. Any deviation threatens that the drywall seams will not fall on the profiles. If you want to get a more solid construction, then just reduce the pitch to 40 cm.
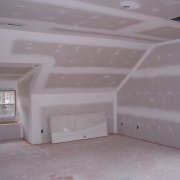
- Now we trim the main profiles according to the height of the room, and install them in the frame according to the received marks, with the front side perpendicular to the wall plane. Above and below we fix them with screws. This option is only suitable if the height of the room does not exceed 2.5 meters (although you can conjure). But if in your case the height is just that, then the frame can be considered ready and proceed with the skin.

Yes, yes, you understood correctly - even Garik Martirosyan knows how to sew drywall. This, of course, is a joke. In fact, the photo shows how to sew drywall in two layers. This measure is necessary to ensure a sufficient level of strength of the partition. The basic rule of fastening the second layer is that the seams of the top sheets should not coincide with the bottom.
For greater strength, the frame requires jumpers, they are also required in places of horizontal joints of sheets. Use instead of PP 50x50 paired with self-tapping screws PN profile 50x40. This design will make it easy to install jumpers, and perform all the fixation with a notch.

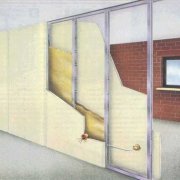
The second type of frame is used for wall cladding, and is more durable, as it allows for additional fixation to the base. The whole operation is carried out similarly to the above, but with slight differences. The software profile 50x50 needs to be deployed 90 degrees, facing you, and fix it with suspensions.
In places of joints of sheets we install jumpers. Here you can’t do without “chemistry” - at the lintels side edges are cut off from the ends, after which they are attached to the verticals with self-tapping screws. See photo below.

This method has a big minus, because at the attachment point we get a bulging of a self-tapping screw, because of which the drywall is bent in this place, or even burst. This means that this frame is best used only in cases where 5 centimeter insulation is installed. Although a paired PN profile, it will still be more convenient.
For the PN profile, the presence of jumpers along the entire wall is mandatory, since they are needed for fixing to the base. In this case, the suspensions are not useful to you - the reinforcement is carried out using the corners, which are cut and bent from the same profile.

When installing false walls, it is more convenient to use ceiling profiles, since the jumpers can be fixed using single-level “crab” connectors, which were not provided for the wall version. Using this frame you can save precious centimeters of floor space, and besides, it will be very durable, and the most inexpensive.
Next, you need to sew the received drywall frame. The process is very simple and intuitive. Therefore, we will give only the most necessary advice.

So:
- When fixing the gyrocock, screw the self-tapping screws at the same distance from each other - it should not exceed 18 cm. Also, do not screw the self-tapping screw too close to the edge so as not to chop the sheet in this place.
- If the height of the room is greater than the length of the drywall, then roll up the whole sheets first, setting them apart (in a checkerboard pattern), and only then screw up the small pieces.
- Many people don’t know how to properly cut gyro, although this procedure is very simple - it is enough to cut cardboard on one side with the help of a stationery knife, then break the sheet and cut the second layer of paper.
Advice! If it is possible to cut the sheet in place (doorway, outer corner of the partition), then do just that - it is much more convenient and faster.
Well, that’s basically it. We tried to explain as clearly as possible how to assemble a wall from drywall. If any questions remain incomprehensible to you, be sure to watch the video in this article. It will show the whole process clearly. You can also find on our website many articles on this topic, from which you will get additional information.