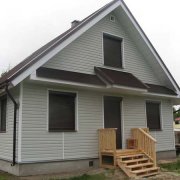
Facing and insulation by siding: rules for the performance of work

Warming and cladding of houses with siding is carried out quite often. This type of cladding is quite common in everyday life.
This is an excellent environmental protection. In this article, we will consider how insulation is done when facing siding and consider the stages of the correct execution of work.
You can see photos and videos on this topic and after that do all the work completely with your own hands. Instructions for the correct execution of the work will be offered.
The content of the article
Differences in the proposed cladding
Nowadays, there is a lot of material to do this work. Therefore, before buying components, you should familiarize yourself with the features of this design and only after that make your choice.
So:
- Warming and cladding siding will serve as an excellent insulation for the room. Such a finish perfectly tolerates temperature extremes and high humidity.
True, it is worth saying that this effect is achieved only if the work is done correctly; - House cladding siding with insulation is done on the frame, so you yourself can choose the thickness of the insulation and this is regulated by the crate;
- This design is quite durable and will last a long time;
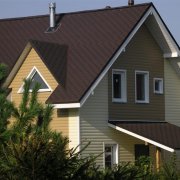
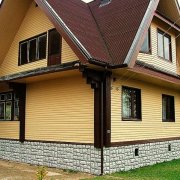
- Facing facades with siding with insulation allows you to make a rather original decision. The material is in different colors;
- After installation, you do not need to do expensive maintenance, just wipe the surface with a damp rag;
- All the work can be done with your own hands and without resorting to outside help and this will reduce the cost of the entire structure;
- You do not need to perform lengthy and costly preparations and this will also reduce costs;
- The price of the material is not so high, almost anyone can afford it;
- There is a drawback to this finish. If you do not need insulation, then you will still increase the size of the room, at least five cm. It is this minimum thickness that the frame will have.
Home decoration
Facade cladding siding with insulation is done in several stages. At the same time, the technology for performing work must be observed. This will be discussed below.
Remember, there are no trifles, everything is done in a certain sequence. Otherwise, you can ruin the entire structure.

Surface preparation
Wall covering siding with insulation is done on a properly prepared surface. Otherwise, the desired effect cannot be achieved.
Now everything is in order:
Attention: Before starting work, you should prepare the scaffold. It is foolish to think that you will do everything from the stairs.
You will need to move around, so prepare the scaffolding. Let them be temporary, but you can move freely.
- First of all, we remove everything from the surface that can hinder us. Eat all the details that are mounted on a plane, maybe it is air conditioning and shutters;
- Now do an inspection of the base plane. We are not particularly interested in the roughness of the walls. We need to identify cracks in the old coating.
If they are, then just knock them down and for this we use a chisel and a hammer. It will be great if you remove all the old coating; - Having removed and cleansed everything unnecessary, we take a brush or spray gun and apply a primer to the surface. When choosing a liquid, give preference to deep penetration material;
- Cladding with insulation siding is done with the correct geometric surface.After all, fastening if it does not go right from the first part, then the configuration of the entire structure will be violated.
Therefore, we need to correctly designate the starting line. To do this, put at risk where we begin fastening; - Now we need to transfer this point to other planes. To do this, it is best to use a hydraulic level.
It should be purchased or simply made by yourself. This tool will allow us to do the job most accurately. Carry the size and put the risks; - We make the connection of points in one line. For this we use kapron thread. We take and beat off the wall. Now we have the outline of the installation of the crate.
Frame mount
Facing with insulation and siding is done on the frame. The geometrical shape of the structure directly depends on its correct fastening.
This will require attention and proper markup:
Caution: The lathing can be done using a metal corner or a wooden beam. In the first embodiment, it will be a more durable design.
If you chose the second, then you will need to do the processing of the rails with antiseptics, which are on sale. This will significantly increase the life of the entire structure. Just do the treatment in advance, the material must be given time to completely dry.
- We cut the beam to the desired size and fix it along the bottom line of the installation. Here you need to take into account one detail, you immediately determine the thickness of the insulation.
After installation, its front panels should not be pressed. It should not be deformed, otherwise it will lose its properties.
Yes, and for ventilation you need a place. Then you will not accumulate condensation. Provide a gap of a couple of cm and then everything will be fine; - Fastening is carried out on the expansion bolt shield. At the same time, they should not be used from kits; they will not ensure the reliability of the connection.
The frame has its own weight and must be securely attached. Therefore, it is worth buying separately dummies and self-tapping screws for them, which are worth taking a couple cm more from the plastic section. Then everything will be reliable and of high quality; - Now, in the same way, we do the strapping around the entire perimeter of the wall;
- We make fastening of cross rails. To do this, we need to withstand one plane.
We pull the fishing line along the diagonals of the crate. This will be our guideline from which we should not deviate; - Now we make markings on the surface of the mounting distance between the rails. Here we take into account the size of the insulation mat.
We need to avoid big waste. The distance between the rails should be no more than 70 cm.
We make the marking and on it we install the rails. To do this, use a dowel. The height of the mount is adjustable using gaskets;
Insulation Installation
Facing the walls with siding with insulation is done and not so difficult. You just need to adhere to some rules and observe the technology of insulation.
The work is performed in the following order:

- We have cells on a plane in the form of a wireframe. Now they need to be filled with insulation. But before that, a layer of waterproofing is applied.
It can be fixed before installing the crate, but then it is simply difficult to fix it. Therefore, many simply attach it to the crate. To begin, we cut the canvas in the desired size;
Caution: When cutting, the size should be calculated correctly. Material never fits together. An overlap is made. When attaching to rails, the canvas should be wrapped and then attached using a construction stapler. The canvas should be laid evenly and without wrinkles.
- If you use polystyrene as a heater, then it should be cut to the desired size and then you can fix it with building fungi. Connection points per meter sq. must be at least six.
After installation, the joints between the plates are foamed with construction foam. Sometimes they also attach to glue. Only then waterproofing is applied after attaching the foam; - Soft insulation is also attached to building fungi by the same method. First, a hole is made using a perforator and after that a plastic fungus is placed;
- Soft insulation should be placed tightly, but not deformed.
Siding installation
Facing with siding and insulation of the house is approaching the final stage.
Now we are already doing paneling:
- To get started, take the starting strip and cut it to the desired size. After that we do its fastening on the lower level of the lathing.
At the same time, we apply the building level and make it exactly horizontal. Other parts will be attached to it; - We mount on self-tapping screws and in holes that are specifically designed for this. We install the self-tapping screw strictly perpendicularly.
We do not fully mount, we must give a tolerance of a couple mm. This will save us from trouble when expanding the material;

Attention: The fixing point of the self-tapping screw in the hole should be selected depending on the ambient temperature. Remember. The material changes its value when heated by 7 mm. Therefore, this factor should be regulated by temperature at the time of installation.
- Now we fix the angular profile, it should just hang freely on the upper self-tapping screws, which should be fixed here in the middle of the holes. If the profile is higher, then it should be cut millet, and if lower, then it should be increased.
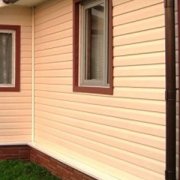
Then laying is carried out not in the joint, but in the overlap, with the top panel lying on the bottom. This will protect against water leakage during bad weather; - For openings apply special profiles that should be purchased in advance. Moreover, the purchase should be the fate and waste, which will definitely be.
This is best done in whole pieces. If the window opening is not deep, then the platband can be used.
You just measure this size first and then you will understand what you need. If the opening is very deep, then the clypeus is applied along with the slope; - For joining the panels, an H-profile is used, which should be placed strictly vertically. This is done using the construction level;

- Now we are facing the entire surface;
- After finishing, we install the finishing profile or molding.
And this work is done. You just need to do everything in a hurry and apply the exact dimensions. Remember, a deviation of one mm will lead to a displacement of one cm through several elements and this will disrupt the entire configuration.