How to glue non-woven wallpaper on concrete according to technology

Many know gluing non-woven wallpaper on a concrete surface, but not everyone did it practically. And here there are some nuances and features. And if you do not follow the technology, then you will not end up with a quality surface.
Today we will tell you how to properly paste non-woven wallpaper and at the same time get a high-quality plane. Also, the video in this article and photo will show the most difficult areas of this work.
The content of the article
Rules for gluing non-woven wallpaper on concrete
Gluing non-woven wallpaper on concrete should be in a certain sequence. Let's immediately decide what and how to do it.
Attention: To do the work, you need to use high-quality materials. Give preference to trusted manufacturers. Also in winter, do not get glue on street stalls. It freezes and loses its astringent properties.
So, the work will occur in the following order:
| Plane preparation | At this stage, we need to create an even base. Otherwise, the coating will repeat uneven terrain and the design will already be damaged. |
| Glue preparation | This is done in advance. The glue should be infused and after that it must be brought to a homogeneous mass. |
| Sticking process | At this stage, we need to prepare the wallpaper itself, and the devices by which the work will be done. This is especially important for various crossings and for inaccessible places. |
Now everything is in order and in detail.
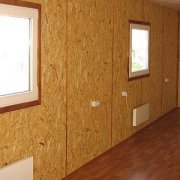
Cooking plane
Gluing non-woven wallpaper should be on a flat and smooth plane. In most cases, in concrete we already have a flat surface.
But this does not mean that it is smooth and is in the axis:
- Immediately take the fishing line and pull along the diagonals of the plane. Here we will see the deviations. If they are more than two cm, then it is necessary to plaster the plane (seeWall plaster technology: how to do it right);
- If the deviations are less, then just putty the surface. Indeed, there are always shells on concrete;
- We knead the finishing material, for this it is worth taking a container without stiffeners. And her dilute the composition;
- We take a wide spatula and apply a thin layer on the wall. We fill all cavities in concrete;
- After the mortar dries, it passes along the plane with a construction mesh. To begin with, we take with a large cross section. After that we pass small. We should have a smooth and even surface;
- Now the plane is primed (seePrimer for wallpaper: which one to choose and how to use) To do this, you should buy a mixture of deep penetration.
Attention: For non-woven wallpaper, the preparatory stage must be done. After all, concrete does not nourish glue. And after applying putty, this will not be a problem.
The markup should also be included in the preparation. After all, the appearance and geometry of the wallpaper strips will completely depend on this. It is necessary to immediately repel the level of wallpaper attachment. To do this, the fastening line is simply beaten off with the help of a kapron thread.
We also do the vertical marking of the first strip gluing. To do this, draw a line, and its verticality is checked using a plumb line.
Wallpaper preparation and sticking
The instruction on this issue is simple, how to stick non-woven wallpaper consider in detail:
- Prepare glue in advance. For its breeding there is an instruction on the packaging. The required proportions are written there. Also, after the glue is infused, mix it thoroughly with your hands and at the same time knead all the lumps;

- Now cut the wallpaper. We do it in the right size.Five cm should be added to the required length, they will be required for proper trimming;

- After that, take the prepared glue and pour a little into a separate container. This will be the ground. Add water and make the composition liquid. It must be completely absorbed into the prepared plane. We put it on the wall;

- Now take the chopped sheet and apply glue to it;

- Glue the sheet according to the previously defined markup. Usually the first is glued from the corner, while not much of it falls along the corner and moves to another wall;

- The upper part is glued with an overlap to the baseboard, the gluing field is cut off;

- Now glue around the perimeter. Where the wallpaper is lying incorrectly and unevenly, it is difficult to fit the next strip to them. Then we glue the lap and do the trim along the length;

Difficult moments in sticking
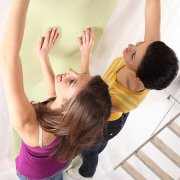
Wallpapering a room is not for loners. For a process to become productive, two or three people must participate.
- The first assistant is on a chair or ladder and puts the top edge of the cover to the area of the pasting.
- The second fixes the lower part of the panel on the floor, folding the edge of the wallpaper with a delineated vertical line. Further, the strip is pressed against the wall surface, after which bubbles with air are expelled with a brush.
- They expel air from top to bottom, from the center to the edge. Protruding excess glue should be removed with a dry cloth.
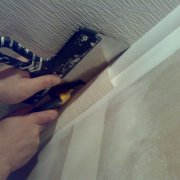
 Cut off the edges Customize the edge | When pasting a wall, as a rule, the edges of the wall covering may remain at the baseboard and at the ceiling. We cut off all unnecessary carefully with a knife. But it is important to consider that the bottom edge of the wallpaper should be 5 mm on the baseboard. When cutting, the knife must be sharp, otherwise it may damage or wrinkle the blade. |
 Skirting is not a hindrance Baseboard Connection | It will be much more convenient for you to glue the wallpaper if you first dismantle the skirting so that it does not slow down the process. If you can’t remove it, insert the bottom edge of the wallpaper between the pasting surface and the baseboard. |
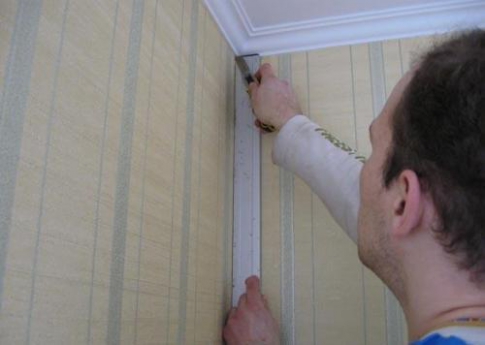
 How to glue the top Top trim | In order not to stain the ceiling, it is recommended that the adhesive formulations tuck the canvas 6 cm from the top. The wallpaper strip is pressed to the surface and smoothed down. Also continue to glue subsequent wallpaper. If you plan to attach the wallpaper not to the ceiling, then first draw on the surface the upper face of the pasting area. This markup will have to be applied throughout the room. |
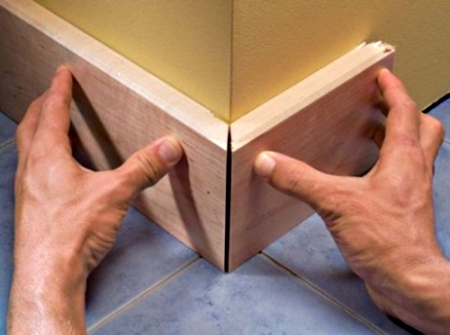
 The difficulty of pasting in the corners Sticking in the corners | At the corners, additional wallpaper overlaps must be provided, taking into account the width of the existing niche. Further, cuts are made at the top and bottom, and the panel, pressing down, is superimposed around the corner. Then the wallpaper is evenly trimmed, where the overlapping of the strips occurred and the joints are gently pressed against the wall, so the wallpaper sticks well. It is worth noting that in the corners of the room the wallpaper should overlap no more than 3.5 centimeters on the adjacent one. In this regard, already on another wall, the first canvas is fixed, starting from the corner, climbing onto the previous 3.5 cm. If everything is done correctly and accurately, then as a result you will get perfectly fitted canvases. |
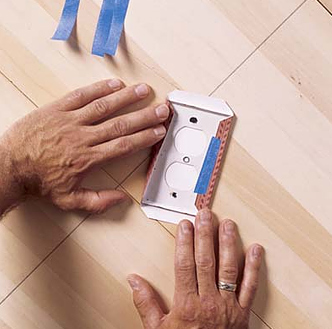 Sockets, switches, batteries Cut out sockets in the wallpaper | Behind the battery, the walls, as a rule, are glued no more than 15 centimeters. To press the wallpaper to the place of pasting, you need to use a small roller with an elongated handle, it will allow you to perform work on the radiator. Above the switch and the electrical outlet, the wallpaper is cut strictly after gluing and drying the glue. |
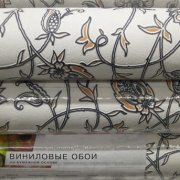
 Window and doorways Customize under the opening | When pasting vinyl wallpapers near windows or doors, you need to make some efforts and efforts. The most difficult is to carefully trim the wallpaper at the slopes of windows or doors. This should be done especially skillfully if these areas are not decorated with a special corner. |
You now know how to glue non-woven wallpaper on concrete, the main thing is not to rush and do everything carefully and doing the work yourself, its price will not be significant.