How to putty slopes on windows: the whole process from start to finish
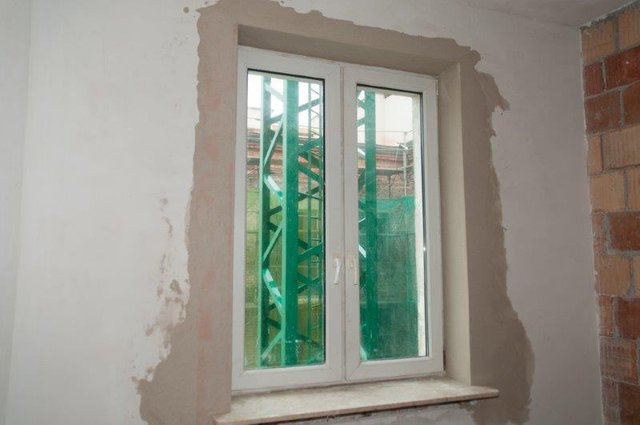
New window units alone will not add aesthetics to a room if they are framed by curved or ragged slopes. The overall impression will be dull. But the situation can be easily corrected if you know how to putty the slopes on the windows and how to finish them after alignment. We will talk about this topic.
The content of the article
Preparation for work
To do everything correctly, efficiently and reliably, it is necessary to fulfill several conditions: pick the right putty, prepare the surface, create indoor conditions suitable for this type of work.
The choice of putty and other materials
The leveling mixture is selected in accordance with the scope and scope of work:
- Puttying external slopes is possible only with water- and frost-resistant cement compounds. All fit types of facade putty.
- The mixture for internal work is selected depending on the microclimate in the room. If there is a constant high humidity (bath, sauna, etc.), then the putty should be cement or polymer. For dry rooms, gypsum and lime-gypsum compositions can be used.
- If a thick coat of mortar is required for leveling, buy both the finish and starting putty. Or a universal mixture.
Tip. In the case of the initial removal of slopes in a new building, they are given the form with stucco mortars, and only then use leveling putty.
- Relatively even slopes, without significant defects, can be repaired using only finishing putty.
In addition to putty, you will need a deep penetration primer to improve the adhesion of the leveling compound to the base, silicone sealant, perforated corners to strengthen the outer corners.
Tip. Buy a primer with antifungal additives. It will prevent mold on the slopes.
The tool kit is standard: a wide and narrow stainless steel spatula, a level, a paint knife, as well as a brush or roller for priming and subsequent painting.
Surface preparation
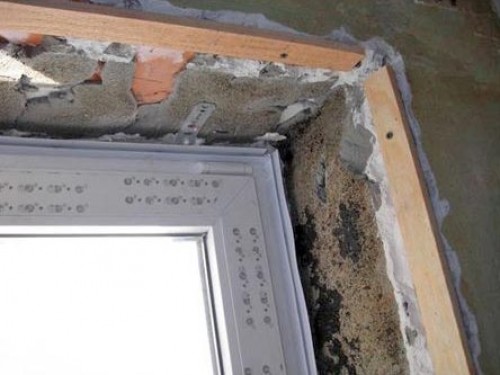
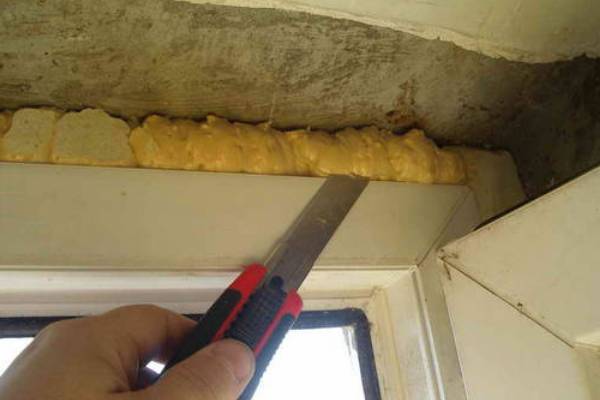
Before you putty the slopes, you need to thoroughly clean the work surface - remove the old paint, loose plaster, sweep off the dust, cut off the mounting foam protruding beyond the window unit.
Tip. Cut off the foam not flush with the frame, but a little deeper. After that, the slice is treated with sealant to protect the foam from condensation, which reduces its thermal insulation properties.
If the window sill is not yet installed, it is advisable to do this before window slope trimso that later you don’t have to level out damaged areas again. In addition, the work performed in the correct sequence will immediately immediately qualitatively seal the joints between the slopes and the windowsill.
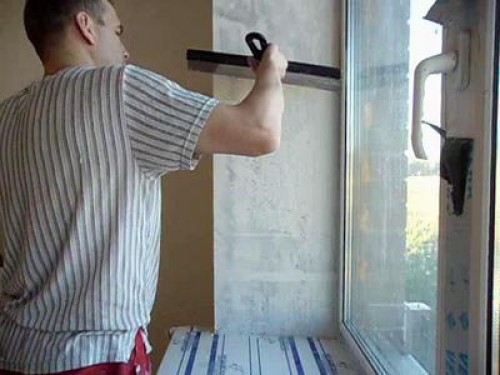
The next stage of preparation is the protection of the window frame and window sill from contamination and damage during puttying. Plastic and wooden structures can be glued with masking tape, and surfaces with an unstable coating, which can come off when adhesive tape (for example, MDF) is removed, can be covered with film or paper.
The final chord of the preparatory process is the primer of the entire working surface.The primer composition should strengthen the base, increase its adhesive properties, and prevent mold from forming due to possible excess moisture.
On the primer, it is better not to save. It does not need much, so its price will not affect the amount of expenses too much. But the quality and reliability of the slopes will be high.
You can proceed directly to puttying only after the soil has completely dried. But you should not tighten it, otherwise the dust will settle on the surface.
Slope Leveling Technology
Now about how to putty the slopes on the windows.
The technology depends on the degree of curvature, the presence or absence of serious defects on the surface. If they are already plastered, then you just have to smooth the surface with finishing putty to get rid of small potholes, scratches, cracks and roughnesses.
Take for example a more complex option when the slopes require leveling. In this case, the main work is performed by starting putty, which can be applied with a sufficiently thick layer, impose several layers.
It is important. Before proceeding with the decoration, make sure that the ambient temperature is not lower than +10 degrees, if using gypsum mixture, and not lower than +5 degrees, if cement.
The instruction for the production of works is as follows:
- Measure the width and height of the window opening with a tape measure, cut off the pieces of the desired size from the perforated corners.
- Using a drill with a mixer nozzle, prepare a putty mortar. Its amount should be the same as you can use before losing viability. This parameter is always indicated by the manufacturer on the packaging.
- Check with the building level the verticality and horizontalness of the corresponding angles formed by the slopes with the wall. Apply putty on them, making the layer thicker where the level requires it.
- Glue the perforated corner onto the fresh putty by pressing it into the solution. Correct the vertical and horizontal angles using the level, pushing it deeper into the solution where necessary.
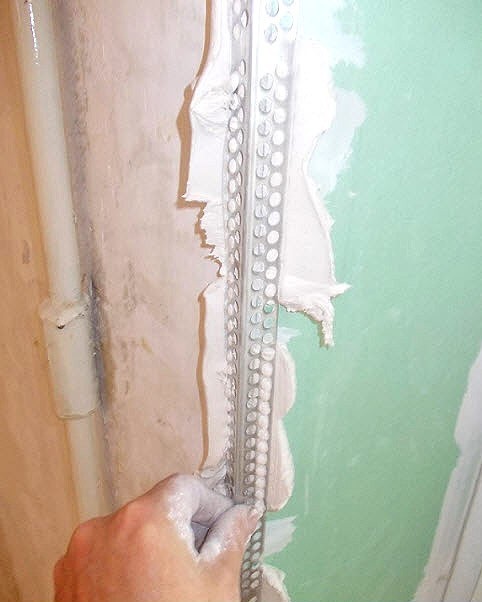
- Allow the mortar to seize and strengthen so that the corners do not move during the putty.
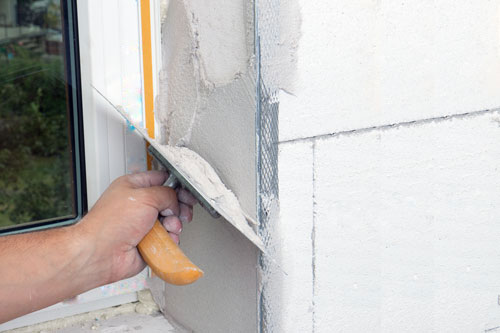
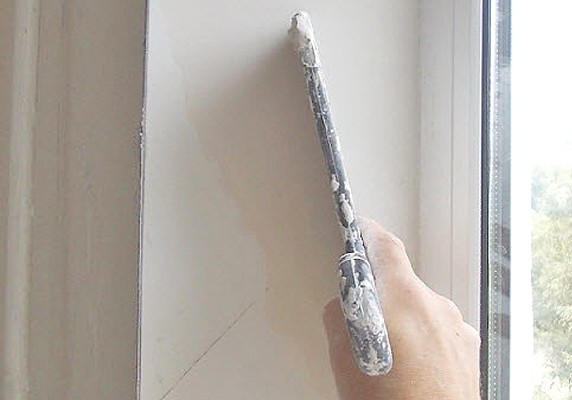
- Using a wide spatula, apply a layer of starting putty on the slope, pressing it to the surface at an angle of about 30 degrees and leading from the bottom up. Then remove the excess in the transverse direction from the window to the wall. At the same time, draw an even angle with the wall.
- One layer of putty should be no more than 5-6 mm. If more layers are required to level and eliminate surface defects, they are applied as many as required, but each must be thoroughly dried before the next.
Tip. So that a thick layer of putty does not begin to peel off over time, it can be reinforced with plastic or fiberglass.
- After leveling, wait for the putty to dry and the sanding pad mounted on the grater, rub the surface, removing traces of the spatula and sag.
- Finish work by smoothing the plane with a thin, not more than 1 mm, layer of finishing putty. After drying and grouting with a thin skin, the slopes can be painted.
Finishing specialists recommend that owners of plastic windows add another intermediate step to this set of works. After leveling the slope, it is necessary to put a thin groove in the corner, between it and the window frame, using a still fresh putty, with a spatula, and when the solution dries, fill it with sealant.
It has good elasticity and will serve as a shock absorber when expanding plastic on hot days. If this is not done, then cracks may appear on the slopes.
Conclusion
Puttying window and door slopes will not cause difficulties for those who are familiar with such work - they independently leveled walls or ceilings.If you first decided to pick up a spatula, then be sure to study the training video in this article. In it you will find answers to those questions that we may have missed.
