How to plaster drywall under wallpaper
Plasterboard wall plaster is an important point in the decoration of the room. How to plasterboard plasterboard correctly, we will consider today in detail. After all, this work is generally already final during the repair, and the appearance of the room will depend on its implementation.
Just as correctly plastering drywall video will show the correct sequence of work.
The content of the article
How to carry out plasterboard work on drywall
First of all, do plasterboard need to be plastered? The answer is one, - it is taken off, you have to, because you still have the joints of the sheets that need to be hidden (see How to putty drywall joints according to technology) Yes, and during fastening there may be differences in the plane, and this drawback must be eliminated. Below is an instruction on how to do this job. Also in the video in this article you can see the progress of the work.
The entire working process of applying putty on drywall, like any other type of construction work, can be divided into successive stages.
Types and choice of putty
Plasterboard plastering can be done with many materials, building materials stores offer a wide range of building mixtures. The variety of putty types is so great that you can easily get confused which one to choose for drywall work (see What putty putty drywall. Analysis of the proposals of construction markets).
There is a mixture for puttying the ceiling and walls, for sealing joints, cracks, chips. Decorative putty for finishing surfaces is also in demand.
It is worth noting that in addition to dry mixes, manufacturers offer ready-made putty in the form of a solution. Drywall decorative plastering is also offered.
But many experts recommend choosing dry mix because of a number of positive points:
- Saving. It is provided due to the long shelf life and use.
- High degree of preservation of their original properties both during storage at the warehouse and at home.
- Resistance to temperature influences, differences.
- The possibility of using part of the dry mixtureto prepare the mortar for routine repairs (joint repair, surface leveling). In this case, the opened packaging can be safely stored until the next work, without worrying about the loss of properties.
Attention: If we talk about the finished putty solution, then it is subject to changes under the influence of various factors. And this does not always affect in the best way its quality, preservation of characteristics.
Based on the material used as the main component, putty is:
- Cement;
- Gypsum (see Gypsum putty: its advantages and problems of use);
- Polymer.
Do-it-yourself plasterboard plastering is done by any of the listed types. The main thing in this case is to take into account the type of premises in which construction work will be carried out.
So:
- For putty in the kitchen or in the bathroom, it is preferable to take a cement mixture, because gypsum is afraid of moisture. An increased level of humidity leads to cracking of gypsum putty when dried.
- Polymer putty is versatile and flexible solution at work, ease of application.In this case, such a mixture is consumed less compared to others. Therefore, many call polymer putty the best option for finishing drywall.
- As for the advertised additional characteristics, for example, frost resistance, fire resistance and others, they are not so important when decorating drywall surfaces in the room, at home. This is just a marketing move, which increases the price of products several times.
And, in general, the best option is to buy a universal dry mix.
Preparation of plasterboard surface for putty
First of all, a drywall wall is prepared for the following operations:
- It is necessary to align it, remove all the protruding heads of the screws, tighten them to failure. But do not overdo it: if you drown the heads completely, then pits form. If you notice that the fasteners are deeply recessed in drywall, carefully twist them and screw in new ones, of a greater length.
- Now let's pay attention to the joints of the sheets: you need to remove all the exfoliated parts of the drywall sheet. To do this, gently tear off the paper with your hands, and then with the help of a knife we cut to the very root. Then we clean the wrinkle using sandpaper.
Attention: Ignoring this work increases the risk of peeling off the putty along with the backed paper, the appearance of bubbles on a dried surface with the subsequent formation of cracks.
- Preparing a drywall wall for painting (see How to prepare for painting the wall: detailed instructions) or wallpaper stickers are very similar. In both cases, a flat surface is required, without dents, tubercles, or roughnesses.
- It is necessary to putty all the seams, to prime the surface. Cardboard has the ability to absorb well, absorb various types of liquids, which leads to its deformation. That is why it is important to create a protective film on the surface that prevents the penetration of moisture inside.
- If the drywall sheets are made without a factory edge, then first we cut the edges ourselves at a 45 degree angle. This helps to better bond the sheets and more evenly seal the joints.
Surface priming
Primer wall - The next step in preparing the drywall surface for putty.
- How to plaster drywall for wallpaper, and if you plan to do this, then the primer is evenly distributed over the entire surface of the drywall. By the way, the primer is a water-soluble mixture, impregnating dry plaster only from above, without affecting the lower layers. Thus, wallpaper glue or paint will not be absorbed into the wall, since a water-repellent film is created on it.
Attention: The use of alkyd primers is prohibited, because this type strongly deforms the cardboard layer. First, bubbles form in the backward layer of paper, which then crack and turn into rags. On such a surface it will be difficult to make a beautiful clean finish.
- And finally, a few words about the preparation of the solution. The dry primer is poured into a container of suitable size, this is indicated by the instructions, mix well and put on the wall from top to bottom with a roller. The primer layer must be at least 0.03 mm over the entire working surface.
Putty application process
After the primed surface dries, you can proceed directly to the putty process, which is performed in several steps:
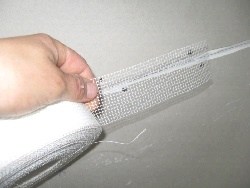
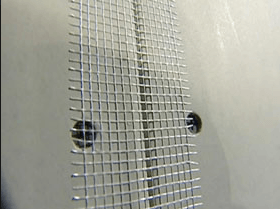
| Glue the Serpyanka | Plaster grid on drywall is on sale. It closes the joints of the sheets and helps make a corner.
|
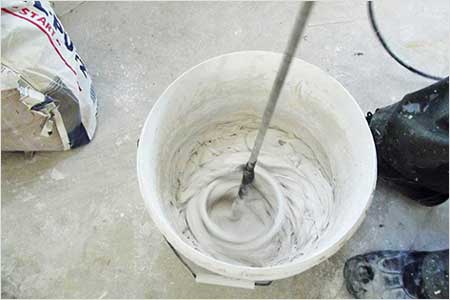
| We prepare the working mixture | We breed a small amount of putty, required at one time.
|
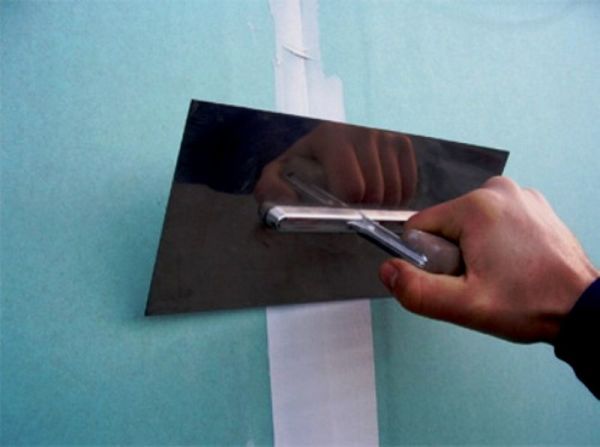
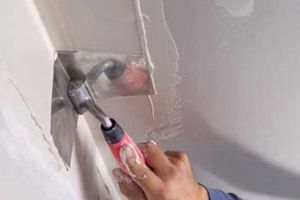
| Close up joints | We need two spatulas, 15 cm wide and 35 cm wide.
|
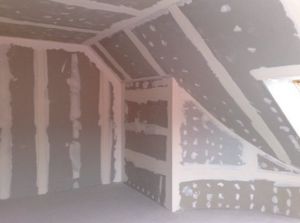
| Putty screws | We use the cruciform method: putty vertically and horizontally. This allows you to fill the fastener caps with a solution and hide their heads. |
| Putty corner | It presents minor difficulties, since the work is not with a flat surface, but with sheets converging at an angle. Immediately uniformly close both sides will fail, therefore, proceed as follows:
A little patience, taking the time to dry out allows you to get an even seam.
|
The main job of putty
Plaster decorative on gypsum board and any other is first applied in draft form. This is just alignment. Now you need to make the final finish and apply the finish.
So:
- The main putty begins with ensuring the evenness of the outer corners. We cut the aluminum corner to the specified dimensions and attach it along the window and doorway to putty or use a stapler.
- We take a small spatula and press the putty into the corrugated holes of the corner, completely filling them. This gives the outer corner rigidity, hardness, resistance to future mechanical stress. Using a wide spatula, we level the solution, performing movements along the edge of the corner, moving to a sheet of drywall.
- To putty the arched passage, we will use a special plastic corner, which is thicker than aluminum. We fix it with a stapler and putty in two stages.
- Fill all holes with the first layer, leave to dry. The second layer aligns the joints of the corner and the drywall sheet. This approach allows you to get an even layer of putty.
Finish finish
At this stage, all the shortcomings are eliminated, some moments are completed, that is, the wall becomes perfectly flat, ready for subsequent finishing.
- We remove irregularities, ledges, cleaning them with sandpaper. We process the entire surface of the wall with zero sandpaper. This improves the adhesion of the putty to the surface.
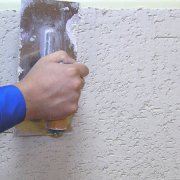
- Final finishing can be done using fiberglass or the same working mixture, complemented by decorative splashes. For work, we take a wide spatula. The consistency of the finish solution should resemble thick sour cream. We put a putty layer evenly, withstanding the same thickness everywhere.
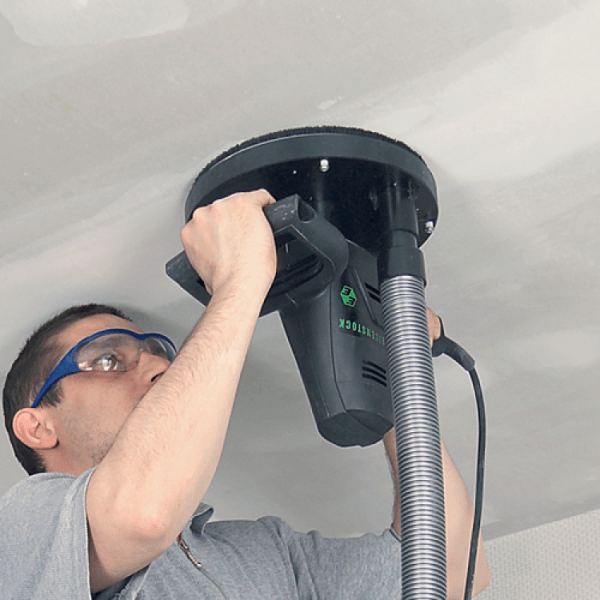
- After complete drying, it is necessary to polish the surface.For this, a building mesh with the smallest section is used.
Attention: If you have a large plane, then it makes sense to purchase a non-expensive grinding machine. This will significantly reduce the time and effort.
Material consumption
The condition of the treated surface affects the consumption of putty.
- A wall with many defects will leave more mortar. For dry cement putty material consumption is calculated as follows: 1.1 kg of mixture per 1 square. m. This is taking into account the fact that the wall was primed.
- For a gypsum mortar, 1 kg of mixture per 1 sq. m
- The consumption of putty on a glue basis is the lowest - 0.5 kg of mixture per 1 sq. m
- To calculate the required amount of putty, get a number that characterizes the area of all the processed surfaces. To do this, calculate the area of each sheet of drywall, according to its size, and summarize.
It is important that you did not perform any calculations, follow the technology of work:
- To prepare a solution in a small amount for 30 minutes of work. If you are distracted from work and missed time, then this solution should be discarded and a new one prepared.
- Follow the entire sequence of the process. Pay due attention to the preparation of surfaces, since it is undesirable to redo the work. Otherwise, the surface will be uneven and the adhesion of the mortar to the wall will be disrupted, which will entail the dumping of pieces of putty.
- Repeat the primer of the wall as soon as the finishing putty dries.
Attention: Careful implementation of all stages involving the preparation of drywall for the final design, decoration, gives confidence that the putty will lie well on the surface, will have a strong grip.
- I would like to mention that it is easy to remove the previous finish from plasterboard sheets processed with putty. With them just shoot the old wallpaper. In this case, a securely fixed putty layer will not fall off, it will not crack.
- After you remove the old wallpaper, you can re-paste new ones, while the quality of pasting will not suffer. And note that repeated puttying of the surface is not required.
There is gypsum plasterboard video, there is also a photo. You must first draw up a work plan and determine the level of alignment. After all, how to plaster drywall, you already know and by doing the work yourself, you guarantee quality and beautiful appearance.
