Installation of beacons for plaster without problems

Plaster beacons quite important for making the right plane. How to put beacons for plaster, today we will consider in detail. After all, this is an exact reference point for drawing the plane.
You can also watch the video installation of beacons for plaster on this page. This is a pretty crucial question if you want to get the perfect plane in the end.
The content of the article
Beacon Rules
How to properly set beacons under the plaster video will show all the moments of the work in the order of priority. Everything is done in stages here. Each of them is important. After all, an ideal plane will turn out when all the elements we have are in the same plane. How to put beacons under the plaster - now we will consider in more detail.
Training
Plaster beacons are already installed on the prepared plane:
- To do this, do a full cleaning of the plane. We remove the wallpaper and putty (see How to remove putty from the walls and how much is needed).
Attention: If the plaster holds firmly, then it will be enough to apply notches on it. This will facilitate adhesion of surfaces.
- If there are cracks on the plane, they will need to be expanded. To do this, use a hammer and chisel.
Also, for the work you will need a quality tool. For the desired end result, two rules are required: one long and one short.
- The long rule should be from floor to ceiling, but somewhat less. And with the help of a short rule, align the solution between the beacons. For such work, you will also need: a wide spatula, a trowel, a building level and a drill or perforator.
- Before you start installing beacons, you need to walk along the walls with a level to determine their curvature.
- If there are large bulges on the walls, then it is advisable to knock them down. As a rule, these can be sticking edges of bricks, which will prevent the beacons from being installed properly, and much more mortar can go. You can remove them with a chisel and a hammer or a perforator, after which the surface of the wall is primed.
Attention: It is imperative that the surface be primed and this process operation should not be neglected, so as not to be liable for poor quality work.
Lighthouse
Installing plaster beacons video will tell about the following stages of this work:
- Installation of beacons.
- Alignment of lighthouses.
- Plastering the wall.
- Dismantling of lighthouses.
- Sealing up the seams left by the lighthouses.

Now how to put stucco beacons. Marks are made on the primed surface of the wall, which will serve as a guide for the installation of beacons. Lighthouses can be made of mortar with fixing any nails or screws. Dowels can also be used.
The instruction is as follows:
- Lighthouses are fastened with dowels - nails, size 6x40 mm, in increments convenient for applying the short rule. The holes for the dowels are drilled using a drill or punch.
- Having fixed the beacons in a vertical position, they are aligned in a vertical plane with the help of a building level, and they are also equalized in a horizontal position, applying a rule.
Attention: Installation of beacons is a very responsible operation, which takes a lot of time, but guarantees high-quality plastering of walls.For greater confidence in the evenness of the installation of beacons, you can use a thread or fishing line, pulling them along the diagonal of the wall.
- In the center of the intersection of the thread, you can see how smoothly the beacons are set: if there is a gap between the threads, this means that the work is not done very well. In this case, the longer this gap, the less quality the work.
- For final fastening, the beacons are coated with a solution on both sides. This fixture must withstand impressive loads during plastering the walls, as they will be constantly carried out by the rule by pressing on it. During additional mortar fastening, the installed beacons should be constantly checked for evenness. After this, the beacons are left until the solution is completely hardened.
How to install additional beacons
Sometimes it may happen that the installation of stucco beacons is done on a large plane, then you need to fix the intermediate beacon between two beacons or on a long wall where the main beacon cannot be installed, for example, pipes interfere.

So:
- Naturally, it should be on a par with all lighthouses. To do this, you can use a flat rail or pull a thread or fishing line.
- Additional beacons are installed only after the final installation and fixing of the main beacons. Final hardening can take several hours, so you can continue to install the main beacons on other walls.
- After the main lighthouses have dried, you can proceed with the installation of intermediate ones. The technology for installing them is the same.
- After installing an additional beacon, it will not be superfluous to check how exactly it stands in relation to other beacons. To do this, you can use a thread, fishing line or flat rail. At the same time, evenness is checked in several places: from above, from below and in the center.
Installing an intermediate beacon using thread
Placing beacons for stucco video also tells about the possibility of using threads in some versions. If it is not possible to use the rule to align the beacons (as a rule, pipes interfere with this), use a thread.
For this, two dowel-nails are driven in at the top and bottom and a thread is pulled between them, which should be above the installation site of the additional beacon.
- Elevations are made at the installation site from the gypsum, onto which a segment of the lighthouse is installed and with the help of a staff or with hands it is pressed into the gypsum until a small gap is visible between it and the thread.
- With the correct installation of the main beacons, the intermediate beacon will also be installed correctly, which can be checked using the level. True, there are places to which you can’t crawl with a level, then you have to rely on the professionalism of the builders.
- Sometimes you have to add not one, but several pieces of lighthouses. This question is very relevant during the plastering of walls in the kitchen, where there are many pipes.
Lighthouse plaster
After installing the lighthouses, you can proceed to plastering the walls. This stage can take much less time than the installation of beacons. The quality of the plastering work will largely depend on the quality of the installed beacons.
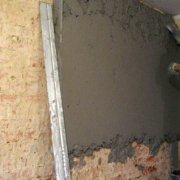
- Stucco on lighthouses begins with casting gaps between them with mortar. In this case, any mortar or starting putty can be used.
- After the gap is filled with a solution, it is leveled with a trowel or spatula. If necessary, the solution is added: ideally, the solution should go beyond the beacons.
- After this, the solution is leveled using a short rule or a straight bar. To do this, the rule is set horizontally, between the two beacons and the upward movement remove the excess solution.
Attention: Thus, the solution is aligned between the beacons, and the excess solution can be used again.
In this way, the entire wall is plastered, moving from the lighthouse to the lighthouse, or rather, from one gap between the lighthouses to another:
- Further, the plaster is allowed to dry. After that, on the second day, the beacons are dismantled. Begin this operation from below, constantly moving to the top.
- With a wall not completely frozen, dismantling the lighthouses is not difficult. To do this, you may need a sharp object, such as a screwdriver, with which beacons are picked out from the plastered wall.
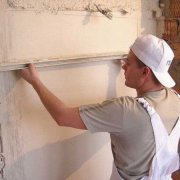
- After dismantling, recesses appear on the plastered wall, which are sealed with the same solution. For this, a trowel is used, with which the recesses are closed with a solution. To thoroughly align the recesses, a stucco grater is used. With the help of her and circular movements produce the perfect alignment of the entire surface. Then you need to allow the solution to completely dry, after which you can continue to work.
- Before finishing the plaster, it must be cleaned with an abrasive mesh using a special grater. Before carrying out any additional work, plastered surfaces are covered with a primer without fail.
- Lighthouse plaster gives the best effect, indicating the professionalism of builders. After such plastering, perfectly even angles are obtained, by which it is very easy to determine the skill of the plasterer.
- Despite this, it can be noted that this technology is more suitable for small surface areas. This is due to the fact that the installation of lighthouses requires a lot of time and money, and this leads to a higher cost of plastering. As a rule, lighthouse plaster is used in the construction or repair of apartments, as well as private houses.
Attention: When decorating other rooms and office buildings, other technologies are used using other finishing materials that require less time for installation, and therefore, means.
Video installation of plaster beacons and instructions will help you avoid mistakes and do everything right. Doing all the work with your own hands, you can finally get a quality plane.
And in this case, the finish price will be much lower. So, look at the photos and videos in this article and you can safely get to work.