Floating screed
The reason why the traditional screed is traditionally chosen is the improved performance of sound, hydro and thermal insulation. In some cases, the cost-effectiveness of such alignment plays an important role. Popular places for independent screed are ground floors, loggias and balconies. The technology assumes that the monolithic slab of cement-sand mixture does not lie on a solid foundation - a cushion of soil or floors, but on a special substrate. Thus, the protective screed is not connected with the rough foundation and the walls around the perimeter, but is isolated from them. In this article, we will consider how to do a floating floor screed with your own hands and what is a floating floor without a screed.
The content of the article
Terminology and basic concepts
In isolation from the base, a layer of concrete, cement or gypsum mixture, or a polymer solution is poured.
This layer is responsible for the redistribution at the base of the loads taken from above. Unbound alignment successfully performs its function only due to its high strength. And levels the influence of building physics and ceilings. Because the characteristics of expansion and contraction when the temperature and deformation under load of a floating screed are different from those of the base. Thanks to the installation of an unbound coating, the floor structure acquires improved operational properties.
Achieving the best thermal and noise protection
Auxiliary materials for the equipment of a substrate for a floating floor screed are responsible for the heat retention in the room and noise reduction. Additionally, low-frequency vibration noise is suppressed due to the presence of an air gap and the isolation of the floating floor screed.
This protective layer is placed on the foam, sheets of foamed polyurethane foam, mineral wool or basalt insulation. The latter is characterized by high density. Polyfoam and polyurethane foam do an excellent job of thermal insulation and room insulation. Mineral wool (suitable even to neutralize the effect of the proximity of the soil and the basement) is sometimes replaced with soft mats of equivalent stiffness. Nevertheless, this is one of the most common insulation products on the market.
Isolon, isoflex, and other foamed thin roll insulators, including plastic wrap, should not be taken. Although some use such a substrate, trying to minimize the rise in floor level. But still, this method is uneconomical and helps to achieve the same effect as with the correct heaters.
Waterproofing
Without a waterproofing layer, not a single unbound base is dispensed with. The insulation layer and the rooms located below, if not talking about the ground floor, also need protection from leaks. Floating floor screed technology involves waterproofing using roll materials. Effective are glassine and roofing felt (paper insulators with bitumen impregnation), materials with fiberglass and fiberglass in the composition, polymers in the form of a thick film or permeable on one side of the membrane.
The membrane is suitable for the ground floor of buildings to remove excess water from the screed and prevent the return of capillary moisture from the ground. It can not be avoided when groundwater is located near the surface, and the gravel-sand cushion is too thin. The waterproofing strips during installation form a container with overlaps of at least 10 centimeters.In this case, the rolled material is laid so that the extreme stripes of 10-20 centimeters come on the walls. The joints between the strips are sealed in different ways, depending on the nature of the material. The polymer film is fixed by gluing with adhesive tape of sufficient width, and in order to fix the bitumen-containing strip of the insulator, the joints are heated with a building hairdryer. Some heaters need protection from dampness, then two waterproofing layers are laid - above and under the insulation. An example of such a heat shield is mineral wool.
If you wish, you can supplement the effect by coating with bitumen mastics, but not replace it. This also applies to solutions of one-component polymer blends. Lubrication in this case is not suitable, since most of the bitumen composition is absorbed into the surfaces to be coated and the meaning of the floating floor screed is lost - the separation layer. Then the upper and lower coatings are not qualitatively separated.
General description of the advantages and disadvantages of technology
Before describing the technology for arranging a floating floor screed with our own hands, we will find out how unrelated alignment compares favorably and what loses. Among the main advantages of a floating floor screed are:
- Improving the protection of the room against heat loss and noise propagation. The more porous the material laid under the screed, the more reliable the protection.
- Absorption of shock and vibration noise from outside.
- Independence of expansion and compression parameters under the influence of temperature and load deformations from the physics of floors between floors.
- The economical use of building materials, since a relatively thin layer is poured.
- Acquisition of floor stiffness.
- High-quality alignment, allowing to lay decorative finishing materials directly on top.
- Laying the heat insulator provides shock absorption and damping loads, which improve the sensation when walking on the floor.
- Long life with proper installation.
- A number of classes of solutions from various mixtures are suitable for arrangement.
- An unbound base is not capricious, does not need care.
Nevertheless, any technology is characterized by shortcomings, floating screed is no exception. First of all, these are:
- An unaesthetic appearance of the surface of the leveling layer of cement-sand mixture, if it is not further processed (sanded or ironed).
- Most popular unbound screed formulations are characterized by low chemical resistance. The traditional way to increase it is by priming with epoxy based compounds.
- The considerable weight of the cement poured (albeit less compared to the classic wet screed) is a serious obstacle if the floor floors in the room are old and fragile. But if perlite is not used in the preparation of the solution, then the perlite strength will not decrease especially, and the mass will be noticeable. Another option is to abandon sand-cement pouring in favor of specialized mixtures, widely represented on the construction market. A layer of the same height weighs much less if a polymer mixture is used.
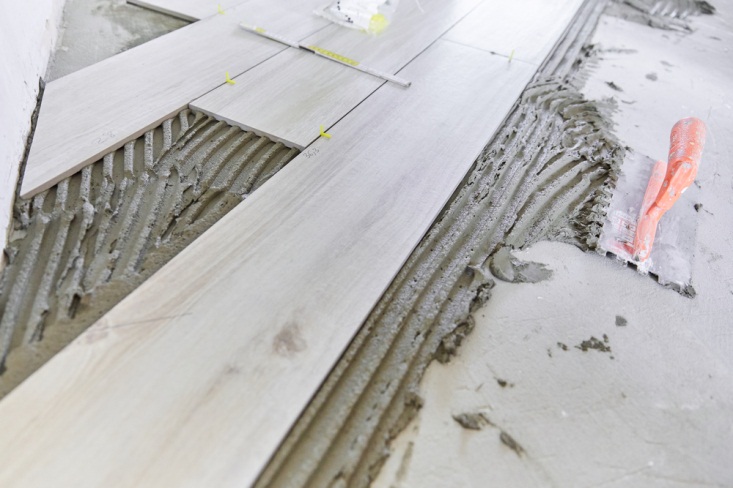
How to make a floating screed
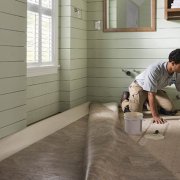
So, after the end of the intermediate work, we begin to equip the floating floor screed with our own hands. The first thing we need is to prepare the foundation. In apartment buildings, the process is simpler, just remove the old coating. In private homes and cottages, foundation preparation involves the creation of sand and gravel pillows in a 1: 2 ratio of components. After backfilling, moisten and cushion the pillow. Next, we clean the draft floor from debris and dust, examine the surface for large defects - cracks, chips and potholes. We gloss over the found defects with a solution and wait until the mixture dries.
We spread heat-insulating material on the dried base (in case of soil, not overlap, do not forget to first protect the screed from moisture, for example, with a membrane). We also lay the waterproofing on top of the insulation. We glue the walls of the room around the perimeter with a damper tape that separates the screed from the walls and compensates for the deformation of the leveling layer during heating and cooling. Now the room is ready for laying out the solution, previously thoroughly mixed.
To fill the floating floor screed turned out smooth, beacons are installed on the surface. Special rails designed for these purposes and multifunctional profiles made of metal and plastic also successfully cope with this role. On the floor, the lighthouse is fixed with small portions of putty. To ensure that the upper edges of the lighthouses are at the same height, after installation, a check is carried out at the building level. The solution is laid out in parts at right angles to the beacons and smoothed out with the rule, resting the edges of the tool on the profiles.
Floating screed: rules and regulations
Strength and durability of a floating coupler guarantees only compliance with the installation rules. One of the fundamental principles is not to fill the layer thinner than the standard. Depending on the concrete in the base, the cement-sand mixture or the mixture on polymer bases, the minimum layer thickness is 5-7 centimeters.
An exception is the finished mixture with the addition of plasticizers. In this case, a layer of 4.5 centimeters may be enough (as the manufacturer reports in the instructions on the package). A screed of smaller thickness will not last long and will soon begin to break down, not withstanding the tested loads.
Like any leveling coating, a floating screed is built on a foundation with a flat surface, without sudden changes. And in concrete slabs between floors, and in wooden flooring, noticeable irregularities have to be eliminated beforehand.
An easy way to do this on your own is through roughing. It is carried out on reinforced concrete slabs in the presence of a significant height difference. The wooden coating is sewn up with plywood. Next, we follow the instructions already described - we put warming, followed by waterproofing materials and apply a reinforced layer of screed.
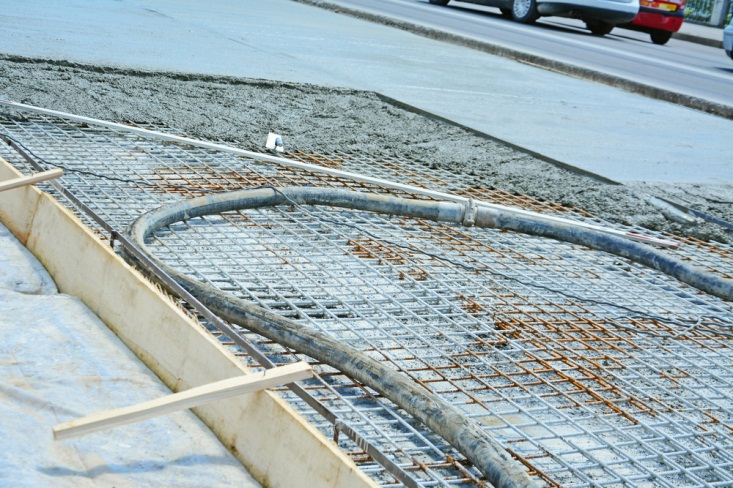
Reinforcement Rules
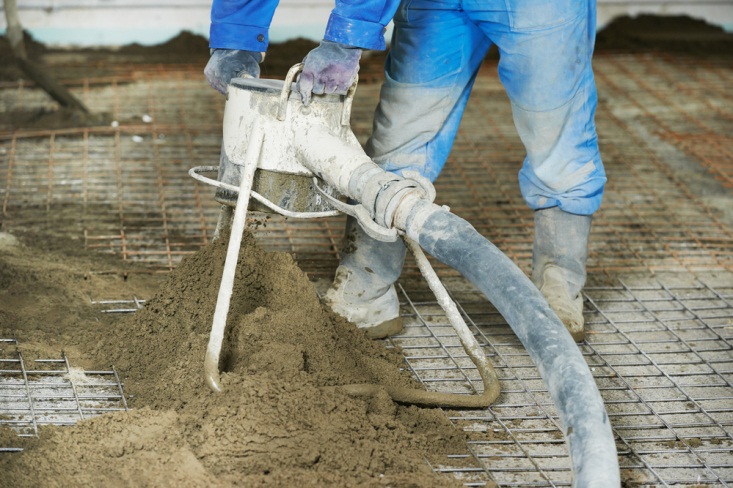
We come to another important stage in creating an independent foundation - reinforcing the screed with a net, rods or special plasticizers in the solution. Just laying a reinforcing mesh on the surface before spreading the mortar is not enough to strengthen the screed. The first rule is the location of the wire or reinforcing mesh in the body of the screed, and not under the solution layer. Removal from the edges determines the thickness of the screed and additional options for the sexual structure.
For example, when pouring the solution with the smallest permissible layer of 4.5 centimeters, we place the grid with the same indentation from the bottom and top. If the layer height, on the contrary, is increased (often used in garages, standing on the ground cottages and with a significant load on the base), it is recommended to lay a reinforcing mesh with an indent from the bottom half as much as the top.
When installing a heating system of a class of underfloor heating, it will be necessary to increase the thickness of the poured layer so that the distance between the reinforcing mesh and pipes is about 10 mm. Other features of combining floating screed and underfloor heating in one design will be described in more detail in the next section.
For an apartment building with strong ceilings between floors of reinforced concrete slabs, reinforcing screed and reinforcing mesh made of plastic are suitable. Additionally, for both options, fiber reinforcement is optionally used, which is added to the bulk mixture during the preparation of the solution.
Warm floor and floating screed
The underfloor heating system is adjacent to an unbound screed comfortably.Pipes are located inside the flooded layer of the solution, which protects the heating elements from mechanical stress. Now more about how to lay pipes.
After preparing the base, laying the heat and waterproofing material, the reinforcing mesh is fixed with hooks or wire on self-tapping screws screwed around the perimeter of the room at a distance of 10 mm from the waterproofing layer. Further, pipes are laid over reinforcing elements, supported by supports in long sections to prevent opening.
We run water through the pipes, give the liquid time to equalize the temperature with the air in the room. The stage of pouring the solution begins, where the heating pipes at the same time and beacons. We cover the heating elements by 2-2.5 centimeters. The liquid mixture of the bulk type in this case is preferable because they are self-flowing. So, it’s easy to fill hard-to-reach places around the pipes.
Here are the main principles for arranging a DIY floor screed. Observance of a number of simple rules will provide the floor construction with durability and reliability, and also do not neglect the manufacturers instructions during installation.