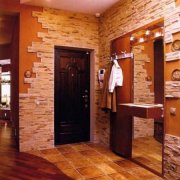
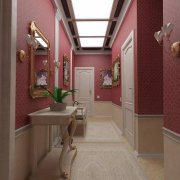
Paneling the corridor: doing it right

The walls in the corridor are more prone to pollution and damage than in other rooms. And if there are pets and young children, then the issue of maintaining the decoration of the corridor is of particular importance.
Considering that the entrance hall is the face of the apartment, the following requirements are imposed on the decoration materials of the entrance hall and the corridor:
The content of the article
Consider the advantages and disadvantages of each material.
As with any material, this has its advantages and disadvantages.
Plastic panels
PVC panels (polyvinyl chloride) are a completely artificial material. It does not contain asbestos and cadmium.
Its cellular structure will provide you good sound insulation:
- A variety of colors and patterns will help bring your life to life. corridor decoration ideas.
- The protective coating will provide resistance to sunlight.
- Finishing with plastic panels is possible in rooms with high humidity.
- The surface of the panel is easy to clean, completely hygienic.
- Due to their artificial origin, it is not recommended to use them inside residential premises.

Decorating the corridor with MDF wall panels
MDF panels are made of wood dust and fine chips, which are pressed under high pressure and high temperature:
- The panel is up to 16 mm thick and resembles wood in appearance.

- MDF panels are easy to cut, they do not break and do not crumble.
- Significantly increase the sound and thermal insulation of the room.
- Moisture resistant panels are available. Moisture-proof impregnation is indicated by the image of a drop of water on the package.
- Panels are also available with refractory impregnation.
- Any room in the apartment can be decorated with such panels, but they look most effective when decorating a corridor or entrance hall (seeDecorating the entrance hall with MDF panels: types of panels and installation).
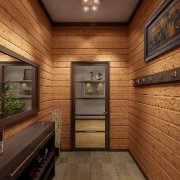
Natural wood paneling for the corridor

The most expensive material for the manufacture of panels is hardwood and wood trimmed with natural wood veneer.
For the manufacture of wooden panels is:
- oak;
- beech;
- alder;
- ash;
- cedar;
- maple;
- Pine.
To give resistance to moisture and fire, finished panels are subjected to impregnation with appropriate preparations:
- In a veneered panel, the main layer is made of the cheapest wood - pine. The veneer is glued to it in 2 or 3 layers. The front layer is glued from the veneer of valuable wood species.
- All these layers are bonded together by hot pressing.
- The panel is then polished and coated with wax, paint or varnish.
- Wealthy people can afford to order panels made of 100% solid and valuable wood species with subsequent polishing.
Natural wood panels at the entrance to the room look very noble and spectacular, whether it is an apartment or a country house.
Fibreboard wall paneling
Wood-fiber boards (MDF) are made from wood fibers by hot pressing. As a result of the action of high temperatures and pressure, lignin is released from the wood fibers.
It is an organic binder.And therefore, synthetic binders are not used in the manufacture of fiberboard.
For the production of fiberboard, you can use other fibers of plant origin:
- Panels made of fiberboard are environmentally friendly and completely harmless to health. They can be used in living quarters. They are easy to clean and not very afraid of moisture.

- Fibreboard panels perfectly fit during decoration walls in the hallway and the hallway.
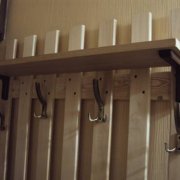
DIY wall panel installation
Now consider how to mount wall panels for the interior decoration of the corridor with your own hands.
Depending on the quality of the walls and the material of which the wall panel is made, they can be mounted in various ways:
- You can attach panels to the adhesive directly to the wall if the wall is perfectly flat and the panels are not very heavy. These are panels from fiberboard and MDF.
In this case, glue is applied on the entire surface of the panel in a zigzag fashion. Then the panel is pressed against the wall.
The glue must have elastic characteristics and not interfere with the thermal expansion of the panel. - The method of gluing the panel to the crate is not widely used due to its fragility. Therefore, it should be used as an addition to mechanical fastening.
- The method of attaching the panel to the crate with screws is very reliable, but it should be used in those rooms where there can be no large fluctuations in temperature and humidity. The fact is that self-tapping screws do not allow the panels to expand with increasing temperature and humidity, and this leads to their deformation and warpage.
- There is another, the most common method, is fastening the panel to the crate with the help of clamps. With this method, the panel has free thermal expansion and is not deformed.
Before starting work on decorating the walls of the corridor, it is necessary to calculate the required amount of material. If you know the length and height of the walls of the room, then the store will help you calculate the right amount of all materials and fasteners.
Materials and tools
It will be required:
- MDF panels;
- wooden beam 20x40 mm;
- finite elements;
- dowels and screws;
- kleimers;
- glue "liquid nails";
- nails of 20 mm, for fastening kleimer;
- drill with a perforator;
- hammer;
- Phillips screwdriver;
- roulette;
- level;
- construction stapler, if you decide to fasten the clamps with brackets
Panel Installation
MDF panels are attached to the crate, which is assembled from wooden bars measuring 20x40 mm.
Attention: if you want to mount the panels vertically, then the crate should be mounted horizontally. If the panels will be located horizontally, then the crate should be mounted vertically.
So:
- Since the walls are uneven, then with the help of the level and bars we eliminate irregularities, laying where wedges are needed.
- We fix the first beam at a distance of 3-4 cm from the floor. The remaining bars are fixed at a distance of 50 cm from each other. We fix the upper beam at a distance of 3-4 cm from the ceiling.


- Now you need to mount the first panel. Begin necessarily with a corner. We expose the panel according to the level strictly vertically and fix it on one side with self-tapping screws, and on the other hand we attach the Kleimer and fix it with carnations or a construction stapler.
Important: if the first panel is installed with a slope, then the entire wall will go with a slope.
Fasten with screws only the first panel. The remaining panels are attached to the crate only with special brackets (clamps).

- We insert the second panel into the groove of the first panel, and, on the other hand, we fasten it with a clamp.

And so we type the panels on the entire wall.
- You can adjust the panels in height using an electric jigsaw or a hacksaw for metal.
- At the very end, all the joints formed between the panels and the ceiling, panels and the floor are covered with glue fittings.

We close the corners, both internal and external, with special accessories for glue “liquid nails”. On our site you can read many more interesting things on various materials of decoration and the rules of the work.