What paint is better to paint the walls in the bathroom, and how to do it right

The bathroom is a room with special requirements for decoration: high humidity, rapid pollution of the walls with splashes of soap and shampoo, as well as wet wear during cleaning, make most of the usual dyes unsuitable. Today we have to find out which paint is better to paint the walls in the bathroom, how to prepare the surface for painting and how to properly perform it.
The content of the article
Requirements
To decide what paint to paint the walls in the bathroom, we need to formulate the requirements for the finishing material.
Here they are:
- The applied paint must be moisture and water resistant;

Please note: these properties are often confused. The first means resistance to high humidity, the second - the ability to tolerate direct contact with water without expansion, dissolution and delamination from the base.
- The coating should tolerate temperature fluctuations over a wide range of values. In the process of taking a hot bath, the air may warm above 30 ° C, but it is worth ventilating the bathroom - and the temperature will drop by a dozen degrees within a few seconds;
- Paint should be resistant to dry and wet wear. In a small room, you will inevitably touch the walls. In addition, they will need frequent cleaning of the inevitable splashes;

- It is desirable that the finish is waterproof. In this case, you can not be afraid of the defeat of the capital walls with a fungus;
- Finally, ideally, the paint should not have an odor, either during operation or during application.
Heroes need to know in person
We bring to your attention two varieties of water dispersion paints that fully comply with all the requirements we have formulated. Meet:
| Picture | Description |
 Facade dye based on silicone from the Sevastopol company "Accent" | Silicone front paint. The word “facade” in the name indicates only that it can be operated in atmospheric conditions - that is, it is exposed to moisture, temperature changes, dry and wet wear. Resistance to the latter is indicated by the fact that manufacturers of silicone paints guarantee over 5000 wet cleaning cycles for them. |
 Rubber “Resel +”. Made in Sevastopol | Rubber water-dispersion paint. This is an acrylic-latex dye that gives an elastic and completely impervious to water coating after drying. However, it does not interfere with air exchange and tolerates wet cleaning using any household detergents (except, of course, abrasive). |
Curious: wear resistance rubber paint “Resel +” and its water resistance are well characterized by the fact that the author successfully used it to paint the plywood flooring of the open balcony and the steps leading to the second floor of the house. The paint stably tolerates rains and the scorching summer sun for the fourth season.

The characteristics of both paints differ slightly:
- Consumption when applied in one layer is 80-140 g / m2, depending on the surface texture;
- Both dyes are supplied in white and tinted in any color with water-soluble pigments;
- The size of the package varies from 0.9 to 11 kg;
- Drying time - 1-2 hours per layer, depending on the surface absorbency, temperature and atmospheric humidity;
- Service life in wet conditions - at least 10 years;
- The price of a kilogram of paint also almost coincides - 137 rubles per kilogram for silicone facade and 140 for rubber;
- The coating texture is matte in the first on our list of paint and semi-gloss in the second.

Application
We found out what paint to paint the walls in the bathroom; now it remains only to find out how to do it right.
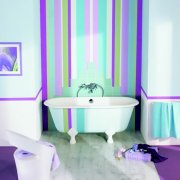
Manual tinting
The main advice: if the white color of the walls fits into the design of your bathroom - do not tint the paint.
This will greatly simplify your future life:
- If the walls are damaged (cracks, potholes, etc.), you can use the usual acrylic putty without subsequent painting. Snow-white putty will not be noticeable on an equally white background;

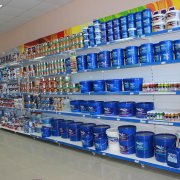
- You can always tint the damaged coating purchased in the nearest building materials store with paint of the same type, without having any problems with its repeated tinting in the same color;

- Finally, if you still decide to change the color of the walls of the bathroom in the future, the new paint will perfectly fall on the old coating, without creating any problems with the compatibility of tones (stains, stains, etc.).
Have you decided that you need tinting?
Then - a few simple rules, compliance with which will allow you to achieve the desired result:
- Before tinting the entire volume of paint (see How to paint: choose an option), try pigment on a small amount. After tinting, use the resulting product to paint any surface (piece of hardboard or wall in an inconspicuous place): the dye looks different in the bank after application;
Note: this instruction is especially important if you mix two pigments. The result can be completely unpredictable.
- After adding the pigment, mix the paint very carefully throughout the entire container. Otherwise, you will get a color of different intensities in different parts of the wall;

- Color the dye with a margin. With repeated manual tinting, you will not be able to get the same shade. In addition, it is advisable to leave a small supply of finished paint for future wall repairs in case of accidental damage.
Consistency
The consistency of the paint when applied should approximately correspond to the consistency of very fat milk. Excessive viscosity will force you to apply the dye in an excessively thick layer, which will lead to unreasonably high consumption and, with a high probability, the appearance of sagging. In addition, a thick layer of viscous paint dries longer than two layers of more liquid.
All emulsions are predictably diluted with water. Its amount should not exceed 10% of the dye volume. After adding pure cold water, the contents of the container are thoroughly mixed with a stick or, which is much more convenient, with a drill with a whisk.

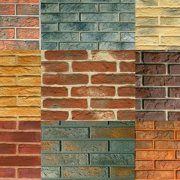
Foundation preparation
Walls for painting should be:
- Durable (without crumbling or exfoliating coatings). All dubious sections of the walls are cleaned to a solid foundation with a rigid steel spatula and leveled with putty;

Note: it is believed that only cement plasters and putties can be used in damp areas.However, subject to effective ventilation of the bathroom and waterproof finish, the use of gypsum mixtures is quite acceptable. This is how the combined bathroom in the attic of the author is decorated.
- Equal. This is especially important for glossy and semi-gloss coatings: they make the slightest roughness of the base noticeable, while matte dyes hide them. Rough Walls putty and polished for painting;

- Dust free. Dust places the adhesion of the paint to the walls, increases its consumption and makes the painted surface uneven. To remove it, use a vacuum cleaner (preferably industrial) or an ordinary brush;
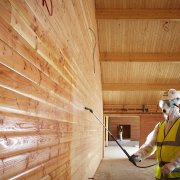
- Primed. Penetrating acrylic primer will make adhesion of the finishing layers stronger with each other, stick the dust remaining on the wall and significantly reduce paint consumption when applied with the first layer (see. Primer for walls for painting - types and tasks).

Painting
How to apply silicone or rubber paint with your own hands?
Yes, just like any other water emulsion. The internal corners are painted over with a brush, the planes of the walls and the external corners are painted with a middle pile roller.

In addition to the brush and roller, you will need a paint tray.
Here are some basic rules for painting walls:
- Painting is carried out at air temperature from +5 to +30 degrees. At zero and below, the water base of the paint will simply freeze, and in strong heat the dye will set before you evenly distribute it on the painted surface;
- First, the paint is applied in the inner corners, then the walls are painted;

- The roller rolls out strictly in the paint tray. If you do this on the walls during the painting process, the coating will lie in an uneven layer;

- The wall is painted in one step. If you paint only part of its area, and the coating has time to dry out, in the area where fresh paint overlaps the old, a thickening of the coating will be noticeable;
- Each subsequent layer is superimposed by the movements of the roller, perpendicular to the movements when applying the previous layer. So on the walls there will be less inevitable stripes;
- The last layer should lie parallel to the prevailing lighting (from a lamp or light window). The goal is again to make the strips from the roller less visible;

- The next layer is applied only after the previous one has completely dried;
- Do not be lazy to wash the brush and roller with water before applying each new coat. In this case, there will be no traces of paint dried on the tool on the walls.

Conclusion
We hope that our material will help you in decorating your home. Do not take it as the ultimate truth: the modern market offers many colors that are not inferior to those described by us in terms of their performance. To learn more about what paint is better to paint the walls in the bathroom, the video in this article will help you. Good luck!