How to glue tiles on the wall and floor

How to glue the tiles on the wall today we will analyze in detail. Although this issue should be considered in conjunction with gender. After all, basically this is done. Both markup and material selection rules will depend on this.
Today we will consider how to choose the right material and how to glue the tiles on the wall in stages.
The content of the article
Advantages of Tiling
If you have not decided how to glue the wall in the kitchen instead of tiles, this is not surprising, because this material is quite difficult to find a replacement:
- When applying this type of coating, you get a beautiful and even plane that will last quite a long time;
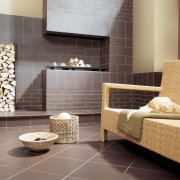
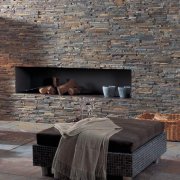
- The material perfectly tolerates high humidity and is most often used in the decoration of rooms with high humidity, for example, in the bathroom (seeTiling the bathtub: how to do it right);
- It is not afraid of low temperatures and is suitable for decoration without heating;
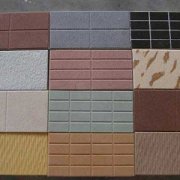
- There are a large number of not only colors, but also sizes. This will allow you to select material with virtually no waste;
- It is not afraid of alkalis and various oils, therefore it is suitable for finishing industrial premises;
- It’s also not difficult care and how to glue the fallen off tiles on the wall you will not have problems, because it is simple and quick to do. You just need to try on and fit the tile to the desired size and just fix it on the solution.
Material selection
We glue tiles to the floor or walls, anyone can do it yourself. First you need to choose the right material. Here everything will depend on the place of facing and the location of the plane itself.
The most basic tile division can be defined in two ways:
 Tile Choose a tile | This material has a thin appearance. It does not tolerate physical effects. It has many manufacturing options and, accordingly, types. So there are plenty to choose from: For example, for “apron "in the kitchen, less quality tiles will do, while in the bathroom, do not get low-quality.
|
 Metlakh tile Floor tile | The difference is that for the floor, it is more durable, with a coating eliminating slipping, while for the walls they use glossy, possibly with a cramped pattern. Dry mix, selected taking into account moisture resistance, this is indicated on the package. The tile "discounted", usually does not match the desired quality, or these are leftovers. |
Attention: When buying, you should always make calculations in the direction of increase, because the tile often breaks, or there may be a mistake when cutting. It is always necessary to remember that, having bought the necessary amount of tiles, in the future, just such, may simply not be.
Ways and methods of laying tiles
Laying tiles is a fairly simple operation. Among builders, it is not considered difficult, it can be performed by anyone, even a student. Nevertheless, the work of such a plan requires preparation for it, and most importantly, actions according to the rules, that is, in order to achieve a positive result, everything needs to be done correctly.

Important safety measures. It would seem - what could harm, with such work? But do not neglect your own health. All work is divided into stages, each stage at the same time, has its own characteristics. Having carefully studied, and strictly following the rules, everything will work out.
Security measures
A very important stage.When working with tiles, one way or another, it is understood that inevitably, you have to deal with the material very sharp, with sharp edges.
So:
- By dismantling (seeHow to remove tiles from a wall without damaging the base), you need to use safety glasses to avoid getting small particles into the eyes.
- To protect hands, use gloves. Here, special attention - the fact is that when tile adhesive gets under the nail, it hardens, while expanding, as a result, you can remain without nails. In case of accidental contact, rinse with a brush.
- The same goes for the eyes. Tile glue is not really cement, it contains a huge amount of chemical compounds. Therefore, in case of contact with eyes, rinse immediately and, if necessary, consult a doctor. When glue gets on the skin of the hands, cracking occurs, and sores form - it is very painful and unpleasant.
- Gloves are used for medical, but choose more durable ones (always a pair in stock). It is recommended to lubricate the face and hands before working with the solution with a baby cream, in case of accidental contact with the glue, it will be easier to remove.
Preparation for the main work
Before gluing tiles to the wall, it is necessary to prepare the base plane with high quality. The appearance and durability of the coating will depend on this. Moreover, you can do everything yourself and, accordingly, the final price will not be high.
Everything is done in the following order:
- To remove all unnecessary, freeing the walls - it is necessary. Sometimes, they try to avoid this stage, but attempts to circle the tiles around the obstacle, mainly lead to the fact that the quality is lost. It is better to remove everything that is possible, it will save time, simplify the task as a whole, and improve the quality of work performed.

- Processing a painted wall.
- It is best to completely wash off the old dye. There is an article on this topic on our website (seeHow to wash off the paint without problems).
- If it is not possible to remove the dye, then it is necessary to process with sandpaper, in addition, notches are made on the wall, for better adhesion of the solution to the wall. The notches are made with an old ax, either with a hammer or, as an option, with a puncher.

- Wall alignment. Aligning the walls is a very important stage. To avoid it will not work, in the end, it can be said - a condition under which it becomes generally possible to perform styling in a quality manner.

- It is necessary to check the angles and verticality of the walls. Otherwise, it will turn out "scatter", it looks very ugly, but in fact it is a marriage. In such works, the vertical direction is most important, the angles themselves, of course, it is desirable to “bring out”, but the vertical will just affect the expansion. This can be done using the level, attaching it to the wall, or using a plumb line.
- If violated, the wall needs to be fixed. With the help of guides, the front wall is "displayed". Guides are attached to the wall using gypsum mortar. You don’t need to cook a lot of it, the guides are attached to the "bloopers", while the vertical is verified.
- They are also installed vertically at a distance of 50 cm from each other, while they should not be taken away from the wall, only at a distance necessary for alignment.
- In cases where it is necessary to take the guides away, more than 3 cm. It is necessary to strengthen the mounting grid before applying the leveling plaster. In this case, the applied layer of plaster should not be made thick immediately, but applied gradually, allowing the previous layer to dry. To perform such work, it is recommended to use dry mixes that meet the quality requirements for rooms with high humidity.
- In the event that the wall already has old tiles, it must be removed. It is removed with a hammer and a chisel, you can use a puncher, having previously installed a special nozzle on it.The work is dangerous in that when the tiles break off, its small parts can get into the eyes. It is necessary to work with goggles.

- The floor also needs to be leveled, after removing the old tile. But before starting work, the floor must be treated with waterproofing. There are a lot of such materials, there are various films, or they use roofing mastic.
This is to prevent possible leaks, as well as the possible accumulation of water in the floor slabs, which in itself may well be - a room with high humidity.

After the isolation device, beacons are installed on the floor and are mounted on a gypsum mixture. It is necessary to install them, along the bathroom, at a distance of 50 cm from each other. The distance is not important, but you do not need to make it too large (it is inconvenient to level the solution), or too small (in vain).
The tool is the same as in the cases stucco wall alignment. If the floor turns out to be wooden, you need to examine it for wear. If necessary, replace (in whole or in part), at the same time, wooden parts are treated with special solutions to prevent rotting and burning. Waterproofing in this case, is done on top of the boards, on the lash on the wall 10 cm.
Markup
Before gluing tiles to the walls, it must be correctly marked.

So:
- When marking, the size of the tile, the presence of plug-in elements, the presence of a border or panel are taken into account.
- Starting from the ceiling, it is calculated how many whole (not cut) tiles fit to the floor.

- The lowest row, on the floor, is fitted (trimmed). For convenience, when working, at the place where the whole tile ends, closer to the floor, a bar or a steel profile is fastened so that it becomes possible to “put” the first row on the “shelf”.

- Such a "shelf" is mounted on the dowel, but so that it can be easily removed, but at the same time, it must be installed in accordance with the level. It turns out that the first row from the floor remains, it is done after the rest of the tile has been laid, the solution has frozen. In cases with a curb, such a regiment is placed in front of the curb, but if there is still little experience, it is recommended to go from top to bottom (gradually), then the curb itself will turn out arbitrarily, it is possible to clarify in place.
- For clarity, a variant with a scheme is possible, here it is simple, a drawing is made, and the tile is scattered. There is an opportunity to experiment. You need to calculate this way - the front wall, the one that directly, from the entrance, onto it, the tile is glued taking into account the separation of the cutting, that is, so that the cut part is on the one and the other side. This wall is done first.
- For beginners, and for experienced tilers, it is very convenient to use special “inserts” in the corners, adjoining the wall to the floor (skirting), in this case, the cut part of the tile is hidden, visually looks very beautiful. But in general, all cut off edges are “driven” to places that are not visible when entering the room, or attention to such places is drawn last.
Laying tiles
Now we’ll directly figure out how to glue the tiles on the walls. This work is done in a certain sequence.
The steps for gluing tiles to the wall will be distributed in the following order:
- Before starting masonry, a solution is prepared.
There are several options here:
 Cement composition Cement mortar | Cement mortar for gluing tiles on the wall is suitable, both on the internal surfaces and on the external. Not afraid of temperature extremes and high humidity. |
 Dry mixes Ready mix | These compounds are best used only for internal work. After all, you don’t even know how much their composition will withstand. After all, the instruction on the packaging does not at all indicate the correct preparation.
|
Water is poured into a bucket (or into a basin), gradually, in small portions, a dry glue mixture is poured, while constantly mixing. The solution should not be too thick, at the same time not too liquid. To mix, it is recommended by the construction mixer (nozzle on a drill).

Attention: after the solution is mixed, it needs to stand, about 5 minutes. And you need to take into account the peculiarity - kneading, after settling, it becomes a little thinner. A solution is prepared, only in cold water. You do not need to add various additives to the mixture, such as cement or sand, sometimes experimenting with adding PVA glue.
The mixture is completely ready after it is diluted with water.
- The next step will be - laying tiles. When it comes to walls, it is simpler, and at the same time more qualitative, it turns out when the solution is applied to the wall. It doesn’t matter, you need to work in a way that is convenient.

- Before applying the mortar, it is recommended to treat the wall with a primer mixture (penetrating primer), this is done immediately before laying the tiles, and in addition to strengthening the plaster structure, it plays the role of wetting, for better adhesion of the adhesive to the wall. At the same time, the tile itself does not need to be wetted. With a notched trowel, the solution “stretches” along the wall, a large area should not be covered, it is enough for 2-3 tiles. "Crosses" are inserted immediately.

- Professionals do not insert crosses in the mix of 4 tiles, and do not drown them. Only one petal is inserted so that you can easily get it later. The mixture under the tile should be evenly distributed, do not leave voids in the corners. During installation, periodically, it is necessary to clean the seams, this is done with the same “cross”, and then it is swept away (with a brush - a brush).
- In the process, it is constantly checked - evenness in all directions (vertical, horizontal), as well as joints of the tile itself. To do this, use the level. For the convenience of work, there are several "chips" - when taking a tile, you need to pay attention to the pattern on the back side, in the future, focus on it, this is done to avoid "flip-flops", sometimes it happens that the pattern on the front side does not match, by what is upside down.

- Tiles in the packaging, during transportation, or later during work, always put on the "edge". This will prevent breaking tiles. Of course it will be changed in the store, but you have to go there, and besides - it may not be the right color. Before work, the material must be “withstood”, about 8 to 10 hours, at the temperature at which it will be used.
Finalization
Means - "grout". The stage is final, therefore it should be treated responsibly. Grouting material is sold ready-made, dry, and can be of different colors.

Attention: It is recommended to use ready-made, already diluted, a certain color. It often happens that it is not possible to repeat the color, and you have to invent something, therefore it is better not to suffer, but to get the ready-made solution right away.
- With the finished mixture, fill the gaps between the tiles using a silicone spatula. This must be done so that there are no voids left. With partial drying, the seams are “washed out” with a foam sponge. For this, ordinary water is used, but liquid soap is added there.
- The seam must be processed in such a way that it forms in a flat strip, without bubbles and gaps. In this case, there is no need to leave too much, the formation is done along the edge of the tile, so that the “grout” does not protrude. All plastic parts (corners, baseboards) are coated with silicone sealants, excess, removed with a sponge and soap solution.
In conclusion, I would like to add - despite the fact that the work itself is not complicated, the attitude to it should be very serious.
How to glue the tiles on the wall you now know. If you do everything in a hurry, then it will not take much time and you will also save financially. After watching the video in this article and the photo, everything can be done quickly and efficiently, the instructions will help to prevent mistakes.