How to prepare the ceiling for liquid wallpaper
Liquid wallpaper on the ceiling in modern homes are quite common, which seems like a miracle to an uninitiated person. It is hard to imagine how silk plaster can turn into a smooth, beautiful coating without seams? How to apply liquid wallpaper on the ceiling will be discussed in this article.
The content of the article
Features of liquid wallpaper
Of all the existing types of wallpaper, liquid stand out for its uniqueness. They are made and sold with a dry mixture, and not in rolls, as usual, after which the compounds are diluted with water, and then applied to the ceiling with a special plastic grater.
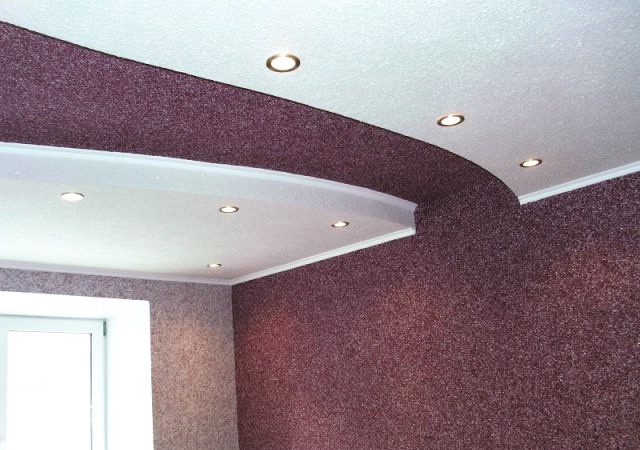
After application, the surface of the ceiling looks:
- Soft.
- Velvet.
- Pleasant to the touch.
- A bit reminiscent of soft textiles.
Such coatings are most effective for:
- The bedroom.
- Children’s.
- Living room.
The material goes on sale in small plastic bags, as in the photo.

The coating composition includes:
- Cellulose or mineral fibers.
- Cotton.
- Silk.
- Glue only of natural origin.
The use of only natural materials contributes to the environmental cleanliness of liquid wallpaper. They are completely odorless when applied, and then further exploited.
In addition, the advantages of the coating are:
- Liquid wallpaper on the ceiling does not have seams.
- They are great for wavy or curved surfaces.that allows you to make them liquid form. In addition, when applied, they fill small cracks on the ceiling, smooth out surfaces perfectly, and hide its irregularities.
- The fibrous structure enhances sound absorption and thermal insulation.
- Antistatic. The material is not able to accumulate static electricity, to attract dust to itself.
- The surface is not subject to burning, and when heated, the material does not emit substances harmful to humans.
- On the ceiling, liquid wallpaper, even under prolonged exposure to sunlight, does not fade.
- Do not absorb any odors.
- They are fairly easy to care for.. With a soft nozzle, vacuums are cleaned with a vacuum cleaner, and varnished surfaces with a damp cloth.
- Damaged areas can be easily repaired. applying a small layer on them liquid wallpapermade from a new mixture.
- The material is not afraid of water.
- Wallpaper can be glued to other surfaces. To do this, they are abundantly moistened with water, removed with a brush and a fresh portion of the mixture is added to the composition.
Disadvantages that have liquid wallpaper for the ceiling:
- Quite a high price compared to conventional wallpaper.
- Not too large a range of colors and shades.
- Despite their moisture resistance, they are not intended for washing.
Tip: If any part of the wallpaper was stained or damaged, you should cut this piece, dilute the remains of liquid wallpaper in water, cover it in the same way as they were applied to the wall.
How to prepare a ceiling for liquid wallpaper
The design of the ceiling from liquid wallpaper consists of three stages:
- Proper surface preparation.
- High-quality preparation of the finishing composition.
- Application and drying of the coating.
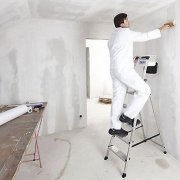
When preparing the ceiling for decoration with such material, it is necessary:
- Cover floors and furniture with polyethylene or other dense material.
- If it is possible to better free the room.
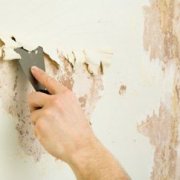
- The ceiling is cleaned to an even layer of plaster. Wallpaper is removed with a spatula (see How to remove wallpaper from the ceiling: instructions), and whitewashing is washed out by water.
Tip: When painting the ceiling with water-based or acrylic interior paints, you just need to clean off the lagging areas.
- Large cracks in the ceiling are filled with putty (see How to putty the ceiling with your own hands correctly), and then are aligned with a grater.
- Metal elements in the ceiling, such as rusty plaster mesh or nails, are removed or painted over with enamel. This will prevent rust.
- With a roller or a wide brush, a primer is applied, which significantly improves surface adhesion with silk or cellulose fibers.

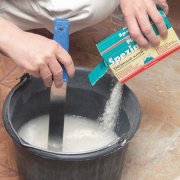
While the primer dries, a mixture of dry powder is diluted for the ceiling.
For this:
- Water is poured into a clean container of up to 10 liters. Its quantity is indicated by the instruction offered by the manufacturer and located on the package.
- The contents of the bag fall asleep and mix thoroughly.
- The composition remains for 12 hours until the adhesive components swell.
- After 12 hours, the solution is stirred.
- If necessary, pigments and texturing agents are added to it.
Tip: When diluting the composition, boiling water or very cold water should not be used, this can impair the adhesive properties of the material. The best option is the room temperature of the water.
The result is a homogeneous mass that adheres well to the surface after its primer. Wallpaper should be applied immediately after preparation, when dried, and then re-soaked, the performance properties of the material are greatly deteriorated.
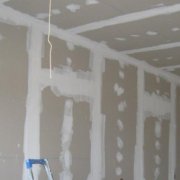
How to prepare drywall for liquid wallpaper
For ceiling decoration gypsum board is a popular material. To fix the sheets, a metal or wooden crate is made, onto which the material is fixed with screws, and the joints are filled with gypsum mixtures.
Tip: When preparing walls from drywall for liquid wallpaper, not only joints between sheets, but also the entire surface of the ceiling should be puttyed.
The putty absorbs water well, and if water-repellent solutions are applied to the ceiling on top of it, and then stick liquid wallpaper, white seams may appear at the joints, which will spoil the overall impression after applying the wallpaper.
Therefore:
- It is necessary to putty well over the entire area of the ceiling.
- It is better to paint the surface with water dispersible white paint so that the putty layer is reliably strengthened. In its water dispersion paint in three parts, it is worth adding one part of PVA glue.
- To prevent rust from coming out of the screws, when they come into contact with the coating, you need to use galvanized fasteners, the cost is slightly higher than usual, when using them you will need to make sure that the heads are well recessed in drywall and securely closed with putty or treated with oil paint on the head of the screws.
How to prepare wooden surfaces, ceiling after painting
Tip: Before applying liquid wallpaper to the ceiling, make sure that all wooden elements are securely fixed, otherwise they can be deformed due to moisture, especially if the boards for covering the ceiling were taken of a small thickness.
Further:
- 2-3 layers of primer are applied.
- The ceiling is painted with oil or water dispersion paint.
For brightly painted walls, metal parts, the most important thing is to avoid manifestation at the junction of colors, after applying liquid wallpaper to the ceiling, this will help to do:
- Surface coating gypsum putty.
- Painting the surface with water dispersion paint, to which PVA glue is added in a ratio of 3: 1.
Thereafter:
- All metal parts protruding on the ceiling are carefully painted with oil paint so that after some time rust spots will not form under the liquid wallpaper.
- Places of fluid leakage, which can create gaps in the preparation of the ceiling when applying liquid wallpaper, should be treated with oil paint.
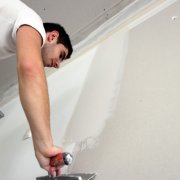
How to apply liquid wallpaper
Tip: The application of liquid wallpaper on the ceiling should be carried out at a room temperature of at least (+ 20 ° C).

The technology of applying the material is as follows:
- Hands from the liquid mass make a small size lump, which is placed on a plastic grater.
- The mixture is applied to the ceiling using a reciprocating motion.
- The grater is periodically wetted with water.
- The packaging indicates the recommended coating layer. An increase in the thickness of the layer will not affect the quality and appearance of the ceiling, but will only increase the consumption of the composition and its drying period.
- The mixture is smoothed over the surface in about 10 passes.
Tip: To obtain the same shade on the ceiling, the mixture from corner to corner should be applied from one batch.
- The surface remains to dry up to 72 hours, which depends on the thickness of the coating layer, humidity and air temperature in the room.
- Liquid wallpaper is not afraid of drafts, therefore, to accelerate the drying process of wallpaper, you can ventilate the room and use heaters to raise the temperature in it.
- With high humidity in the room, liquid wallpaper should be varnished.
To properly prepare the ceiling for liquid wallpaper, apply it yourself, get acquainted with the nuances of the work you can watch the video.