Tiling the fireplace - do it right

If your house has a fireplace or stove, or if you are just going to build them, then thoughts about how to decorate them will surely appear. The most reasonable option is to do the tiling of the stove with your own hands.
Those who are familiar with the technology of laying tiles, it will be easy to do. But for them, and beginners in this matter, the information below on the choice of materials and some secrets of finishing heating surfaces will be useful.
The content of the article
What gives the cladding
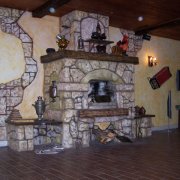
Facing Fireplaces tiles are made not only to give them an aesthetic and complete look.
It allows you to solve some operational problems, including:
- Facilitation Dirt and dust are easily removed from the surface of the tile, eliminating the need for annual whitewashing or painting the oven;
- Prevention of ingress of combustion products into the room through masonry joints and cracks that break down over time;
- Increased heat transfer. Of course, the heating time and the moment of the start of heat transfer to the room will increase slightly due to the increase in wall thickness, but the heat will remain longer;
- Increased structural strength. Facing tiles for fireplaces and stoves are highly resistant to mechanical damage and the appearance of cracks when exposed to high temperatures, therefore, subject to strict adherence to the facing technology, it will serve you for more than a dozen years without requiring repair.

Material selection
Before proceeding with restoration or fireplace decoration (furnaces), it is desirable to make an estimate of costs, including in it not only basic, but also consumables, as well as tools. This will allow you to decide on finances and decide which tile to choose.
Tile
Today, in the construction market, ceramic tiles for stoves and fireplaces are presented in a huge assortment.
It differs not only in size or appearance. Despite the fact that clay is the basis and the main component for different types of tiles, manufacturing technology largely influences their performance.
Your task is to choose a material with such properties as:
- Environmental friendliness - when heated into the environment, harmful substances should not be released;
- Mechanical strength - the lining must be reliable and durable;
- Refractoriness - the material must withstand high temperatures and their differences without loss of strength.
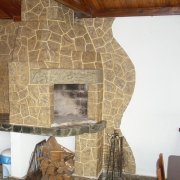
Clinker, porcelain stoneware, majolica, terracotta are suitable for these parameters. Experts believe that the most practical and reliable is the facing of fireplaces and stoves with terracotta tiles made by pressing and high-temperature firing.
It has a porous base that facilitates adhesion to the surface, and high surface strength.

For reference. Majolica is the same terracotta tile, on the front surface of which colored glaze is applied. It differs only in higher cost and appearance.
Cladding with a brick tile or porcelain stoneware is also very practical and durable. But it is better not to use ordinary ceramic or tile for this purpose - it can not withstand either temperature or serious mechanical influences.

Tip.When buying tiles, be sure to require a certificate that guarantees compliance with the technical specifications of the material normative.
Plaster and glue
Instructions for facing furnaces require prior plastering of the surface. This will qualitatively close up all cracks and cracks, as well as align the base for subsequent finishing.
If you are not limited in finances, as a plaster you can use ready-made adhesive mixtures intended for laying tiles on heated surfaces.
They are quite expensive, so to save money you can prepare a stucco mortar with your own hands from the following components:
- Cement grade 400 and above - 1 part;
- Clay - 3 parts;
- Sand - 0.2 parts;
- Water.
Tip. In the finished mass, you can add ordinary table salt (1 kg per bucket). It improves the properties of the working solution, preventing the evaporation of moisture from it.
The glue that will be used for tiling fireplaces must also have refractory properties, otherwise the finish will not last long. However, do not choose too expensive mixtures that can withstand heating above 500 degrees - not a single domestic stove will give such a temperature on the outer surface of the walls.

Other materials and tools
In addition to tiles and glue, you will need other materials and tools to work. First of all, this is a mesh netting with a mesh size of 5x5 cm, as well as self-tapping screws and a dowel for attaching it.
Although it is usually used to create the basis for the plastering of permanent stoves. AND tiling do-it-yourself fireplace can be done right on the brick.
To create even and uniform thickness joints, stock plastic crosses. You may also need skirting boards, cornices and other decorative elements, depending on the chosen design - they also need to be included in the estimate.
As for the tools, these are mainly spatulas:
- Flat - for applying the solution to the surface;
- Toothed - for leveling;
- Rubber - for grouting.
You also need a metal brush or grinder with a special nozzle for cleaning the seams and removing old plaster, a rubber hammer for tapping tiles, a plumb line and a level for leveling the masonry vertically and horizontally.
Facing steps
All the work on the exterior decoration of the hearth can be divided into several stages.
Training
Regardless of whether you have a new oven or an old one to be reconstructed, its surface needs preliminary preparation and leveling. To do this, remove the old clay plaster from it or simply clear the seams to a depth of at least 10 mm. Here you will need a stiff metal brush or grinder with a nozzle.
Then the surface is cleaned of dust and, if necessary, upholstered with a metal mesh, which serves as reinforcement for the plaster leveling layer. Directly before plastering, the walls are well moistened.

To do the tiling of the stove with your own hands with minimal errors, the surface must be carefully leveled, applying plaster using a plumb and level. This is the most difficult and time-consuming part of the work, but the final result depends on its quality.
After leveling, lightly melt the hearth, wait until it cools down, after which you can go directly to the finish.
Cladding
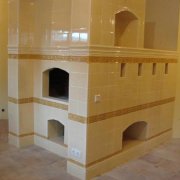
Before starting the facing, it is necessary to mark the surface. Most often, masonry is carried out horizontally from the bottom up (only square facing tiles for the fireplace are laid diagonally).
It is also advisable to make a layout, to calculate how many whole tiles fit in one row to minimize the need for cutting it.It is very convenient to use tiles with special corner elements. When laying out, do not forget to consider the thickness of the seams.
The marking and pre-layout allow facing to be done as accurately as possible and with minimal material loss. Pay attention to this moment when watching the video on this page.
Horizontal layout can be done in two ways:
- If you will be installing a skirting board that closes the joint between the cladding and the floor, fix a thin, even rail on the bottom of the fireplace wall - it will become a support for the first row of tiles. At the end of the masonry, it must be removed;

- If there is no baseboard, the top edge of the rail should be fixed at a level from the floor, which is equal to the width of the tile, taking into account the seam. The second row will be installed on it, and the first will have to be laid at the very end of the cladding after the adhesive has hardened and the support has been removed. In this case, you can trim the tiles to the floor level.
Apply the adhesive mortar to the surface with a flat spatula, then level it with a toothed one and gently press the tile into place. If necessary, tap it with a rubber mallet.
Do not forget to insert between the rows of special crosses to ensure the same clearance.

Tip. After each pair of rows, check the horizontal and vertical level of the masonry. Until the glue has set, you will have the opportunity to fix the distortions.
To cut the tiles to size, use a regular tile cutter or a grinder with a diamond disk. Start laying with whole tiles from the most visible corner, so that the cut pieces fit at the end of the row and do not catch the eye.
Remove mortar on the surface of the tile immediately with a damp cloth.
Grouting
Grouting is started no earlier than the glue dries - the holding time is usually indicated on the packaging. As a rule, it is from one to three days.
As a grout, you can use both ready-made dry mixes that are kneaded on water, and the glue with which you fixed the tile.
The method of grouting depends on the texture of the tile: if it is smooth, fill the seams with a rubber spatula, performing movements in the diagonal direction with respect to them. If the surface is embossed or textured, it is better to use a special gun.

Excess grout should be removed immediately with a damp sponge.
Now you can install decorative elements, if they are in the design project. But the first time you can flood the fireplace only after a few days, trying not to allow too intense burning.
Conclusion
If you are not afraid of dirty work and feel confident in your abilities, facing a stove with a do-it-yourself tile will not be too difficult a test for you. The main thing is patience, accuracy and strict adherence to finishing technology. And, of course, quality material.
The updated hearth will become the main decoration of the interior of your home, make it warm and cozy. A beautiful and durable lining will provide simple and easy maintenance.

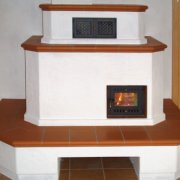
When tiling a fireplace, one should not forget that it is not worth saving on the quality of the materials used, as saving on quality will inevitably affect subsequently unplanned additional costs. The fireplace is essentially one of the main objects of the house, both in functionality and in practical use. Before facing the fireplace, it is necessary to smoothly finish all the finish surfaces of the fireplace.