How to breed putty with self-repair

Alignment of the walls and their preparation for decorative decoration is one of the most important jobs, the quality of which depends not only on the aesthetics of the room, but also on the reliability and durability of the repair. If you do it yourself, it is important for you to know how to spread the putty - the proportions of dry mix and water, mixing methods, the optimal consistency depending on the purpose and purpose of use.
The content of the article
What should be the mortar for putty
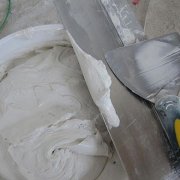
The putty mixture should be plastic, elastic, smooth out well and adhere to the surface, not drain off it and not fall off in pieces. At the same time, it should easily lag behind the spatula and have a uniform consistency without lumps and solid inclusions.
Buying ready-made putty in a hermetically sealed container, you free yourself from the need to think about how to achieve the required quality of the solution - the manufacturer has already taken care of this, you just have to mix it well before applying.

But the price of finished mixtures is much higher than dry, requiring dilution with water directly at the construction site, so the choice most often falls on the latter.
It would seem that there should not be any problems with their preparation, since the packaging always contains detailed instructions from the manufacturer, which describes the entire process in detail. But, firstly, putty mixtures are sometimes prepared independently from gypsum or cement, and secondly, the consistency of the solution obtained by strictly following the instructions is not always convenient for performing one or another type of work.
So:
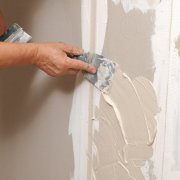
- If the surface needs serious leveling with filling of significant potholes and cracks with the putty mixture, it will be easier and faster to do this, giving the solution a thicker consistency. It is also easier to seal joints between plates, masonry joints with a thick solution;

- For finishing putty the mixture should be more liquid, since it is applied in a very thin layer and is intended to give the base smoothness;

- For the ceiling (see Ceiling putty in different versions) and for walls, the proportions of dry mix and water also need to be changed in order to achieve better adhesion to the surface.
Experienced finishers by the type of finished solution and its behavior when typing on a spatula are able to determine suitability for a particular purpose. Those who undertake such work for the first time will have to act empirically, taking the proportions from the instructions as the basis and preparing the mixture in small portions.
Note. It is necessary to breed putty immediately before its use. Each type of mixture has its own working period, after which the solution begins to harden and lose its properties. Reanimate it by adding water and mixing, it will not work.
Preparation of putty
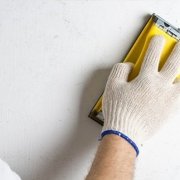
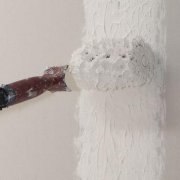
Before spreading putty for walls, make sure that they are ready for leveling: they are cleaned of dirt, sagging and splashing plaster, greasy stains. They must also be primed (see Primer before puttying walls - is it needed) and let the primer dry. All this must be done in advance, since the finished solution will not wait.
Breeding order
Prepare a large clean container with smooth walls, a dry spatula and a drill with a whisk.
So:
- Pour the right amount of water into the container;
- Pour the dry mixture into the water, trying to pour into the center of the container to form a slide;
Note. If you prepare the solution according to the instructions, which indicate the amount of water for the entire volume of putty, pre-calculate the number of components according to the specified proportion.

- Allow the powder to settle in water, then mix the contents well with a drill with a nozzle;
- If the solution turned out to be of the wrong consistency, at this stage you can still add the dry mixture by collecting it with a spatula from the bag, or water, immediately mixing again;
- Collect the mortar from the walls of the bucket with a spatula and immerse it in the total mass;
- Leave the putty alone for a few minutes to swell and form molecular bonds, then mix again.

If you prepared the putty mixture with your own hands or you do not have recommendations for proportions, then the powder is neatly poured into the center of the container with water until the height of the heap above the surface of the water is approximately equal to 1/3 of the height of its underwater part.
You should get a solution in which the putty knife stands like a spoon in thick sour cream, and when typing it does not fall from it in pieces and does not drip, but slowly slides, leaving no residue.
Useful Tips
As you can see, there is nothing complicated about how to properly putty putty. But there are several nuances that it is desirable to know and apply in practice.
- Do not mix the mixture at very high speeds of the drill, as at high speed air enters the solution, which when bursting on the surface forms bursting bubbles;
- Water for cooking should be clean, room temperature. Too cold or hot adversely affects the quality of the mixture, which when dried can begin to peel off from the wall or crumble;
- Try to prepare such an amount of solution that you will have time to spend before it sets. And plan your actions so that you do not have to be distracted in the process of puttying.
Note. The thicker the mixture, the less water in it, the faster it will dry.
- If you did not manage to work out the entire solution, do not try to “revive” it by diluting it with water. Even if in appearance it will be quite suitable, its quality will suffer, and the coating will not last long;
- Always use only a clean container and nozzle for mixing; wash them after each use. If this is not done, the dry particles that have fallen into the fresh solution will not dissolve and will not allow you to perform the work efficiently, leaving grooves on the surface;

- The same applies to spatulas and other putty tools.
It is important. Before washing, be sure to disconnect the whisk nozzle from the drill so that water does not get into the cartridge.
Conclusion
Any, even the most basic work requires a responsible approach and compliance with the rules for its implementation. In the case of putty breeding, there are few such rules, they are simple, so even beginners should not have problems. Especially if you watch the video in this article and see the whole process from start to finish.