Do-it-yourself ceiling plastering: video instruction

Plastering the ceiling with your own hands is quite an ordinary matter. Many do it. The work is not so difficult, but the price of finishing will be much lower.
Today we will tell you how to plaster the ceiling for painting. Also in the video in this article you can watch individual moments of the work and do it better.
The content of the article
Rules for plastering the ceiling
Plastering the ceiling with your own hands should be done in a certain sequence and in compliance with generally accepted rules. It is time tested.
Let's deal with this issue in more detail and outline what we should first pay attention to. Instructions on these issues are outlined below.
The putty process is divided into the following stages:
| Training | The first stage is the preparation of the ceiling surface. During surface preparation, all irregularities are removed, dirt is cleaned. At this stage, a hammer drill is used. |
| Priming | In the next step, the surface is primed with a special composition (see How to primer the ceiling: we understand in stages), which has the ability to penetrate deep cracks. At this stage, a paint brush and roller are used. |
| Launch application | At this stage, a preliminary putty is applied. The function of this layer is to cover all small bumps on the surface. It must be borne in mind that the finished solution is similar to thick sour cream. At this stage, a metal polisher is used. |
| Finish finish | This stage is the final stage of applying putty. It is recommended to apply the solution in two layers. If the room has ventilation and the temperature remains stable at about 18 degrees, then the finishing putty can be started four hours after applying the preliminary layer. If these conditions are not available, then the main putty should be applied only every other day. |
Regardless of the leveling method you choose, you need to remember that before painting, you must apply a primer to the ceiling. As a primer, you can use the very paint that will be applied to the surface.
Preparation and priming of the plane
Plastering the ceiling for painting will be more difficult than just for another coating. Indeed, in this case it is necessary to have a perfectly flat and smooth plane.
All work is done in the following order:
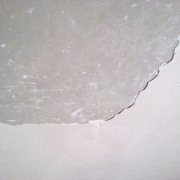
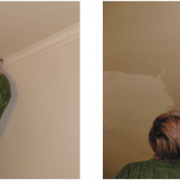
- First you need to remove the old coating. This is wallpaper or paint (see How to remove paint from the ceiling: do it yourself) We should see the base plane. If there are cracks, then they expand with a chisel.
- Now you need to determine the application layer. To do this, just take the fishing line and pull along the diagonals. Then we will see everything at once;
- If the required layer exceeds two cm, then it will be necessary to apply the coating in layers. First do the alignment, this can be done with a simple cement composition. And after that put the finish, for this a plaster composition is suitable. There is not a large fraction and we get a smooth surface.
- We need a quality foundation, for this the plane is primed. It is better to give preference to deep penetration liquids. After application, let the surface dry completely.
Further, the work is done depending on the material of the ceiling and the composition of the plaster:
- If it is a wooden coating, then shingles are applied. After all, just the solution does not stick to the tree;
- If it is concrete, then it is necessary to make incisions with an ax on the plane, then the composition will be better held;
- If the coating layer is more than two cm, then it is mandatory fasten reinforcing mesh. She will strengthen the coverage.
How to apply the starting layer
During the application of the solution, two spatulas are used, one of which has a narrow and the other a wide canvas.

So:
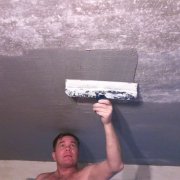
- Using a narrow spatula, a little mixture is taken and applied to a wide spatula. It is necessary to strive to apply the mixture on the central part of the blade. After this, the mixture should be applied to the ceiling so that its entire surface touches the surface of the ceiling.
- Here, a smooth plane is not needed so much, we need to withstand its geometry. The layer is applied no more than two cm.
- We are waiting for the coating to dry. After this, a second coat can be applied. So we cover the entire ceiling with the starting layer.
Putty and grinding
Coloring with polyvinyl acetate aqueous emulsion compositions on plaster ceilings is done on a completely smooth and even plane. For painting you need quality. Therefore, the finish should be perfectly even and smooth. For this, the plaster composition is mostly used.
He has a small fraction. Plastering the ceilings with your own hands video will show the correctness of the work.

- It is necessary to strive to apply the mixture in a smooth and even layer, because after one movement it will be impossible to return and correct irregularities.
- So that strips do not form on the applied area, the spatula in the hand is held at an angle to the surface of the ceiling. The angle allows the central area of the spatula to apply the material, and the two sides of the spatula do the inherent functions.
- That part of the spatula, which is lower from the central part, slides along the untreated area, and the other part in the area where the mixture has already been applied does not touch the surface due to the angle. In this way, irregularities and stripes can be avoided.
- The choice of a putty knife is a very important part of the whole process since the quality of the putty also depends on the characteristics of the selected tool. A correctly selected putty knife should have a medium hard blade, if the blade is too soft then the blade of the spatula will bend too easily, this will significantly interfere with the application of the mixture.
- If the spatula bends, then its side edges will turn in front and during the application of the material they will contribute to the formation of strips, so even a completely new spatula is processed with a file that sharpens its edges. And so a correctly selected and well-developed putty knife will provide a perfectly smooth and even surface.

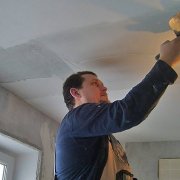
- After applying a layer of putty, we wait for the complete drying of the composition. After that, take a grater and overwrite in a circular motion.
- After processing, the surface of the shell will remain, they must be puttied with a liquid composition. In this case, it is better to use a rubber spatula.
Attention: If you have a large plane, then it is worth using a grinder. In this case, you will significantly reduce the time of work and save your energy.
Do-it-yourself ceiling plastering video of course will show everything, but you should do it. When working, do not rush. Use only materials from trusted manufacturers and then the coating will serve you for many years.