Concrete plastering: the pros and cons of modern renovation

With each season, more and more new products, ideas, styles, directions. They are displayed in all areas of repair - decoration options, housing style, fashionable color palettes, new furniture for the apartment, how to arrange it and lay out individual zones in the room, how to decorate walls, ceilings and concrete plastering became the novelty of this season.
The content of the article
Decorative stucco in the design of the apartment
When choosing decorative finishing coatings, currently, on the market you can pick up and satisfy even the most demanding customers:
- In addition to the traditional, familiar and probably already long-worn solutions, you can find more daring, modern designs.

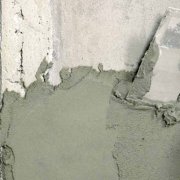
- One of these is decorative plaster for concrete. This is a novelty in the field of repair, in a short time it began to be in good demand, popular. And all this thanks to its unusual texture and appearance.
- Decorative stucco for concrete has very good exploitation properties, the ability to fit and emphasize any room interior.
Its surface is often a little rough to the touch, but completely not embossed.
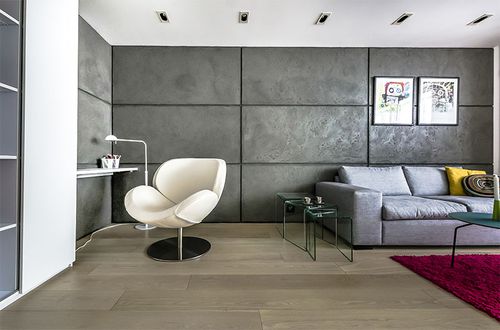
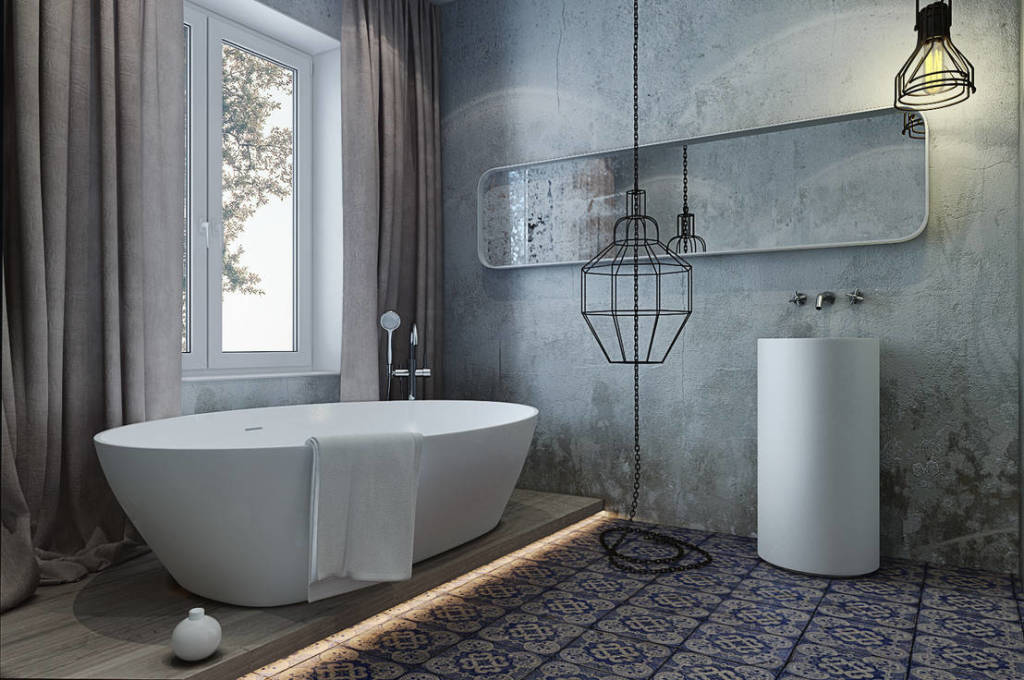
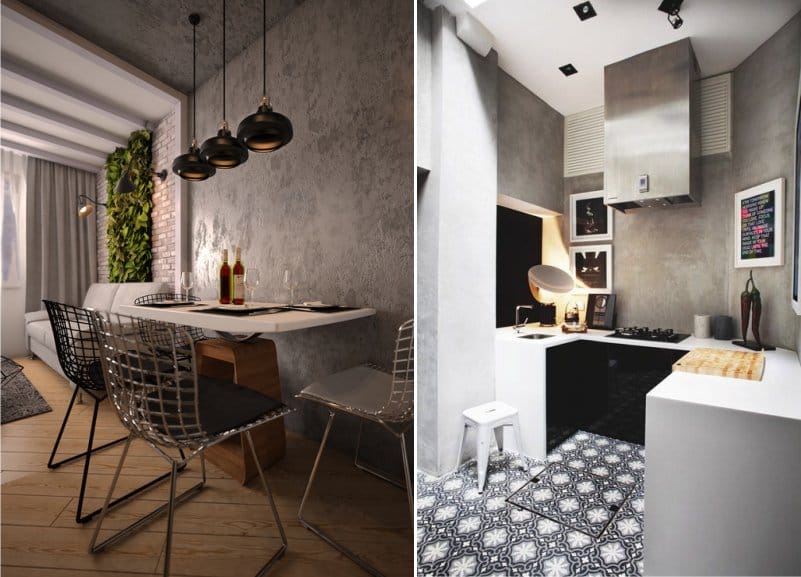
Style directions and colors
Concrete plaster gains its roughness due to the fact that it consists of small pebbles, sand. They give the surface of the walls an unusual, interesting and unique texture.
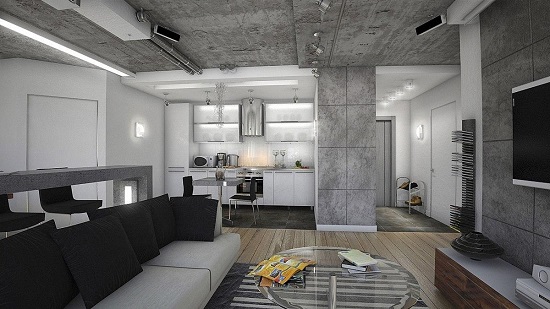
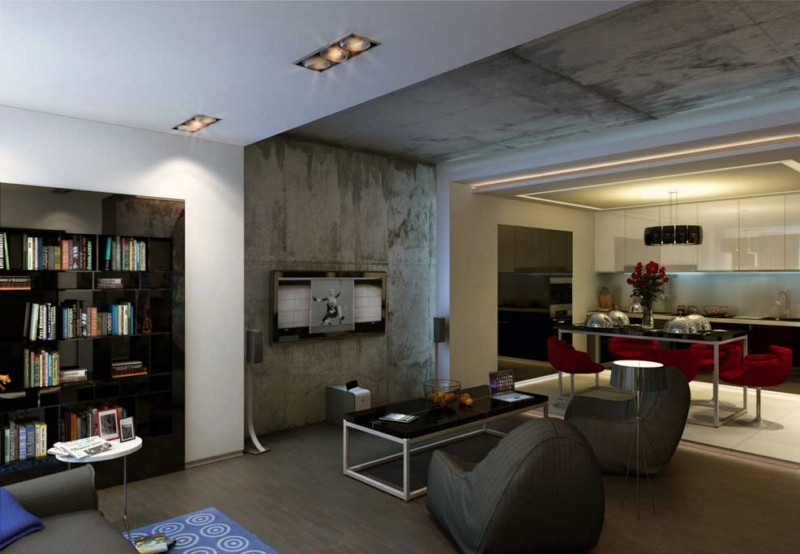
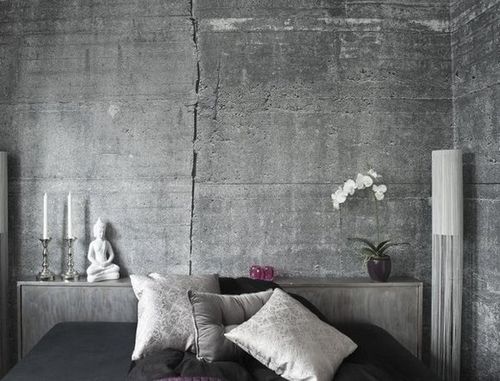
See the photo in modern style:
-

- How to plaster concrete walls: modern style
-

- Art Nouveau bathroom decoration
-

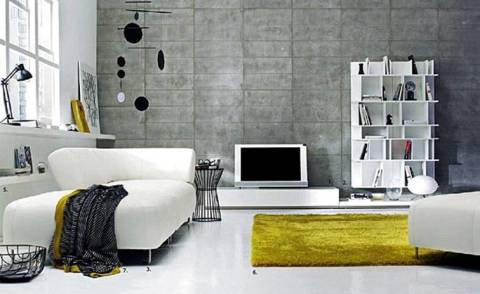
- Hall design, exclusive
-

- Partial design
-

- "Concrete" in the interior, bedroom
-

- Studio apartment
- Using stucco for concrete walls, you can complement the Art Nouveau style in your apartment, if the plaster is with the effect of metal corrosion.

- For high-tech style (seeMaking high-tech walls) A plaster that mimics the surface of concrete is perfect.
- This style is characterized by minimalism, which is especially expressed in furniture, which is why it is worthwhile to focus on the walls.
They should be as close as possible to the chosen style and match it. Decorative plaster will cope with this task very simply and easily.
Color spectrum

The color scheme in which the plaster exists will allow you to create and emphasize any style, will organically correspond to it and harmoniously complement:
- Calm grays.
- Blue gray
- Silvery.
Note. The colors of the plaster will not leave anyone indifferent and will become the main, stylish decoration of your home.
Advantages and disadvantages of decorative plaster

So, about the benefits:
- It protects the walls from mold, dust.
- It keeps heat well.
- With its help, a certain noise barrier is created.
- The technology for applying plaster is very simple, you can work with it without special knowledge.
- It is characterized by good durability, long retains its former, fresh look.
- You can vary the thickness of the plaster layers.
- The opportunity is provided, if desired, various hollows and bulges.
- Unusual roughness effect.
- Good toughness.
- Stucco dries on the walls for a long time.
- The price of decorative plaster is high, due to its high quality, characteristics, properties.
Disadvantages: pros and cons of plaster
Starting a repair, many people think about whether to plaster concrete walls. There are two opinions:
- if the walls are smooth and no cracks and spots are visible, then it’s not worth it;
- and second opinion, you need to plaster in any case.

If you have already planned a serious repair, it’s not worth saving, you need to do everything right and for many years.
Plastering concrete walls is a personal matter for each owner, but it is worth noting a few nuances:
- Stucco is necessary for leveling the walls.. This is difficult to achieve in any other way.
- Even small cracks will be noticeable, besides, concrete is characterized by porosity, which can also negatively affect the repair and appearance of the walls.
Note. Plaster will smooth the walls, keep the room warm, hide the joints of concrete slabs, protect the material from the harmful effects of moisture, and give an attractive appearance.
Cement, limestone, gypsum or which is better?

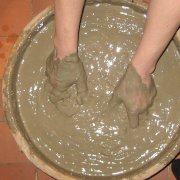
What plaster concrete walls have to decide in advance and make a calculation of material consumption. Usually plaster with a solution of cement and limestone, sometimes with a polymer-cement mortar. They adhere well to concrete, dry quickly and are characterized by a long service life.
Tip. It is impossible to plaster concrete walls with mortar, which includes gypsum. He does not hold well, and the plaster will fall off.
In such a case, do not forget about such a tool as a primer for concrete and plaster:
- Before decorating the wall, it must be covered with a primer layer (seePrimer walls and all for that matter).
- It will enhance the adhesive properties of concrete, improve the adhesion of the mortar to the wall, increase the resistance of the surface to moisture.
Tip. Before applying the primer, it is worth it to clean the wall well. It is worth buying a primer specifically for concrete walls. It will provide surface roughness.
The benefits of concrete contact

Another tool that will help you in the repair is concrete contact under the plaster. This tool will provide reliable adhesion of concrete and plaster. With it, you can glue everything.
The application technique is very simple:
- After the primer is completely dry, with a wide spatula, roller, apply a contact with a non-thick, even layer of concrete to the wall.
- Only after the concrete has dried thoroughly can the plaster be applied. It dries at least 2-3 hours.
Tip. Be sure to wait for the concrete to dry completely. The most optimal option is if you put this contact in the evening, and in the morning proceed to the next work. If the concrete has contact on the walls for more than 48 hours, then apply it again before plastering, otherwise there will be no desired effect.
Stucco technique

The necessary set of tools and material:
- Bags with plaster.
- Bags with concrete contact.
- Primer.
- Puncher, screws.
- Hammer, several levels.
- Rule (you can a couple of pieces).
- Bucket.
- Screwdrivers, tape measure, gloves.
- Staple, scissors for metal.
Beacon Installation

After applying a primer and concrete contact, beacons should be installed:
- They are a special metal profile, 2.5 and 3 meters long, and a width of 1-2 centimeters.
- Lighthouses can be mounted to the wall using plaster, or to special fasteners (seeInstallation of beacons for plaster without problems).
- In order to correctly install the beacons, you need to accurately measure all the bends and bulges of the wall, make notes with a pencil.
- Accordingly, in the place where the wall has the greatest bulge, the plaster layer will be the thinnest.
- And where there is the largest cavity - the thickest layer of plaster.
- At the top and bottom in each corner of the room we twist the dowel onto which we attach a fishing line.
- It must be strictly even. It depends on how smooth your wall will be after repair.
The video in this article will tell you more about how to install beacons.
Tip. The distance between the beacons should be less than the rule. So it will be much more convenient to align the walls.
Wall plastering

After the installation of the lighthouses is completed, we break directly to the plaster walls:
- A mixture of plaster can be bought ready-made in a special store, or you can cook it yourself.
- Usually a self-propelled mixture consists of sand, cement in a ratio of 3: 1. Dilute all this with water until the consistency of thick sour cream. It should not drain from the staple, but it should not be too thick:

- If you use the purchased mixture, then you should read the instructions on the package. There is always detailed information.
- It is best to use plaster for concrete to use a construction mixer.
- In a bucket of water, slowly pour the mixture, all the while stirring with a mixer. We use the average mixer speed for this process.
- The finished mixture should be free of lumps. There should not be excess water.
Tip. Do not cook immediately the whole mixture. It may thicken and will not be suitable for work. While one worker is plastering the wall, the second is preparing the next batch of plaster. It’s more convenient and you save your time.
The method of applying plaster

Professionals always apply the plaster using the mortar method and always start from the bottom of the wall:
- To do this, we collect a small amount of mortar on the spatula and with a light sweep of the hand we throw the mortar on the wall.
- After several such movements, we take the rule and smooth the mixture, from the bottom up.
- If bubbles or bumps have formed on the plaster, then it’s necessary to remake this place.
- The solution may not reach the wall, and over time, cracks will go and it will fall away.
- You need to take a staple and carefully remove the solution in this place, apply a new one, and once again go through the rule.
- After you align one section of the wall well, go to the other and so on.
- When the plaster has already been applied to the entire area between the two lighthouses, we take the rule and once again level the wall:

- We carry out this rule from the bottom up, do not push it very hard, hold it slightly inclined and perform slightly zigzag movements. In this way, you will achieve better alignment and remove excess plaster.
- And once again we pass the rule on all surfaces of the plastered wall, already without zigzag movements and tilt.
- One strip of the wall, which is located between the lighthouses, needs to be plastered quickly enough, without breaks for rest and pauses.
Otherwise, the plaster may simply dry out and then it will not succumb to you to leveling. It is better to take a break after this strip of wall is completely ready.
Tip. Experienced craftsmen advise to level the wall with the rule several times. It will not be difficult for you, but the result will be a perfectly smooth wall.
Are the walls even? How to check?

When the walls throughout the room are plastered, you check if the walls are even:
- To do this, apply the rule at different angles across the wall. If you find out of alignment greater than 1 mm, gently remove them with a staple and smooth out the rule.
- Fresh plaster, which has not yet had time to completely dry, will easily succumb to you.
- If any cracks are found, we cover them with a liquid solution and smooth them.
- The next step in your work will be the removal of beacons.This is necessary, because over time they will rust and spoil the appearance of your wall:

- To remove these lighthouses, you need to hook the lower edge of the lighthouse with a screwdriver and just tear it from the wall.
- Believe me, this is easy enough. Now we gloss over with the solution the formed cracks in which there were beacons.
- To do this, use a staple and a thick solution. After completion, you need to go through the rule so that the concrete plaster lies smoothly.
Tip. When closing cracks, the solution is best applied in an X-shaped manner. So it penetrates and fills the gaps better and denser.
The price of leveling the walls depends on the quality and cost of the entire consumable. But this is an important stage in the repair and should not be missed. For more information, we recommend that you watch the video in this article.
Tags: concrete, plaster, plaster material