Wall with a drywall door: construction technology and sound insulation

Our topic today is a wall with a drywall door. We will find out from what and how to assemble the frame of the wall, at what point you need to install the door block in it, how to ensure maximum structural rigidity and high-quality sound insulation between rooms. Let's get started.
The content of the article
What to buy
What will be needed to assemble the partition?
Frame
The frame of any drywall construction can be made of galvanized profile, produced specifically for this purpose, and from a slightly cheaper bar.
What to choose? We strongly recommend staying on profile.
There are several reasons for this:
- Its perfect geometry. The bar often has noticeable bumps, “propellers”, bends and other defects, so part of the material purchased without sorting will inevitably go to waste;

- Its zero hygroscopicity, on the practical side, it means the permanent shape of the frame regardless of humidity and air temperature. The tree swells in wet weather, which often leads to deformation of the wall and the appearance of cracks in its decoration;
Note: this lack of wood is leveled by its impregnation with drying oil or other water-repellent material. However, the price of impregnation negates the difference in cost between the bar and the profile, and the time of its drying will force you to delay the repair for several days.
- Its resistance to biological influences (rot, mold, insects). High humidity, coupled with hungry wood-beetle bugs, are quite capable of completing the career of a wooden frame in a dozen years.
Which profiles need to be purchased to assemble the partition frame with the doorway in it:
| Picture | Description |
 Rack profile 50 mm wide | Rack. It forms a rigid frame and door frame trim. The height of the vertical walls of the U-shaped profile is constant and equal to 50 millimeters, but its width can vary from 50 to 100 mm. The width is selected depending on the requirements for the strength of the wall (a wide profile provides greater rigidity) and its soundproofing qualities (thick sound-absorbing material will allow fewer sounds into the adjacent room). The length of the profile must be at least equal to the height of the wall, and the number of profiles is selected for the step between the racks of 600 mm. |
 Guide profile 40x50 mm | Guide. He is responsible for fastening the racks to the capital structures - the ceiling, adjacent walls and floor. The width of the guide profile must correspond to the width of the racks. The total length of the guides is equal to the perimeter of the partition with a margin of about a meter per door unit trim. |
Supporting materials
In addition to the profile, installation of a wall from drywall with a door will require the purchase of additional materials:
- 9 mm metal screws. They frame parts are connected to each other;
- Dowel-screws (60x6 mm for concrete and 80x8 for brick). They are attached to adjacent structures guides;
- Self-tapping screws for sheathing the frame with drywall. With single-layer casing, their length should be equal to 25 millimeters. If the sheathing is two-layer, the second layer is attached with 40 mm screws. The number of fasteners is about 70 self-tapping screws per GKL sheet;

Hint: two-layer cladding is desirable in rooms with increased load on the walls (read with high traffic) - hallways and interior corridors.
- Self-tapping screws for attaching the door block to the racks. Their length is determined by the thickness of the door frame and varies from 16 to 40 mm. In most cases, you can use a 25 mm fastener for gypsum plasterboard;
- Gypsum putty for filling joints and filling fasteners;
- Serpyanka (fiberglass with a width of 5-8 cm with an adhesive layer on one side) for reinforcing seams;

- Damper tape for acoustic isolation of the partition frame with ceilings and walls;
- Drywall itself. In dry rooms, a wall 12.5-mm gypsum plasterboard is used, in humid (bathrooms, bathrooms and kitchens) - moisture-proof drywall of the same thickness. The amount of material is calculated by the area of the wall, taking into account two-sided cladding and a margin for cutting of about 15%;
- Acrylic primer. Priming precedes the final finish of GKL.

Tools
To assemble the partition you will need:
- Perforator with a drill for the size of dowel-screws;
- Screwdriver;
- Metal scissors for profile cutting;
Caution: cutting a galvanized steel with a grinder is strongly discouraged. When abrasive cutting, the anti-corrosion coating burns out, and at high humidity, the profile begins to rust.

- A bucket for the preparation of putty with a volume of 3-6 liters;
Please note: the volume of a single serving of gypsum putty usually does not exceed 3 liters. The stock by volume of the container for mixing the mixture is useful for kneading, but inconvenient for filling.
- Knife, hacksaw or jigsaw for cutting drywall;
Hint: curvilinear parts are cut out of the gypsum board with a narrow hacksaw or an electric jigsaw. In straight lines it is better not to saw it, but to break it, after having previously cut the knife in a ruler by 1/4 - 1/3 of the thickness: this way there will be much less gypsum dust in the room.

- A pair of spatulas (narrow and wide) for putty;

- Grater or grinder with grinding grids No. 100 - No. 120;
- Tape measure, ruler, plumb line and pencil for marking the frame and wall sheathing.
Installation procedure
First and main: what first - doors or drywall on the walls? The door unit is most conveniently mounted at the assembly stage of the frame. How exactly - we will tell you now.
The video in this article will help you more clearly become familiar with how a drywall wall is mounted with a door.
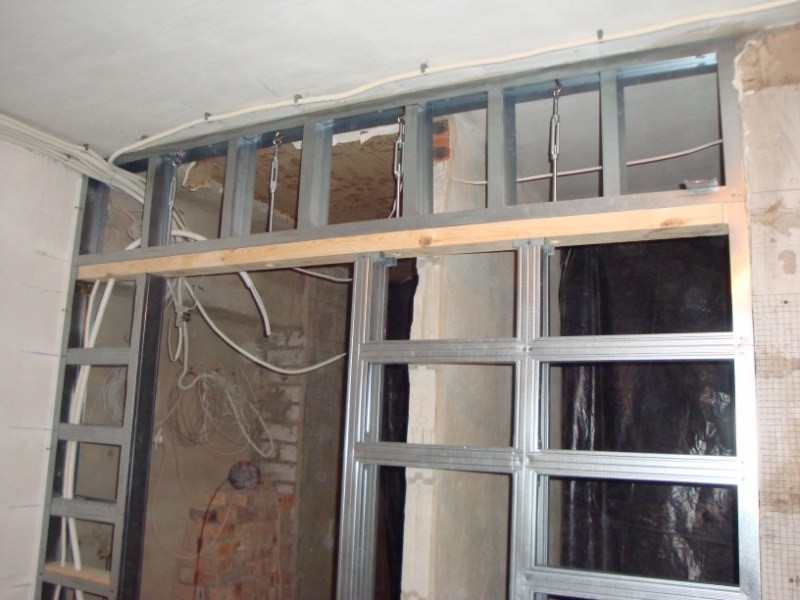
Frame
Here is a step-by-step instruction for its assembly:
- Mark the line of the future wall. Marking is first applied to the floor or ceiling, then transferred to the second floor using a plumb line and only then, it is done on the walls;
- Fasten the guide profile along this line. The distance between the dowel screws is 40-50 centimeters. The holes for the fasteners are drilled directly through the profile pressed to the ceiling, wall or floor. In the lower guide, make a gap to the width of the doorway (door leaf + box) at the place of installation of the door;

Hint: do not forget to put damper tape under the guides. If you did not find it in nearby construction stores, the tape can be cut from a foamed insulation or a thick foamed substrate under the laminate.
- Mark the position of the racks on the floor and ceiling. Marking is carried out strictly on a plumb line. A pitch of 600 mm is measured between the midpoints of the profiles: in this case, the joint of adjacent sheets of drywall (its width is 120 centimeters) will be there;

- Trim the rack profiles in length, align them with the marks and secure with metal screws on both sides of the rail.
Tip: do not be too lazy to measure the distance between the floor and the ceiling for each rack. The difference in the height of the overlap often reaches several centimeters, and racks cut by the general standard have non-zero chances to go to waste.

In pursuit of rigidity
What if the small area of the apartment limits the thickness of the partition, and the throughput of the premises imposes strict requirements on the strength of its frame?
Here are some possible solutions:
- Reduce the pitch between racks to 400 or even 300 millimeters. The main thing is that the width of the drywall sheet remains a multiple of this step;
- Connect the rack profiles in two (in the form of the letter “H” or by enclosing them in each other);


- Insert wooden mortgages into the rack profiles - bars with a section of 50x50 mm.
Soundproofing
In general, it is carried out with mineral wool laid between the uprights of the frame.
Hint: it is more convenient to use not rolled insulation, but glued boards with a size of 1000x600 mm. They without trimming the width stand between the racks with a standard pitch and do not cake, leaving the top of the wall without soundproofing filling.

If you need the highest possible sound insulation (for example, between a bedroom and a living room in a two-room apartment), filling the frame with insulation is not enough: you need to decouple the wall sheathing from both sides acoustically. The fact is that the frame perfectly transfers low-frequency vibrations from one side of the partition to the other.
How to do it?
Having assembled two independent frames with a centimeter gap between them. Each of them is filled with mineral wool and sheathed with drywall on one side.

Door
As we wrote above, the swing door is installed at the stage of assembly of the frame.
This is done like this:
- Install one of the pillars adjacent to the doorway along a plumb line;
- Expose the door block close to it (a box with a canvas wedged in it);
Attention: if you do not wedge the door in the box, after installation it can overwrite the jambs. In the role of wedges, you can use pieces of hardboard or wood chips.
- Pull the door frame with the screws screwed from the side of the rack. Pitch - 20-25 cm;
Hint: adjoining the door frame to the rack will become airtight, and the connection itself will become more durable if you first apply a strip of mounting foam to the rack.
- On the opposite side of the door block, fix the second pillar in the same way;
- Screw the second rack to the rails;
- Connect the racks adjacent to the door with a horizontal jumper from the guide profile. To the crossbar of the door frame, it is attracted by the same screws.

A special case
How to install sliding doors on drywall walls? If you want the door to open, go into the wall - you will need a serious revision of the frame structure.

- The frame of the blind section above the door should have a maximum thickness of 100 mm;
- Under it, a wooden mortgage is installed in the frame - a bar with a cross section of at least 50x100 mm. He will perceive the vertical load from the door leaf;
- Below the mortgage, two frames are formed with a gap between them. Since the wall thickness is limited by the width of the 100 mm profile and the beam, a ceiling profile is usually used for their assembly: the height of its side walls is only 27 millimeters.
Sheathing
So, the frame is ready, the door is installed. Next stage - plasterboard wall cladding. Here are the simple rules for installing it.
- The sheet is set so that its edge fits exactly in the middle of the rack;
- Fastening start from the top of the sheet - then you do not have to hold it with your hands;
- The screws are screwed in increments of 150-200 millimeters;
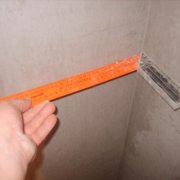
Tip: if you do not rely on your eye, use a span instead of a ruler. This is the name of the ancient measure of length, corresponding to the distance between the tips of the index finger and thumb apart. In SI units, the span is converted to 17.78 cm, in practice, its length varies from 17 to 19 cm.

- The distance between the attachment point and the edge of the gypsum plasterboard must be at least 20 mm. Otherwise, the self-tapping screw will crumble the edge when screwed in;
- The self-tapping head is heated by about 1 millimeter, while the shell of the sheet should not break. In this case, the fastening strength will be maximum, and the putty will easily hide the fasteners;

- The sheet is screwed to all profiles that it overlaps, including the guides.
Puttying
Sealing of joints begins with their expansion: the edges of the additional sheets are cut with a clerical knife for 2/3 of the sheet thickness at an angle of 45 degrees (see Putty of drywall joints: how to do it) Stitching allows you to fill the seam when puttying to its entire depth, which will reduce the likelihood of cracks in the future.

Captain Evidence dictates that semicircular factory edges do not need to be stitched.
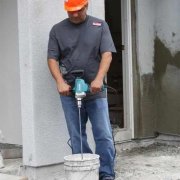
Now it’s the turn of the putty. It is shut with water at the rate of 1 liter per 1.6 kg of dry mix.
At first, water is poured into the mixing tank, and only then gypsum is poured: otherwise, dense lumps will form at the bottom, which will leave furrows when puttying. After 3-5 minutes, the water-absorbing putty is mixed with a spatula or drill with a whisk, and after another 5 minutes it is ready for puttying.

How to putty with your own hands the seams remaining between the sheets when attaching drywall:
- Stick a serpentine along the seam;
- Fill the seam with putty directly through its cells;
- After drying the putty (at least 6 hours later), apply with a wide spatula a second coating layer of putty. It should hide the relief of the fiberglass mesh.

By the way: the hats of the screws also have to be putty 2-3 times. Putty (even the so-called non-shrink) in practice still gives a little shrinkage when dried.
Do I need to putty the wall over its entire surface?
This is done in two cases:
- Under the wallpaper, which is planned to be changed in the future. The separation layer between the wallpaper and the GCR shell will allow you to remove the final coating without damaging the drywall;
- If the seams between the sheets cut in place are highlighted in thickness. A thin (1 mm) layer of putty will help level the surface.
Puttying over the entire area of drywall is carried out with a wide spatula, on which putty is applied with a narrower tool. If you do not have a lot of experience in the relevant work, it is easier to apply not one millimeter layer, but two thin layers “on the cut” perpendicular to each other.

Attention: both spatulas and utensils for mixing putty must be washed immediately after the development of the next portion. Otherwise, the next time clutching lumps will spoil the finish, falling under a spatula.
Fine finish
It begins with polishing the wall with a grinder or hand grater.

A few tips:
- Use glasses and a gauze dressing or respirator. Gypsum dust irritates both the eyes and the mucous membranes of the respiratory tract;
- At the time of grinding, close all doors to adjacent rooms and plug the remaining slots.This will save you from the need to wash the furniture, repainted in white, and other household utensils throughout the apartment;
- Grind the wall in bright light falling at an oblique angle. Lighting will emphasize all the bumps.
Then the wall is swept away from the remaining dust and primed with a brush, roller or spray.

Painting and sticker wallpaper are quite standard (see Drywall decoration for wallpaper) There is only one subtlety: you can paint the wall with any water paint at least half a month after filling the joints, when the processes of hydration of gypsum are completely completed in them. Otherwise, they will stand out in shade, regardless of the number of layers of paint you apply.
Installation of platbands
Platbands are put after finishing. The mounting method depends on whether you plan to remove them in the future.
If dismantling is possible - use brass or copper nails without hats, drowning them with a damper (so as not to leave dents); otherwise stick the platbands on liquid nails or sealant (silicone or acrylic).

Opening up
How to close up an opening in the wall with drywall if the door has become unnecessary?
Very simple: mount a guiding profile along its perimeter, choosing its width so that after plastering (single or double layer), the GCR surface is flush with the surface of the main wall.

Hint: if the edges of the opening are uneven, use straight suspensions to fasten the guides.

You already know the further scheme of action: after installing one or two racks, the frame is sutured, followed by puttying of the joints and fasteners.

Conclusion
We hope that we were able to answer all the questions accumulated by the reader. Good luck!