Lathing for drywall on the wall and other problems of installation of gypsum plasterboard

What and how is the gypsum board crate going to the wall? What GCR should be used to align walls and build partitions? Is it possible to fix the finishing material on the surface of the wall without the crate? In our article today, we will try to answer these and some other questions.
The content of the article
GKL types
First, a few words about how to choose drywall for walls.
The standard sheet size is 2500x1200 mm. It is the most versatile and perfect for wall decoration in most urban apartments with their typical ceiling heights of about 2.5 meters: the sheet does not require trimming in length and covers the entire height of the wall.
However, if you wish, you can find on sale drywall as a larger (3000x1200), and smaller (1200x600, 600x300 mm) sizes. Long sheets are convenient in houses with a high ceiling height (for example, in steel walls with their three-meter gaps between the ceilings), and compactly cut GKL simplifies the lining of ceilings and complex structures without an assistant.

In addition to sheet sizes, drywall is classified according to two more parameters:
- The thickness. It can be equal to 6 mm for arched (flexible) GKL, 9-9.5 mm for ceiling and 12.5 mm for wall;
- Functional purpose:
| Picture | Description |
 Drywall Drywall | Normal (white) GKL is intended for installation in rooms with constant low humidity. |
 The color of the sea wave indicates increased moisture resistance | Moisture-resistant (blue-green) sheet differs from the usual moisture-resistant cardboard shell, and gypsum core with antifungal additives. It is intended for damp rooms. |
 Fire Resistant GCR | Fire-resistant GCR has increased resistance to heat: it is able to delay the spread of flame in a fire. It is used in rooms with increased fire hazard; in particular, it is in demand in the decoration of wooden houses. |
Curious: in addition to moisture-proof (GKLV) and fire-resistant (GKLO) drywall, there is moisture-resistant (GKLVO). In private construction, it is used for finishing damp rooms in wooden buildings.
So, which drywall is better for walls:
- Wall (thickness 12.5 mm). The less durable ceiling and especially the arched sheet is easy to break through in case of accidental impact with furniture or any other object;
By the way: in rooms with high traffic (for example, in hallways), drywall designed for walls is often mounted in two layers. In this case, the sheets of two layers are attached with the overlap of all seams (horizontal and vertical).

- The length of the sheet depends on the height of the ceiling in the room: ideally, it should be equal to or slightly greater than the height of the wall;
- The functional purpose of GCR (normal, moisture-proof or fire-resistant) is selected depending on the type of room. In bathrooms, toilets, showers and kitchens, a moisture-resistant sheet is used, in the hallways and living rooms - ordinary, in wooden houses (including frame and built from sip-panels) - fire-resistant.

Wall alignment
Alignment of walls using GKL It has several convincing advantages over conventional stucco:
- The speed of work directly resulting from a significant area of the sheet;
- The low price of finishing a square meter, even with significant irregularities in the base;
- The ability to use the gap between the drywall and the wall for wiring or installation of other utilities (plumbing, ventilation, etc.).

Drywall can be mounted in two ways (see How to install drywall on the wall): on the crate and on the glue. Let's look at each method in more detail.
Crate mounting
We strongly recommend that you assemble the crate not from the bar, but from a galvanized profile made specifically for this purpose. Why?
Here are the arguments for the profile:
- Perfect geometry;
- Resistance to decay and insects;
- No deformation due to fluctuations in humidity and temperature;

- Unlimited service life.
What will be needed to assemble the crate:
| Picture | Description |
 Ceiling CD | Profile CD (ceiling) dimensions 60x27 mm. It acts as a vertical or (less commonly) horizontal crate. The length of the profile should be equal to or greater than the height of the wall; the number of profiles is calculated for a step between them of 0.6 m. |
 Ceiling guide UD | The UD profile (ceiling guide) measuring 28x27 mm is responsible for fixing the battens to adjacent structures (walls and ceilings). Its total length should be equal to the perimeter of the wall. |
 Direct suspension | Direct suspensions provide the rigidity of the crate, connecting it to the main wall. They are mounted along each CD profile in increments of 0.6 meters. |
 Galvanized metal screw with drill | Self-tapping screws 9 mm long for metal are responsible for connecting the parts of the crate to each other. |
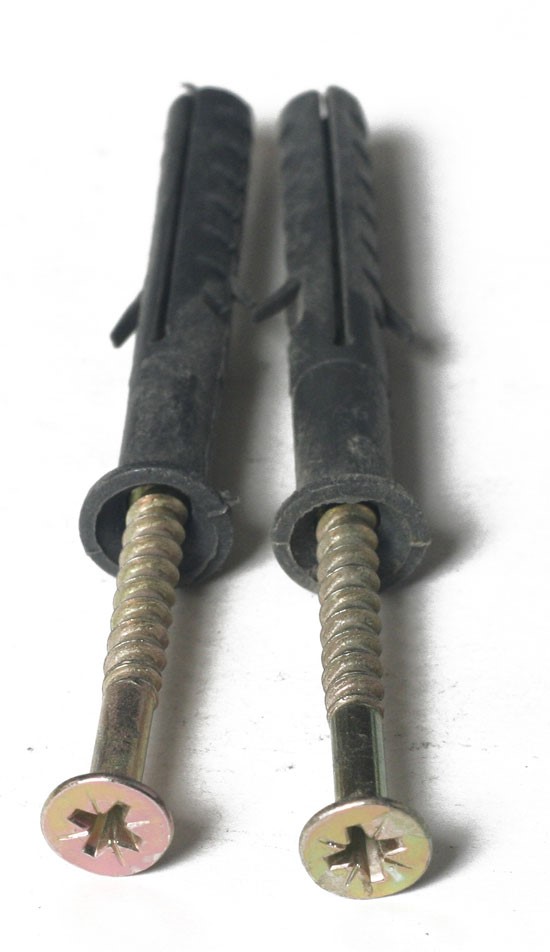 Dowel screws 60x6 mm | Dowel screws are needed for mounting rails. Their optimal size is 60x6 mm. |
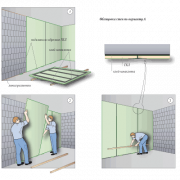
What is the technology of wall battens for drywall?
At your service is a step-by-step instruction on all the main stages of work:
- Mark the line of the false walls on the floor or on the ceiling. When marking, take into account the thickness of the profile, all the irregularities of the wall and the cross-section of utilities that are planned to be masked with a crate;
- Using a plumb line, transfer the marking line to the second floor (ceiling or floor), then connect the lines with vertical markings on the walls;
- Fasten the guide profile according to the marking with dowels. Walls and floors are drilled directly through the profile pressed to them;
Caution: use metal shears to cut galvanized profiles. Cutting with a grinder helps to heat a thin profile in the cut area and burn out a layer of zinc on it. As a result, the profile begins to rust at a high level of humidity.

- Mark the vertical lines of fastening of the crate on the wall with a step of 0.6 meters and fasten straight suspensions along each profile along the same step;
- Insert the trimmed ceiling profiles into the guides;
- Align them one by one according to a plumb line or a long rule followed by fastening to the suspensions. Suspension ears screwed to the side walls of the profile, with excess length, bend towards the wall.

How to screw drywall to the wall after the crate is assembled?
Each sheet is exposed vertically and screwed to the crate so that its vertical edge is exactly in the middle of the CD profile. Screws for drywall walls have a length of 25 mm (with a single-layer sheathing) and are screwed in increments of 20 cm using a mains or cordless screwdriver.
This work has several subtleties:
- Screw the screws so that the head is recessed 1 mm deeper than the surface of the gypsum plaster;

- The distance from the fastener to the edge of the sheet should not be less than a couple of centimeters, otherwise it is likely to crumble;
- In order not to miss past vertical profiles covered by a sheet, partially screw one self-tapping screw under the ceiling and hang a plumb line on it. The remaining screws are screwed along the plumb line;
- GKL needs to be attached to all elements of the crate, including to the guides;
- Supplementary sheets with straight edges are not cut with a hacksaw or jigsaw, but are cut along the line with a sharp knife about a quarter of the thickness and break off at the edge of any elevation with a smooth edge. In this case, the room will have an order of magnitude less gypsum dust than when cutting.

How to handle a drywall at the joints between adjacent sheets? Seams are sealed with gypsum putty (see How is plasterboard joints puttying performed).

The following measures will help prevent cracks at the seams due to humidity and temperature fluctuations in the room:
- Stitching of seams between additional sheets with their rectangular edges. Two-thirds of the GKL thickness is chamfered from the edge with a clerical knife;
Hint: the joint helps fill the joint with putty to the maximum depth, thereby reliably connecting adjacent edges to each other.
- Mounting adjacent edges only on a common profile for them. If the height of the wall is greater than the length of the drywall sheet, hem horizontal bridges from the same profile between the CD profiles;
- Reinforcement of seams with fiberglass (serpianka) or fiberglass;

- Bandage of putty seams with paper tape.
The video in this article will help you learn more about how to lay drywall on the wall.
Glue mounting
Laying drywall on a brick wall or any other solid base can be performed on gypsum adhesive (for example, Volma Installation, Perlfix, etc.). Instead of glue, plaster or plaster can also be used with equal success. This technology allows you to save the usable area of the room and is used with a small (no more than 30-50 mm) size of wall irregularities.

How is the GCR mounted in this case:
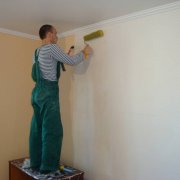
- The wall is cleaned of dust, dirt, fragile or having poor adhesion to gypsum coatings (whitewash, paint, weak or crumbling plaster);
- Its surface is treated with penetrating acrylic primer;
Tip: on a panel or monolithic wall, use adhesive primer with sand (concrete contact).

- The mounting adhesive is applied with cakes with a pitch of 15-25 cm on the surface of the drywall sheet or directly on the wall;
- The sheet is placed against the wall, pressed against it and leveled by the level pressed against it with gentle blows (palm or rubber mallet);
- When mounting the next sheet, the edges are carefully aligned in one plane. All installation flaws will have to be fixed with putty.

The sealing of the joints between the sheets is carried out by the method already known to us - putty with reinforcement and / or banding.
FAQ
Now we will answer a number of Frequently Asked Questions (FAQ) that arise for beginners in working with drywall:
- How to assemble a soundproofing partition from drywall?
A whole range of measures is needed here:
- Between the guide profiles and the capital structures, a damper tape is laid;
- Sound-absorbing material is placed in the partition frame or under the lining of the false wall (as a rule, glued mineral wool with a plate size of 60x100 cm - it rises between the profiles without undercutting in width);

- If an unprecedentedly high sound insulation is required from a partition, it includes two independent (and, accordingly, acoustically decoupled among themselves) frames with a distance between them of 5-10 mm.

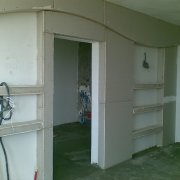
- How to build a wall with drywall with your own hands, reducing the area of the opening in it?
The frame of the extended section is assembled from the rack and guide profile (CW and UW). The width of the profile should differ from the wall thickness by twice the thickness of the drywall sheet (with double cladding - by four).

- How to transfer a drywall wall when redeveloping an apartment?
From a legal point of view, transfer can create problems only with the resale of housing: GKL partitions are not load-bearing and do not affect the strength of capital structures, but their position should be reflected in the apartment data sheet.

Technically - disassemble the old wall with a mount and a screwdriver. Drywall in this case will almost certainly be broken and unsuitable for reuse, but the profiles can be dismantled intact and a new frame can be assembled from them, which is sheathed with the newly acquired wall gypsum board.

Conclusion
We hope that we were able to acquaint the reader with the basics of installing simple GKL structures. The video in this article will help you learn more about how to lay drywall on the wall. Good luck!