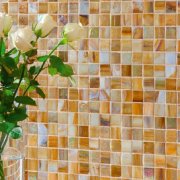
Facing with mosaic tiles of walls, floors and other surfaces

To finish surfaces in humid and hygiene-demanding rooms, mosaic tiles are often used. Today, this type of decoration is becoming very popular due to the fact that the small elements of the mosaic do not have to be glued separately, they are combined into matrices, which are small tiles or whole panels.
The content of the article
Types and characteristics of the material
Mosaic tiles can consist of pieces of ceramics, glass or stone. They differ only externally, while possessing similar operational characteristics and ease of installation.
Advantages
Among the many advantages of surface finishing with flexible mosaic tiles are the following:
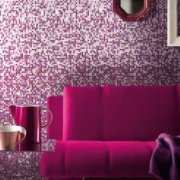
- Aesthetic appeal, the possibility of original interior decoration due to rearrangement of any number of individual small details;
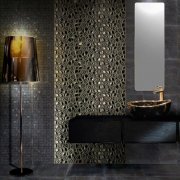
- Large selection of colors and textures of the surface - matte, glossy, corrugated, smooth;
- Possibility of finishing small in area, narrow or curved surfaces;

- Excellent water repellent;
- Strength, hardness, abrasion resistance;
- High hygienic characteristics - a mosaic, like a regular tile (seeFacing surfaces with ceramic tiles: make walls and floors), easy to wash with water and cleaning products;
- Durability;
- Incombustibility;
- Possibility of use for facing both indoors and outdoors;
- Low installation cost compared to the classic mosaic.
Note. If you have experience in facing walls with tiled or ceramic tiles, then you can handle the mosaic module sticker just as well, which will save on expensive professional services.
Execution of mosaic modules
Mosaic is produced in the form of modules from several rows of chips.
Individual elements can be held in the module in two ways:
- By fixing them with a base on a fiberglass backing. In this case, the mesh base during installation remains in the thickness of the glue;
- By sticking a thick sheet of paper on the front surface of the module, which, after fixing the tile, is removed from the surface.

For reference. So that after removing the protective paper layer on the mosaic there are no traces and stains, it is glued to easily washable bone glue.
Standard facing tile mosaic has a size of 30x30 cm. It is easy to cut at the seams between the individual elements, cut holes of the correct shape at the edges or in the center of the module.
In addition to the tiles, the mosaic is produced in the form of large panels.
According to the color scheme, they are of the following types:
- Plain
- Mixes - sheets of multi-colored elements arranged in random order;
- Stretch marks - a mosaic with a smooth transition of color from light to dark;

- Facing carpets made of mosaic tiles, where each detail occupies a specific place, and together they create a pattern, ornament or pattern.
There are also matrix borders of various widths for decorative decoration and decoration of tiled walls or floors.

Simple patterns and ornaments can be created independently, immediately after gluing the tiles, cutting out elements of one color from it and replacing them with others.
Mounting technology
Wall covering mosaic tiles begins with a thorough surface preparation. It must be leveled and primed. You will read more about how this is done in the corresponding article.
Next, you need to solve the question of the location of the tile, make the necessary calculations, and if you are going to lay out some kind of pattern or ornament, you should do this first dry - laying the tile on the floor and marking its future position in the layout convenient for you.
Tip. From monochromatic tiles of different colors, you can create interesting color transitions. To do this, they partially overlap each other, after which, by cutting the substrate along the edge of each tile, strips of chips from two to five elements in length are removed so that the cutouts during connection exactly match.

Do not forget to calculate and buy the right amount of grout and glue, the type of which is selected depending on the type of base (concrete, brick, drywall) and the operating conditions of the surface (humidity, temperature changes, etc.). The instructions attached to the composition will help you decide.
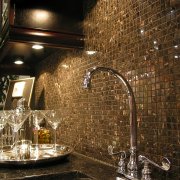
If you mosaic only part of the wall, for example, apron for the kitchen, then fix on a given horizontal level an even stop bar that will prevent the tiles from sliding until the glue dries.

Now you can start installing the tiles with your own hands:
- With a notched trowel, apply glue to a small section of the wall that you will be able to revet in 10-15 minutes. After this time, the solution will set and lose its adhesive properties.
- Apply glue to the back of the tile, but with an even spatula.
Tip. On a transparent glass mosaic, apply the solution in two layers so that grooves left by a notched trowel are not visible through it.
- Press the tile against the wall, aligning it along the edge of the rail or on the floor (installation is from bottom to top), press and forcefully roll with a roller, ensuring a tight fit, uniform adhesion to the surface and the absence of air under the tile. Here and there you can tap on it with a rubber mallet.
- The next tile is glued so that a distance equal to the seam between the mosaic elements is maintained between it and the previous one. For this, plastic crosses of the desired thickness are used.

- Continue laying, constantly monitoring the vertical and horizontal level of the rows.
- If you hesitate, and the glue on the wall is covered with a glossy film, smear it again with a notched trowel, adding a little fresh solution.
- After 15-20 minutes, the paper must be removed from the tile on a paper substrate by wetting it with a damp sponge and letting it stand for a couple of minutes. The coating is easiest to remove by grabbing the paper at the top corner and pulling it diagonally.
- After removing the protective layer, visually check the evenness of the seams and, if necessary, correct the flaws until the glue has dried.
- Having thus faced part of the surface, cover the next with the solution and continue work in the same sequence.
The video shows this process in great detail, study it in order to learn the technology well.
After 12-48 hours, depending on the type of glue, you can start grouting the joints. Before this, the finished surface should be cleaned of particles of the solution that accidentally fall on it, and also remove the excess from the seams with a special knife.

Grout is applied with a wide rubber spatula at an angle of 45 degrees. Its traces from the mosaic can be removed with a damp cloth after 20-25 minutes.
Conclusion
As you can see, tiling and mosaics are absolutely identical processes. Mosaic gluing is a little more difficult due to the lower rigidity of the module, but it is also easy to adapt to this.
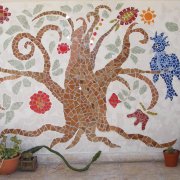
But you have the opportunity to independently create artistic compositions on the walls, window sills, countertops or floors, which cannot be done when they are faced with ordinary tiles.