How to prime walls before wallpapering and surface preparation rules
The primer for the walls under the wallpaper is applied in most cases, because this work is of practical importance in preparing the base.
Today we will tell you how to properly prime the walls before wallpapering and what to consider when doing the job. Having studied the article, you can do it yourself and in this case the final price will not be high.
The content of the article
Why are the walls primed before wallpapering?
You can’t decide whether it is worth covering the wall with soil before you start gluing the wallpaper? Then, for starters, it's worth figuring out why you need a primer for wallpaper and whether it is necessary for you.
Often, when the question arises, whether to prime or not, the decision is made regarding the purpose of the room in which wallpapering is planned. For example, if this is a utility room, people are not constantly there, then you can glue the wallpaper as it is.
Attention: If mold starts on any wall in the house, then it will restlessly spread throughout the building and soil can prevent this.
- After drying, the applied primer increases the reliability of contact of the adhesive with the surfaces on which it is applied.
- A high-quality primer will allow the lower layer to maintain its integrity and will prevent moisture from absorbing into the walls.
- The application of a primer organizes a comfortable microclimate for the wall material, creating adverse conditions for the appearance and spread of mold.
- In addition, without primer, wallpaper glue, with a high probability, will be less effective and wallpaper can move away from the wall. The soil mixture impregnates the material, acts as a kind of patch for cracks and pores, making the wall smoother and increasing the area of contact with the glue.
Primer Application
The primer for the walls under the wallpaper is applied according to certain rules and observing the technology. Only this can guarantee the quality of the plane. More often a white primer is used for wallpaper, and for plaster or subsequent cladding, any color can be used in principle. Preparation for its application will be almost identical.
Training
The walls must be primed correctly, the quality of the gluing and the durability of the wallpaper depend on this. Therefore, you need to carefully prepare. Instructions for preparing the base plane are as follows.
So:
- First of all, it is necessary to remove any foreign elements from the wall, for example, old plaster (seeHow to remove old plaster from walls without problems) and nails.
- Then follows the application of a new putty. Further, the surface is wetted with special impregnation to remove dirt, because the primer should be applied on a clean, dustless surface, to ensure perfect adhesion.
- Previously, instead of the primer, old newspapers were used, because the finishers didn’t have other options, but now, with the current variety of goods in construction stores, there is a more technological solution.
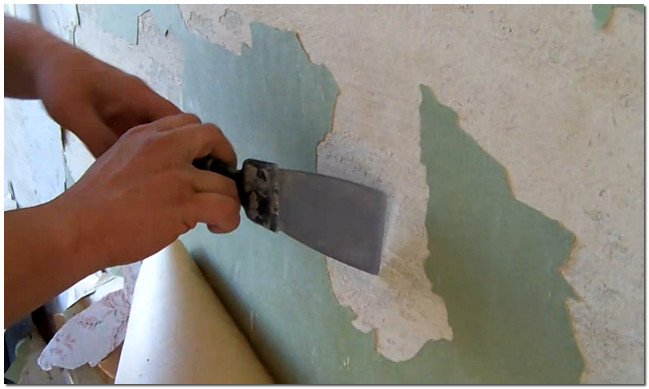
- In the event that we already had wallpaper on the wall we needed, it is necessary to carefully remove all their remains and wash off the old glue well, because if this is not done, in places where there are two layers of wallpaper on top of each other, the top ones will be early or late begin to move away from the wall and puff up. A metal spatula is suitable for this (seeConstruction spatula - types and differences), scraper and water. In water, you can add vinegar, gel cleaning electric stoves or any other cleaning agent.
Attention: If the old wallpaper is difficult to remove, then you can try to make cuts on them so that moisture penetrates better inside.
- As a more technological option, you can purchase a special tool for removing wallpaper in a hardware store.
- A small amount of liquid is added to the container with water, the resulting solution is wetted by the wall and left for 30 minutes. After that, the old wallpaper should be removed without any difficulties. However, such a tool is not cheap, so it is recommended to try the simpler options described above to get started.
- When the process of removing old wallpaper is over, you will need to wash the surface with warm water, remove traces of paint and whitewash.
Attention: If we are talking about wet rooms, a kitchen or a bathroom, then you should pay attention to the corners of the room - there may be a fungus. It will definitely need to be removed before applying the primer.
- In places where the fungus is located, it is necessary to treat with bleach, making a solution of 200 grams of the chemical per liter of water. Then, in these places you need to use special wallpaper glue with fungicide, otherwise it is highly likely to reappear and spread to new wallpapers and to other rooms.
- When all the work described will be completed, you need to carefully inspect all the walls. All cracks and irregularities need to be putty. If the apartment feels cold, it makes sense to insulate the walls with a special material, for example, foam plex (seeHow to properly insulate the walls with your own hands).
- You can also use polystyrene as a cheaper heat insulator, but do not forget that it is very combustible and its layer will be thicker to achieve the same effect. Recently, a special foam has begun to appear on sale, which after spraying turns into a heater, as a result of which, it can be used in various hard-to-reach places.
Priming process
How the wall primer is applied under the wallpaper and how to do it correctly now we will consider in more detail. It should be decided what exactly we will primer the walls with. There are a lot of options.
- In some cases, this is done even with simple PVA glue or the same wallpaper glue, just more diluted, but special formulations are more preferable and convenient to use.
- If you still want to save money, then, all the same, you should consider purchasing a special primer, as most of the time, it costs a little more than PVA and definitely cheaper than wallpaper glue, which is suitable for priming walls.
Attention: The most important thing, choosing a specific primer, the instructions should be carefully studied, because not the first available tool is suitable for all surfaces.
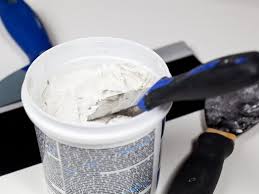
- It is most convenient to dilute the primer in a bucket, the proportions will be indicated in the instructions for use. The composition must be mixed very carefully so that it is homogeneous, without lumps. It is best to use a special nozzle on a rotary hammer or drill, for stirring.
- We draw your attention to the fact that any soil mixture may contain substances that cause severe allergic reactions. To avoid negative consequences, you should dress in such a way that there are no open areas of the body that the composition may fall on, and you should also wear a respirator, since vapors of the substance can also negatively affect your health.
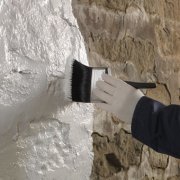
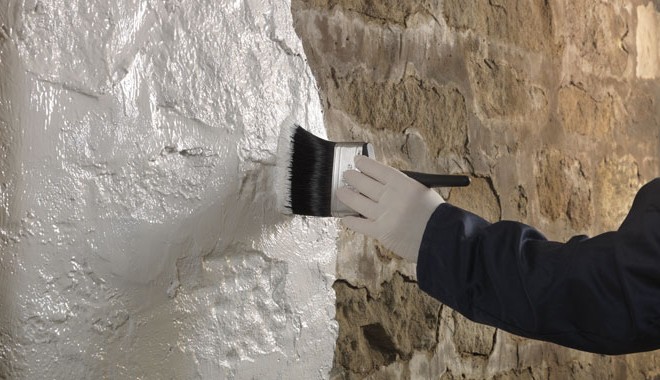
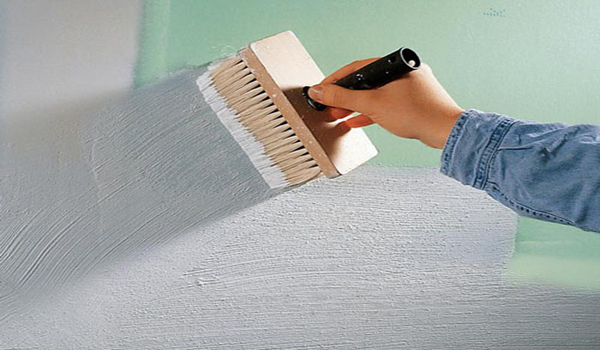
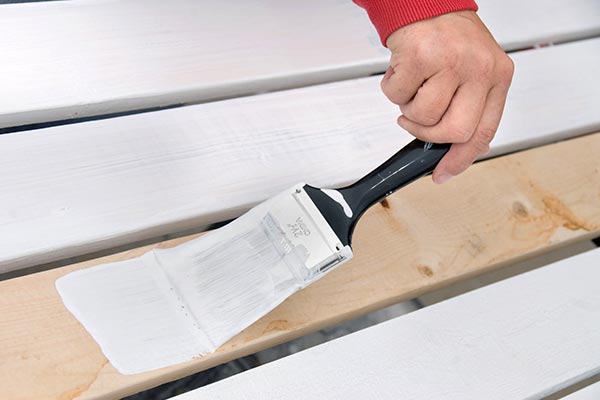
- The primer should be applied with a wide brush, an even layer, trying not to leave tubercles. After applying the first layer, you must wait until it dries and be sure to apply a second layer.Even if the instructions do not indicate that a second layer of primer is required, anyway, it must be applied, because only then you can be sure that the composition is perfect.
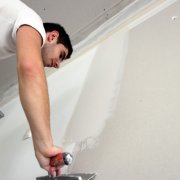
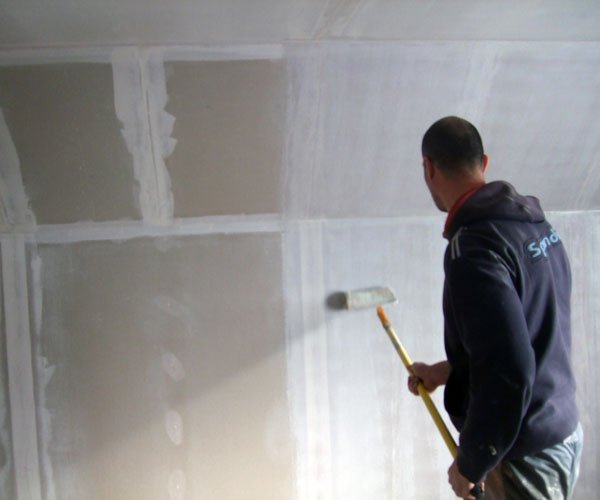
- If the required wall is perfectly smooth, which is rare, you can apply the primer with a roller, then the process will be faster and more convenient. Curved walls can also be covered with a paint roller, but after it, you should carefully grease all the missing places with a brush.
What types of primers are
Before deciding on a particular primer, it is worth considering its types available on store shelves:
 Acrylic primer Acrylic white primer for wallpaper | This primer is universal and common, combined with any wall material, except metal, but best of all with plaster, putty (seePrimer before puttying walls - is it needed) and concrete. Dries quickly, about 5 hours. |
 Alkyd primer Alkyd Primer Use Photo | This species is well suited for wood. It allows you to very effectively prepare the surface for any coating, be it paint or wallpaper. However, it is worth remembering that it can not be applied to plaster, especially on a gypsum basis. Such soil dries up, most often, about 15 hours. |
 Gliphthal primer Use of glyptal primer | This type of soil mixture is ideal for metal, but it behaves well with wood. There are no problems with stucco, you can apply it to any. So, we can say that this is a universal option for all occasions, but it has one drawback - it dries for about a day. |
Attention: For a poorly treated surface, a deep penetration primer should be taken so that there is no doubt about its effectiveness. Its price is usually not much different from the usual one.
- In order not to miscalculate, it is best to choose funds from well-known manufacturers who guarantee the quality of their products, despite slightly higher prices. If you save on the composition once again, and it turns out to be of poor quality, then you will know about it only after you glue the wallpaper and fix the unsatisfactory result will already be very costly and problematic.
- You should not buy a special primer “under the wallpaper”, because, in fact, it is no different from the usual one, but, as it is, is much more expensive.
Attention: It is worth paying attention to the composition of the selected primer, it should consist of acrylic polymers, not glue.
Depending on the surface, 100 to 200 milliliters of finished compound per m2 may be required. The approximate consumption is always indicated on the packaging with the primer. In most cases, after waiting 3 hours after the second coat of primer, you can start gluing the wallpaper.
Glue primer
If you still have a desire to use wallpaper glue, then you need to know that any brand will not work for this.
- On the package must certainly be written that the adhesive can be used as a primer for walls.
- There should also be a guide for diluting glue specifically for these purposes.
- If there are no such labels, then using this glue instead of a primer is not worth it, one of the above, a special mixture will work better and the result will definitely not disappoint you.
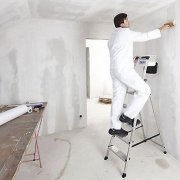
Walls in a new house
Unfortunately, buying an apartment in a new house and arriving for the first time in it, you will certainly find a large amount of dust and construction dirt. Walls can also be damp.
- If your home was not provided for primary decoration, it will take a lot of time to prepare the walls for applying a primer and wallpapering.
- If the wallpaper in the new apartment is already pasted, and you want to change it, this will cause additional inconvenience, because despite their freshness, they will also have to be completely removed before gluing new ones.
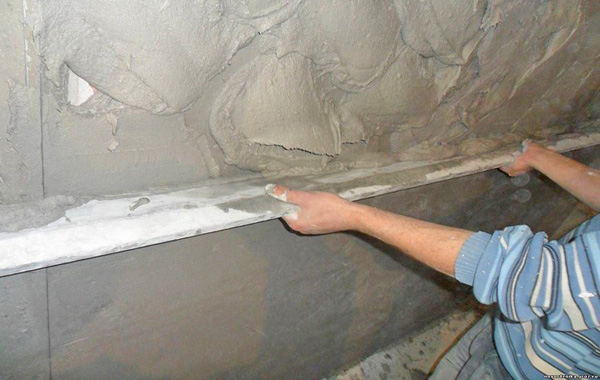
- To begin with, spray should be applied, 3-9 mm thick, comparable in consistency with thick sour cream. You need to do this even if the walls have already been plastered by the builders in advance. This is very important, because the better the consistency, the better and easier the putty will lie on top.
- Then comes the process of applying a primer, necessarily in 2 layers. After this, a coating is applied with a thickness of 2 to 4 mm, forming a very thin layer.
- After all these manipulations, you can wipe the walls with an emery cloth of a fine fraction, until the ideal result is achieved.
Previously painted walls
If you stick the wallpaper directly on the existing paint, it is likely that they will move away from the wall. Therefore, in order to make high-quality gluing, the surface should be thoroughly cleaned of paint.
This process is not easy and rather painstaking:
- Sometimes people just sand such a surface, make serifs and apply a primer on the paint. If you stick wallpaper on such a surface, then it is likely that they will simply fall off over time.
- A pretty good way to clean old paint is to use a building hair dryer, but it’s not safe. The area with the paint should be properly heated with a hairdryer, and then remove the soft paint with a spatula.
Caution: In this case, good ventilation is necessary, because when heated, the paint will emit toxic fumes, which are dangerous to breathe. And yet, this process will take quite a while, because it will not work to heat up a large area at once.
- A belt sander is also suitable for these purposes.but there will be a lot of dust during the process. Before starting work, close the doors, slots in other rooms and open the windows. This method is quite fast and is often used, along with laying new communications inside the walls.
- After such manipulations, it is imperative to carefully remove all dust and dirt that has appeared.. It is most effective to clean the paint with a special wash. True, it is quite poisonous, so before work you will need to wear gloves, a respirator and safety glasses.
- The process is not much different from the removal of old wallpaper with a special chemical. It is necessary to dilute the wash in water, referring to the instructions, apply to painted areas and wait a while.
- If after removing the paint the wall remains uneven, it is best to level it. There are times when all of the above methods do not help to remove the old paint, in which case you can apply a special primer concrete contact to the wall. But, nevertheless, if you want to get the perfect result, you need to make every effort and completely get rid of the paint on the wall.
Hopelessly crooked walls
Often the walls in the apartment turn out to be completely uneven, especially such situations are often found in different types of Khrushchevs. In this case, any finishing material will lie crookedly and defects will be evident. Preparation of curved walls is done in the same way as even walls, only much more carefully and takes incomparably longer time.
So:
- After finishing the preparation of the surface, you should carefully examine the entire room so that there is not a single visible defect left. The quality of the work performed as a result directly depends on this.
- Especially carefully choose the wallpaper. For curved walls, vinyl on a non-woven basis is suitable, since they are very dense, consist of several layers, have embossing and for all this many irregularities simply will not be noticeable.
- In this case, you will need special glue to ensure good adhesion to the wall. Such wallpapers are always glued butt, so it is necessary to use a level.
- If, in addition to the walls, you also have an uneven ceiling, then you can not worry about it and just mount tension strips that will remove any irregularities, however, for this you will have to turn to specialists, because it is quite problematic to stretch the ceiling with your own hands and, given the low cost such services are pointless.
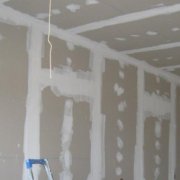
- Curved walls can be fully leveled. This is a very time-consuming work that can reduce the area of a room, but it is quite possible. The simplest, most popular, but the most expensive in terms of area option is to align the walls with drywall.
- Such a surface will also need to be putty and primed, but it will be perfectly smooth, due to the large size of the sheets of material. It is important to remember that for rooms with high humidity, such as a bathroom or kitchen, you should use moisture-proof drywall.
Carefully read all the instructions and take your time in the process of preparing the surfaces before wallpapering, because this is not such an easy job as it might seem at first. Now you know how to ground walls under the wallpaper. Use only quality materials.
If you approach everything with feeling, properly, with the arrangement, it is quite possible to achieve the ideal result, albeit by sacrificing a lot of time. And if you have enough money, it’s better to contact professionals in the field of interior decoration who will do all the work for you.