How to plaster walls - we know theories, go to practice

Theoretically, many know how to plaster walls, but not everyone can do this work on their own. After all, there are requirements and features.
In this article we will look at how walls are plastered and what to consider when doing work. In the video in this article and photo you can see the most difficult areas of work.
The content of the article
Requirements for the quality of plastering
Before deciding how to plaster the walls with your own hands, you need to familiarize yourself with the requirements, which no doubt exist. After all, plastering works, as well as other construction and finishing measures, must meet a number of requirements listed in the latest edition of SNiP:
- The maximum horizontal deviation per meter of working surface does not exceed 2 mm, vertical - 3 mm. On a wall area of 4 square meters, the appearance of two irregularities up to 3 mm deep is permissible. This concerns a satisfactory quality of work;
- For good quality stucco, vertical and horizontal deviations are not more than 2 mm, and there are 2 or less irregularities of up to 3 mm per 4 square meters;
- Plastering work deserves the highest score when meeting the specified quality parameters: horizontal and vertical deviations of 1 mm, existing bumps on an area of 4 square meters do not exceed a couple of pieces and go deep into the maximum of 2 mm.
Basic rules for plastering
The choice of how to do the job is determined by how serious the wall defects are:
- If the surface slope, as well as protruding tubercles or depressions, are practically not noticeable, then after applying the solution, it is leveled with the rule without any auxiliary fittings;
- If wall defects are visible to the naked eye, then before applying the composition beacons required. They will be an indicator for leveling the surface and determining the thickness of the composition used. Plastering works using only the rules is quite easy to carry out. More questions arise when performing construction activities with the installation of beacons.
Rules for plastering
All work is done in a certain order and must be observed.
Technically, everything looks as follows:
| Plane preparation | This is the first stage. And the quality of the coating will depend on its proper implementation. If the preparation is done incorrectly, then longevity and quality should simply be forgotten. |
| Solution | Here you need to consider where you will plaster. If this is the inner plane, then the most commonly used lime composition. If this is the outer surface, then it is better to give preference to cement mortar. If you need to make a seam of a certain color, then it is better not to find a dry mixture. It can be almost any color. |
| Solution application | Technology is important in this matter. The quality of the plane will depend on it. If the application is done incorrectly, then the material may simply flake and will not last long. |
Now, how best to plaster the walls, we will analyze the points and the details.
List of tools, equipment and supplies
Instructions for plastering rules begin with a correctly selected tool (seeWall plastering tool: what you need to work) Therefore, we start with this.

Required:
- Plaster mix of a certain composition of components (the most popular mixture is cement and gypsum-based);
- Composition for priming surfaces;
- Primer roller and brush for hard-to-reach spots and corners;
- Trowel or putty knife (about 15 cm wide) to apply plaster;
- Lighthouses (represent guides from aluminum with perforation);
- Hammer and drill of the appropriate size;
- Dowels and screws to make markings;
- Level for measuring the inclination of the planes;
- The rule is a rigid metal or wooden rail up to 2.5 m long;
- Ironed of steel;
- Scissors for cutting metal or grinder.
Preparing walls for applying plaster
About the preparation you saw in the table. But here it is necessary to analyze this process in more detail.
- First, we need to decide on the application layer. To do this, we pull the fishing line along the diagonals of the plane, then immediately you can see the necessary layer. If it is less than 2 cm, then the application can be done in one approach. If the layer is larger, then several layers must be applied. If the thickness exceeds 5 cm, then it is better to level the plane with drywall (seeMounting drywall on the wall: how to quickly and inexpensively hide all defects).
- Now it is necessary to cleanse unnecessary wallpaper, plaster and other coatings that do not hold well and subsequently, possibly, will lead to the departure of the applied plaster layer.

- Another necessary step is to increase the adhesive properties of the wall. If there is a hard-to-remove long-term paint coating, then a spatula is notched on it. Stucco lath promotes better adhesion of mortar and walls of wood. In the presence of an impressive area of work, the use of a sandblasting apparatus will be most welcome.
- When plastering with a layer of large thickness (up to 5 cm), installation work is carried out reinforcing metal mesh. In order to avoid the appearance and development of corrosion, the mesh is treated with a special anti-corrosion compound.
- For better adhesion of the surface and the working composition, preventing the formation of mold and fungi, as well as protection against moisture, priming is carried out.

- For surfaces sensitive to dampness, having tubercles, pores and other defects, a deep penetration primer is used. "Concrete contact"- a composition that will be ideal for processing concrete walls. Work is carried out with a brush or roller.
Tips for installing beacons correctly
The marking and error-free installation of lighthouses is not only the most difficult stage of finishing work, but also the most important. At this stage, determine what thickness to apply the plaster layer, and, in accordance with this, set the levels strictly vertically and horizontally to level the finished mixture.

So:
- First of all, they are looking for the biggest irregularities - tubercles and depressions. To do this, the rule is brought to various sections of the walls. All defects found are marked with a marker. It is practical. In the future, as a guideline will be the most noticeable ledge.
- After detection and fixing of surface defects, marking is carried out. For these purposes, dowels with screws and a rope are used. Work is performed sequentially. Having just finished with one wall, they begin to work with another. At first, the top and bottom screws are twisted. The distance from the ceiling and the floor should be 15 - 20 cm, and from the corners - about 30 cm. This is because the beacons are shorter than the distance between the floor and the ceiling.
- The segment on which it is planned to place intermediate self-tapping screws near the floor and ceiling is determined in this way: when working with a rule of about 2 - 2.5 m in length, they are placed at a distance of 30 - 40 cm from each other. They start from the corner, so that in the future it is convenient to level the mixture between the beacons. At this stage, the construction level is useful, it will help to make an even vertical line.
- As a result, 4 self-tapping screws will be installed on the working surface in the corners plus intermediate ones located in the places of crossing vertical dashes and horizontal ropes.Using the level and rule, place the caps of existing screws in the same plane. This procedure must be approached with all responsibility, as this will determine the level for setting guides.
- At the next stage, beacon guides are installed and fixed with their finished composition. Its consistency should be such that it does not flow along the wall. Using a spatula or trowel, a little mixture is thrown onto the work surface and the beacon is lowered into it so that it is in the same plane as the self-tapping head located on the vertical line of the breakdown. By the same principle, the remaining beacon profile is placed. The correct location of each of them is determined by the building level and the rule.
- After completion of the procedure for installing beacons, the self-tapping screws are removed.
How is plastering carried out?
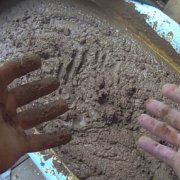
If repairs are carried out using a cement-sand mixture, then this recommendation should be taken into account: the thicker the layer is required, the larger the sand grains in the mixture should be. You can do the work with other mixtures, the proportions for the preparation of the solution, you can see in the photo.

- To prevent the plaster from drying out while finishing the selected area, it is kneaded in small portions. A liquid solution is suitable for the formation of a thin layer, and a thicker for a denser one.
- To knead the working composition take a separate container. And with the help of a construction mixer or a special nozzle on the drill, plaster is prepared. First, 1/3 of the water is poured into the container, and then a special mixture is slowly poured out. Only after the solution has become homogeneous, it can be applied to the selected area.

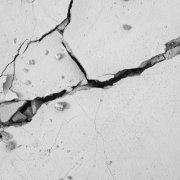
- From time to time, it is recommended to spray water from the spray gun onto the surface intended for plastering. This is necessary if there are pores and roughness, since they absorb liquid from the plaster, because of this it can crack and peel.
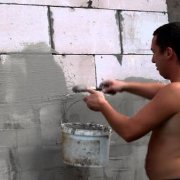
- Using a spatula or trowel, the resulting composition is poured onto the area in the middle of two lighthouses. To make the mixture better stick to the wall, make an effort. Zones near the floor and ceiling are treated at the very end. Ideally, the width of the area on which the composition is applied should be greater than the distance between the beacon guides. Thus, the area near the beacons will be filled with plaster.

- Further, using the rule, align the plastered area. The rule is applied with a pointed part to the edges of the guides. It is important to position the tool perpendicularly. If this recommendation is not followed, then the excess layer will be removed.

- They begin to level the wall from the floor, gradually moving towards the ceiling, while the tool should zigzag from one side to the other. So that the assembled composition does not have time to dry, it is immediately thrown onto a site higher. If voids or bubbles form in the layer of the working solution, they must be removed immediately, since in the future, due to the rapid drying of the composition, this defect cannot be eliminated. The selected segment is leveled until excess plaster remains on the rule.
- When finishing with cement mortar, alignment should not take more than 12 hours. During this time, the plaster does not completely dry. If you want to apply two layers or more, it is recommended to wait until the previously applied layer hardens.
- After the cement mortar dries well and becomes solid, begin to fill with the composition of the areas located at the top and bottom of the wall.
- Openings at doors and windows are plastered flush with them, or - with an overlap.
In the event that the defects in the treated area were very serious and it was necessary to apply a solution with a thickness of more than 50 mm, the following actions are performed:
- Comply with all the previous points;
- Take a break in processing for 3 to 4 days;
- For better adhesion, notches are applied to the surface;
- Carry out another priming;
- Apply another layer of working solution.
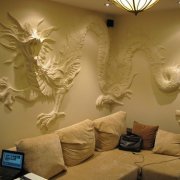
Stucco grout
The zone processed by the rule becomes flat and smooth. However, to achieve the perfect result, this is not enough. It is required to perform the mandatory procedure - grout.

- Prepare a special plaster solution in advance, which in density resembles liquid sour cream. Ready plaster is applied to the selected area.
- Using ironed metal, the composition is thoroughly triturated until the surface becomes perfectly smooth. Grouting is recommended to be carried out before the main plaster layer dries, while it is raw and can be easily processed.
Attention: When leveling the walls in the shower room and subsequent laying of tiles, it is not necessary to wipe the plaster. This is due to the fact that the adhesion of glue with a rough surface is much better than with a flat and smooth.
And now, how to dry the walls after plastering, this is done at natural temperatures. Some use heating appliances, but there is one caveat, at high temperatures, the coating may begin to crack, so pay attention to this.
Important notes and tips
Slopes are classified as complex surfaces. If you did not plaster, then try this job on a flat surface.
- Lime-cement and cement plaster can be purchased ready-made in hardware stores or made by yourself. Do not use an expired mixture.
- Always use only drinking water to knead the solution. There is a lot of impurities in industrial water, this leads to the appearance of a white coating on the plaster.
- For the preparation of solutions, use sand only in fine fractions. The finer it is, the higher the smoothness of the plastered surface.
- If the operating air temperature is below +10 ° C, then prepare the solution using Portland cement.
Note: Concrete and reinforced concrete surfaces can only be plastered 28 days after pouring.
- Plastering surfaces with any mortar can only be done after the primer has to be primed.
- The primer is applied only 8 hours after spraying, so that the solution sets and dries.
- It must be remembered that beacons made of wood or metal must be removed after smoothing the plaster.
- Where it is planned to cover the surface with ceramic tiles, you can simply prime it.
- Do not leave a void under metal profiles.
- Use a corner trowel to level the plaster in the inner corners.
- Wall painting or wallpapering can be done two weeks after plastering with gypsum and 28 days after the use of cement mortars.
If you are thinking how to plaster adobe walls, then this work is done in exactly the same order. Never rush and do everything carefully, the instruction will help you not to make mistakes. You can find how to make walls without plastering with other materials on the pages of our site.