Dry floor screed: do it yourself from A to Z
Familiar to the Russians cement-sand screed - A classic way to level the floor. It remains popular in spite of growing competition from moist and dry. screeds. In some cases, when it is not possible to fill in the traditional leveling layer, or installation time is limited, builders still recommend leveling the floor with plywood or OSB boards installed on beacons, filled with insulation between the insulation.
That's what a dry screed is, which will be discussed in this article. Consider the types, advantages and disadvantages, as well as what kind of materials for dry floor screed you will need. Do not ignore the price of dry screed.
The second name is the national team, because it is necessary to assemble the structure from a set of elements. This is not a new idea, rather a well-forgotten old one. A few decades ago, Soviet houses were massively supplied with bulk floors, then the popularity of prefabricated structures decreased. But the German manufacturer KNAUF and the OPTIROC company from Finland, which presented ready-made sets of materials for prefabricated floors on the Russian market, revived interest in dry screed.
So how is this done. The guides are installed first. Then a layer of insulation is poured onto the floor slabs (or between the lags). The selected sheet material is laid on top (we will discuss the options in the following sections). So you get a ready-made base for the installation of the finishing decorative flooring.
Let's see in which cases a dry screed in an apartment is preferable to a wet one.
- If the building is old, and the reliability of the supporting structures is in doubt. The weight of the sheet and bulk material is several times lower than the equivalent thickness of the cement-sand mortar layer. And that means the load on wooden floors.
- If there is not a month left to dry the poured solution, the deadlines are tightened.
- If installation is carried out in the cold season, and a wet screed is not feasible for technical reasons.
- If during the reconstruction of the wooden floor the “warm floor” system is installed.
Dry screed begins after successful testing of water supply and heating systems.
The content of the article
Views
First of all, dry screeds are classified according to the used sheet materials (GVL, chipboard, OSB or plywood) and bulk insulation (expanded clay, perlite, polystyrene foam chips, mineral wool).
See the following sections for the benefits of using different materials.
Since the greatest demand among buyers in Russia are elements for dry floor screed brand Knauf, we dwell in more detail on the internal classification of this manufacturer. The German company distinguishes the product groups Alpha, Beta, Vega and Gamma. Which group the sample belongs to depends on the purpose and difficulty of installation. The Alpha and Beta groups are designed for floors with a flat surface. The second difference is in the designation for laying on a layer of heat and sound insulating porous-spongy or porous-fibrous materials. Here and foamed polystyrene, and polyethylene "Vilaterm", and mineral wool in the form of plates. The use of products from the Vega group is the third level of complexity, which implies that the soundproofing and leveling layer is made of bulk material.
The fourth group “Gamma” combines the properties of the two previous ones, they are laid on both plate and loose heaters.
Advantages and disadvantages
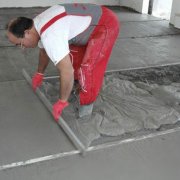
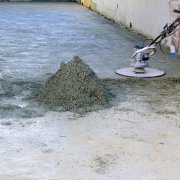
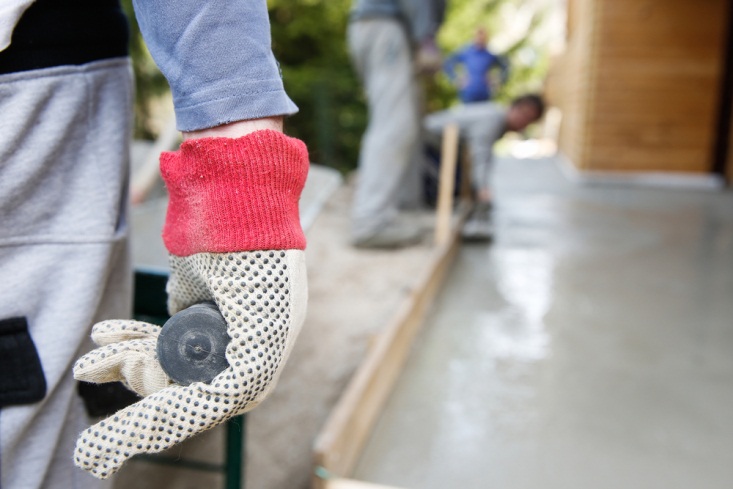
To begin with, what kind of dry floor screed suggests pluses, we will talk about the shortcomings at the end of the section.Installation work on the arrangement of the floor structure without the use of sand-cement mortar is much faster, which means that they save owners time. After a day spent on a wet screed, you will have to wait for the final solidification of the layer for another 4 weeks, with which periodically moistening the solution. After the day in which the sheet leveling layer was laid, nothing will prevent you from finishing the floor immediately.
The second most important advantage of a dry screed is simplicity, the arrangement does not require special knowledge and skills more than can be gleaned from the preparation in the video and instructions.
Mistakes often made when mixing a mortar for cement-sand screed, in this case, do not threaten to turn the alignment of the floor into a nightmare for inexperienced owners. A simple calculation of the necessary components for a dry floor screed with an online calculator also speaks in favor of choosing sheet alignment. It is reliable and does not take much time. Dry screed reviews indicate the high heat and sound insulation properties of such a floor - if you responsibly approach the choice of materials for a dry floor screed. It is not necessary to mount a dry screed in one go, it is possible in parts, with interruptions, which is prohibited when filling the room with a solution for cement-sand screed.
Another of the advantages of a dry screed is the availability of communications laid in such a floor. This means that heating pipes, electric wires or cables will be placed there - all lines that the owner can conveniently get to in order to troubleshoot. Last but not least, the merit of dry floor leveling technology - the construction will cost no more than a classic cement-sand screed. So for the listed advantages you don’t even have to overpay. In addition, installation is possible all year round.
Cons of dry screed - it is less strength and durability compared to wet and fear of moisture.
Therefore, it is recommended that you choose a traditional leveling with mortar if the floor load is planned to be high. An alternative - increasing the number of lags, but this is not a panacea - will not help in every case.
It is also better to refuse dry screed in rooms with high humidity (these are primarily bathrooms and kitchens). Moreover, it will be necessary to protect from moisture both the materials before installation and the finished screed before laying the finish coating. The disadvantage is the incompatibility of the dry screed with a water floor heating.
Materials and Tools
As already mentioned, different types of dry screeds will require a different set of elements. For example, as a sheet material, gypsum fiber sheets of a format reduced to 2 times are often taken. We advise you to choose the following sizes: 100 x150, or 60x120 cm (and a thickness of 1 cm). Instead of a small-format GVL sheet, of course, no one will forbid taking a standard one, but because of the high weight it is difficult to work alone. Other options are less common, but also acceptable - sheets of plywood, OSB or particleboard.
Bulk insulation, as a rule, is fine-grained expanded clay. But no less effective is the dry mixture for screeding and based on perlite or expanded polystyrene. However, expanded polystyrene is combustible and costs a lot. More resistant to burning will be basalt wool, which, unfortunately, does not have an excellent heat-shielding rate. In general, ceramite is not in vain used more often than other heaters.
Classical waterproofing is represented by a plastic film. But if breathability is required from the insulating layer, paraffin or bitumen paper is laid. As a rule, this is necessary in the case of wooden floors. Ruberoid and glassine also cope with vapor barrier in the floor screed. Elements that do not imply alternatives are self-tapping screws for fastening sheets, PVA glue and damping tape.
The set of tools does not imply exoticism; most likely, there is everything at home. But just in case, check and keep at hand:
- roulette wheel;
- marker (pencil);
- jigsaw or sharp knife;
- screwdriver;
- narrow spatula and brush;
- level and rule;
- beacons (both a metal profile, and pipes of small diameter, and timber will do);
- protective respirator and goggles (when using loose heat insulation of a small fraction it will be dusty).
Technology and device dry screed
A brief instruction on the device of a dry floor screed looks like this:
- we clean a rough floor;
- eliminate defects;
- lay a layer of waterproofing;
- exhibit beacons;
- we fall asleep and align the insulation;
- we lay sheet material.
Such a guide is suitable for an experienced builder who has an idea of the technology of the above steps. For beginning masters in the following sections we offer a detailed description of the upcoming work.
Step-by-step instruction
The first step, as always, is preparation. In the case of a dry floor screed, preparation begins with ensuring and maintaining low or normal humidity in the room, the temperature regime also matters. We make sure that the room is not colder than +5 degrees Celsius. We also finish by the time dry floor leveling begins the installation of plumbing and electricians, wet construction work.
Foundation preparation
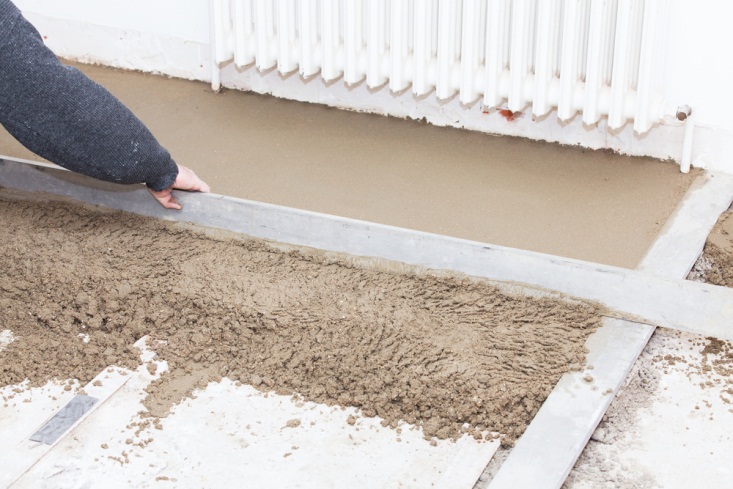
Now we clean the surface of the floor. We dismantle the old flooring, get rid of construction debris and dust (dust is removed with a special vacuum cleaner, household ones will not work). We fill with cement-sand mortar of a brand of at least 100-150 cracks and potholes in the subfloor, joints between the floor elements, gaps along the line of abutment of the base parts to the supporting and enclosing structures (walls). We stick a damper (edge) tape around the room.
Steam waterproofing
Immediately we mention an exception to the rule - the case when it is permissible not to lay an insulating layer. The choice of extruded foamed insulation, characterized by closed pores, allows you to do without continuous waterproofing. Then we glue the joints between the sheets with tape. In other cases, it is recommended not to neglect the vapor barrier layer. Consider the main methods: the use of plastic film and bitumen (waxed) paper. The concrete subfloor is covered with polyethylene sheets of thickness up to 0.2 mm with an overlap of 20 cm on each other and the conclusion of the edges on the partitions above the level of the screed. Joints are fixed with mastic. For wooden floors, they take specialized paper, which involves 5 cm of overlap of adjacent paintings, and it is not necessary to display extreme canvases on the wall.
Beacon Installation
We decide on guides - we buy lighthouses, metal profile, thin pipes or timber. Without these elements, a flat insulation surface will not work. We fasten the lighthouses according to the marks made using the building level. Insulation
If it is expanded clay, we gradually fall asleep a layer, starting from the far wall and moving towards the door. In different sources, the recommended minimum layer thickness is from 2 to 40 millimeters. Based on the characteristics of the room or choose a middle ground (20 mm of insulation). Align the layer, resting the rule on the edge of the lighthouses and trying not to damage the expanded clay. If this is expanded polystyrene (for those who want to raise the floor level and soundproof the room), we lay the material without gaps between adjacent sheets. But the technology provides a perimeter gap of 10 mm, which protects the layer from deformation due to temperature changes. Fill the remaining empty space with basalt wool (other soundproofing material will do).
Installation of sheet material
The intermediate layer of the screed is ready, go to the final stage. Remember that dry floor screed Knauf it is often offered already in the form of two-layer plates and saves owners time. But Knauf and other manufacturers also sell a single-layer screed, which involves independent installation in 2 layers.In this case, we make sure that the joints on the upper and lower layers do not coincide anywhere. To do this, we shift the laying on a half-sheet, cover the surface with glue and go through the notched trowel.
Knauf dry screed is also convenient for the presence of docking elements, locks that are connected during installation. We lay the plates starting from the corner (having previously laid a track of plates to the corner), and carefully stepping on the granules under the track elements with minimal pressure. On the plate insulation, the sheet material is laid across, closing the joints. Joints of plates before laying are coated with glue. If you have to cut the sheet, use the remainder in the next row, thus reducing the waste of sheet material.
Next, we fasten the sheets with self-tapping screws, choosing a suitable length so that it is enough for the thickness of the plates (up to 35 mm). Screwing the sheet, stand on it to pin down, and hold the screwdriver perpendicular to the floor surface. Flush the head a millimeter from the surface. The last step is the filling of the screwed-in screws and the joints of the sheets.
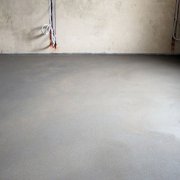
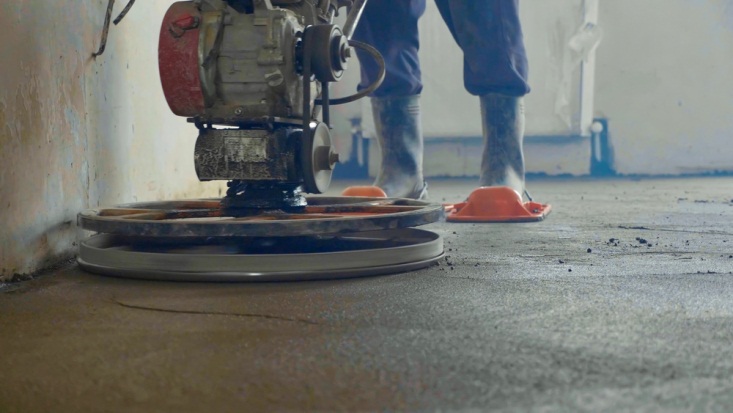
So, several hours have passed (instead of a month), and the surface is leveled and ready to lay decorative flooring. The advantages of dry screed on the face, read customer reviews and watch thematic videos before finally deciding on the method of leveling the floor. And of course, do not forget to follow the instructions.