How to finish the arch with plastic on your own

Home furnishing can take quite a lot of time, effort and, of course, require significant financial investments. However, this process is very interesting and fascinating, because it involves the discovery and mobilization of all your creative abilities.
Therefore, the independent decoration of the interior of the premises, including the decoration of the arch in the corridor, is the most attractive way to carry out repairs.
The content of the article
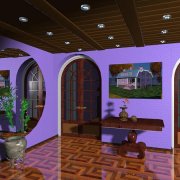
Plastic arches in the interior
Plastic arches are a great option for doorway trim both in standard design and in original design projects. In itself, this building is already unique.
So, for example, currently the corridor with arch is widely used for decoration with all kinds of materials suitable for both rooms, between which there is no longer a door. This is very important, as the passage remains completely open and all sorts of discrepancies will be very noticeable.
Speaking about the purpose of exclusive plastic arches in the house, we can conclude that, in addition to the main functions performed by traditional arches (and this is a visual separation of rooms, while maintaining the integrity of the space and decoration of openings), made for the arch, plastic trim is intended in order to complement the house with originality, non-standard and, possibly, asymmetry, which will make your interior exclusive.
Varieties of design of doorways in the form of an arch

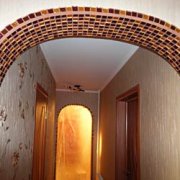
Arches in the apartment, along with the fact that they are designed to preserve the integrity of space, should become a kind of “highlight”, see photo.
Indeed, in each new room they will be different, taking into account all the requirements relating to:
- Size.
- Forms.
- The thickness.
- Invoices.
- The colors of the material used.
It is subject to these conditions that finishing the arch with plastic will be a worthy addition to the general stylistic ideas of your interior.
The main stages, which involves finishing plastic arch
When choosing the dimensions and shapes of the arch, one should not forget about such an important point as the height of the ceilings in the room, as some forms of arches may not be adequately evaluated and, accordingly, the impression and effect of the arched construction may be not only unexpected, but also undesirable .
Tip. Before you begin work on the construction and decoration of the arch with plastic, it is worth making some calculations and preliminary measures. So, for example, in order to decorate a doorway with plastic, you need to determine its cost and advantages compared to alternative options.
You can immediately identify two advantages of this material. It is very easy to care for it, and the plastic is quite cheap.
In addition, you can choose almost any color gamut of the coating. Yes, and the installation of this material takes very little time, and it is possible to implement it even alone.
Finishing includes the use of the following materials:
- Plastic panels.
- Special wooden slats.
- Plaster.
- Glue.
The shape of the plastic arches used in the process of separating rooms and decorating them is more a matter of taste for the owner of the house. As already mentioned, due to its unique properties, this material allows you to resort to the classical style of the design of the arch, which assumes an arc of the correct form.

Types of arches:
- Modern style - an arc of a slightly truncated radius.
- Romantic - arch with rounded corners.
- Ellipse - an arch in the form of a regular or irregular ellipse.
- Trapezoid - in the form of a trapezoid.
But when it comes to decorating the arch, plastic becomes indispensable. After all, its main advantage is that it is able to take any desired shape.
Therefore, you should not be afraid and refuse to create a more complex asymmetric shape in accordance with the general spirit and style of your home.
How to finish the arch
Before finishing the arch with plastic, you first need to create a template for your future project.

Attention! The work on the production of these elements of the internal decor takes an average of 1 to 3 days, and can be implemented in several ways, which depend on the tools used.
It can be:
- Profile bending machine using glycerin.
- Infrared heaters.
- Hot air currents.
However, despite the various equipment, the stages of production of plastic arches are approximately the same. Plastic arches are made of polyvinyl chloride (PVC) in various colors.
Therefore, you should not be afraid that this or that plastic will not fit into the general interior of rooms. Production begins with the separation of PVC into individual elements, which are then given the necessary shape.
Tip. In order for the arches trimmed with plastic to look unusual not only because of the irregular shape and color of PVC, it is worth resorting to the use of various decorative elements.
These include:
- Textile.
- Decorative glue.
- A variety of artificial imitations (leather, gold leaf, metal surface, mosaics, etc.).
Self-finish plastic arch

Before you begin to finish the arch with your own hands, the openings must be puttied. To do this, they must be previously cleaned of the previous finishing material (if any) and cleaned of dust and other contaminants that were formed during the destruction of the partition or door removal.
Attention. Puttying refers to the process when an arch is erected in a wall of concrete or brick.
You will need:
- Hammer,
- Brush
- Brush,
- Primer,
- Putty,
- Putty knife,
- Rag.
So, you have a bare doorway.
To begin with, it is necessary to sweep away all residual dust and repel possible protrusions of the hardened concrete or cement mortar. This can be done with a hammer and brush.
Tip. To prevent dust from flying in all directions, spray water from the spray gun from time to time.
Next, it is necessary to dilute the primer with water and how to process the entire stone surface, on which the putty will then be applied. This is necessary for its full adhesion to the wall surface.
Putty can be purchased in semi-finished or finished form. Using a spatula, it is applied to masonry or concrete slab.
After it hardens, it will be necessary to treat the surface with a sandpaper or sandpaper in order to make it perfectly smooth.
The next step is preparing the frame for plastic panels

Tip. As the material for the frame, it is best to use wooden battens, which are attached around the perimeter of the arch on both sides using mounting foam.
Therefore, you will need additional struts that will hold the attached rails in position while the foam will harden.
So:
- In order to carry out everything correctly, you are offered instructions on the packaging with mounting foam for working with this material. Before starting work, it is recommended that you watch the training video.
- Further, the spacers can be removed, and the slats themselves will remain firmly pressed to the doorway. The base for the plastic trim is ready.
You just have to prepare the plastic parts of the required size and attach them to the rails. This is done using a stapler and large staples.
Depending on the width of the opening, the panels can be stacked vertically or horizontally. - So, in most cases, the panels are offered with a width of not more than 30 cm, while the arch can be much thicker. In this case, you will have to cut each panel into separate elements, the length of which will correspond to the width of the opening.
- If the arch is built in a wooden wall, then the primer and puttying of the surface is omitted. You can immediately proceed to the installation of the frame, while the rails are beaten with ordinary nails.
Do not forget that at each stage it is necessary to carefully measure not only the dimensions, but also the levels of inclination, verticality and parallelism of certain elements of the arch.
Tip. The most vulnerable point of the arch is its corners. Over time, the ends of the plastic can begin to peel off, and it does not look beautiful.
Fortunately, manufacturers made sure to arrange them reliably. For this, special plastic corners for arches are used, which have a different width, which you can choose depending on your requirements.
The most convenient and popular size is 10 - 20 mm. The wider side of the corner is attached to the inside of the arch, and the narrow to the facade.
As glue, liquid nails are used. In order for the corners to attach, it is necessary to properly press them to the surface and hold in this position for 2 to 3 minutes.
There is another way to close the ends of the plastic - the use of guide angles. These are the same elements that are used as elements. finishing slopes of plastic windows.
They are attached before the plastic panels themselves to the rails, again with a stapler and staples.