Screed floor waterproofing
When the owners, when repairing a house or an apartment, find that their strength and finances are running out, they are drawn to finish quickly, having missed events that are unimportant from their point of view. This list also undeservedly includes waterproofing the floor under the screed in all rooms, because among non-professionals there is an opinion that waterproofing can not be done only in the kitchen and in the bathroom. This is an erroneous position, so be patient and include the stage of isolating the floor from moisture in the work plan. In this article, we will explain why waterproofing the floor before the screed is the basis of safety for nerves and property, as well as how to choose and install water-repellent material correctly.
The content of the article
What is waterproofing for?
From the name of the procedure it is clear that to protect against moisture. A nuance that needs to be clarified: the protection that the floor screed provides waterproofing works in both directions. That is, by laying an insulating layer, the hosts kill 2 birds with one stone.
Firstly, they avoid conflict with neighbors from below, to which water will not flow either from the screed or from unforeseen flooding during an accident. Secondly, they protect their own floor structure from absorbing excess moisture from below. From the soil or moist basement air - relevant for the inhabitants of private houses and the first floors of multi-apartment buildings. Or a neighboring room with a high water intake - this is close to a resident of any floor. For concrete and cement screed due to the high porosity, such an effect is fatal, since it threatens with loss of integrity and gradual destruction. Following the damaged screed, decorative flooring will go.
By the way, waterproofing under the screed is also installed because the concrete in such a neighborhood will dry more slowly. And this helps to improve the quality of the leveling layer. Experienced craftsmen knowingly artificially slow down the drying of poured concrete, covering it with plastic wrap and moisturizing the layer during the first days after pouring. Those for whom these arguments are unconvincing prefer to limit themselves to laying a waterproofing layer over the entire surface only in the toilet, bathroom and kitchen. In living rooms, dispense with insulating areas under heating pipes, batteries, at the joints of stoves. But after weighing the pros and cons, it’s easy to make sure that waterproofing the floor under the screed is cheaper than eliminating the consequences of its absence.
Types of waterproofing and methods of application
Without focusing on the specifics of the types of waterproofing, it is difficult to choose the right material by name. Recently, the offer of goods in this area has expanded and you cannot do without a professional guide on the assortment. So, the classification of types of insulating materials determines the method of application. Allocate rolled, liquid, penetrating and waterproofing with plaster. In the following sections, we consider the advantages and disadvantages of each method.
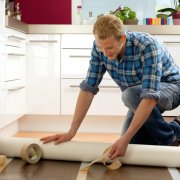
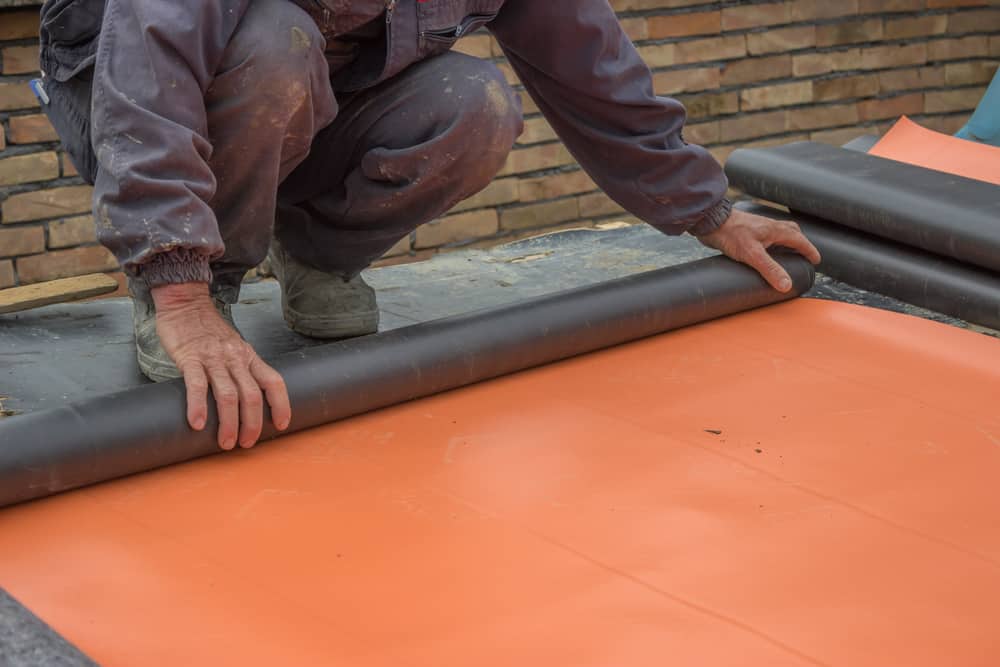
Roll materials
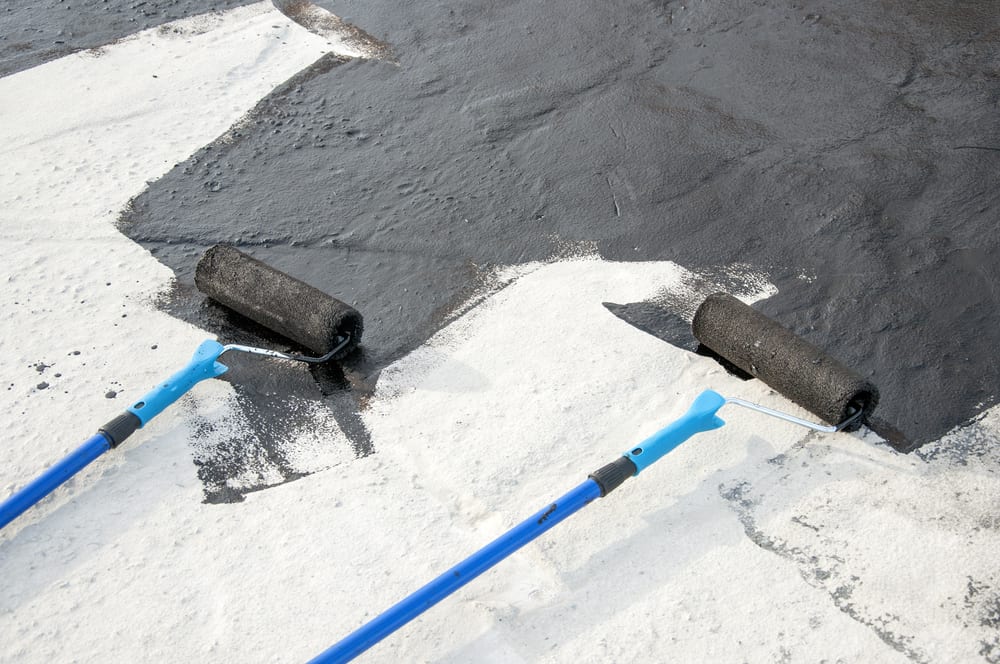
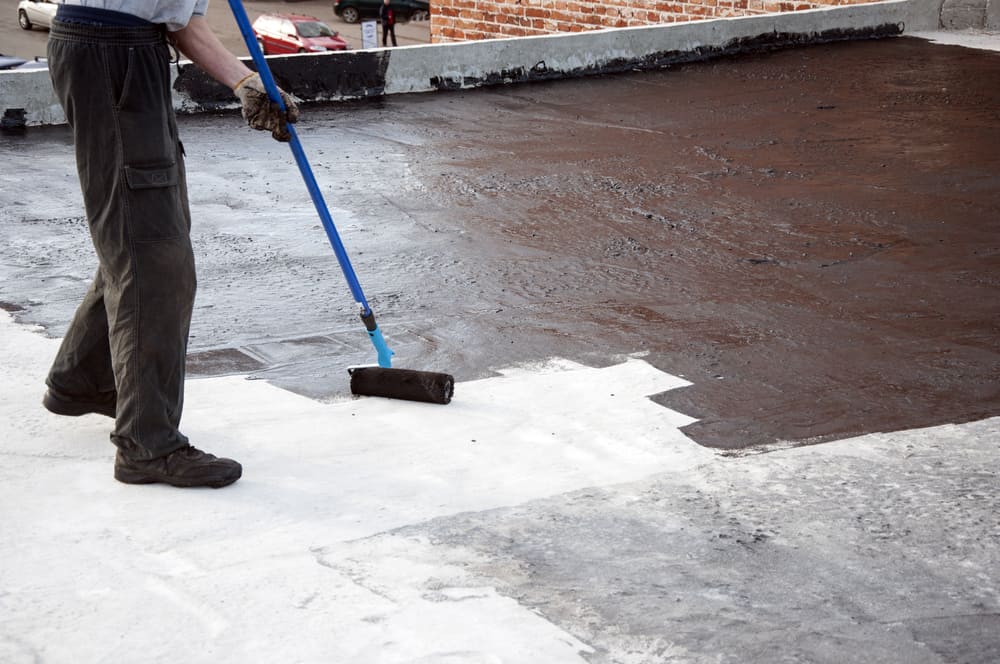
Good old ruberoid is a classic example of roll material for screed waterproofing. Due to the development of the market, this veteran of finishing fights cannot stand any comparison with more modern brothers (like any material on a paper or cardboard basis, for example, roofing). Do not succumb to the temptation of a modest price for roofing material - the price is modest just because of the lack of demand.If you want to install reliable, durable waterproofing of the floor before the screed, choose isoplast, aquaizol, filisol, hydroisol (with a fiberglass base), PVC or film. The latter is considered an economical option - a dense material, available in 3 colors: brown, gray and black.
Bitumen mixed with special synthetic components is applied to the base fiberglass mesh - this is how rolled materials for waterproofing are obtained. The deposited and glued are divided according to the method of attachment. In the first case, the surface and the rolled material are heated with a blowtorch or gas burner, and then glued together. The molten bitumen provides reliable adhesion, while gluing materials require a separate link - mastic from the same bitumen or tar, or an adhesive mixture with epoxy resins.
Where to start any construction or finishing process, if not with the preparation of the foundation. The first step in the implementation of any waterproofing is to prepare the foundation. Waterproofing the floor before the screed is by no means an exception. For the happy owners of private homes, the first stage of preparation is the creation of a layer called "air cushion". Due to the use of fractions of natural material of fine dispersion and different densities, air pockets are formed that do not allow moisture to pass from the ground during capillary rise. The role of such pockets, as a rule, is played by the gaps between the particles of crushed stone, poured to a height of 0.1 m. The specified level is achieved by pouring a layer of sand on the crushed stone.
Apartment owners who have a ready-made subfloor begin preparations for applying waterproofing under the screed with cleaning and inspection. To eliminate the detected defects, sand-cement mortar is used. The modified base is primed with an emulsion of bitumen. Looking ahead, we note that when combining several waterproofing methods, now is the time to apply a penetrating composition.
Next, fix a tape made of expanded polystyrene around the perimeter of the room, protecting the walls from temporary deformations of concrete.
We proceed to laying insulation sheets - the main participants in the process. The overlap of sheets helps both to secure the joints, both on the walls and on each other. The average recommended overlap width is 0.15 m. A building hair dryer firmly welds sheets. Anyone who nevertheless continues to worry about joints will cover them with sheets of a second layer of insulation. Cut along the walls protruding above the surface the remains of the damper tape, for the screed you still have to glue a new strip.
The appearance of bulges of the waterproofing under the screed in the form of waves and bubbles is unacceptable, puncture such areas and expel excess air from under the laid layer, pressing and smoothing. Recoat the puncture site with the mastic inside and out.
Summing up the conversation about roll waterproofing the floor before the screed, we note the affordable cost and reliability. On the second side of the scale is a difficult installation, which implies the experience of the master and a set of special tools.
Hydrophobic mastics
The next step is the discussion of waterproofing using liquid formulations. Often the same bitumen is the basis, but rubber and polymer-cement varieties are also found. Stock up with a roller or brush, if you had experience in painting work - it is time to apply the knowledge. The principle of application is similar to thick paint. Thrifty owners sometimes strive to apply bitumen brought to the correct consistency, but professional builders do not recommend doing this. Bitumen-rubber and bitumen-polymer mixtures contain synthetic resin, so waterproofing before screed noticeably benefits from the choice of such mastics. The increase in value in this case is justified and justified, and it is more convenient to use them.Polymer additives exclude the reaction of the composition to lower temperatures and simplify the application of liquid waterproofing the floor under the screed.
Clean the surface of dust and debris, as well as oil stains, if any. If this is not done, dense adhesion of the mastic to the base will fail. Fill the cracks with cement-sand mortar, knock off excess on the protrusions. The next step is the application of a primer that improves adhesion. When choosing, pay attention to the compatibility of the compositions. It is most reliable to purchase mastic and primer from one manufacturer. Coat the surface with no gaps or gaps, allow 2 hours to dry, unless another period appears on the primer label.
When this layer has dried out, we proceed directly to the liquid waterproofing before the screed. On one layer, the movements of the brush or roller are carried out in one direction, respectively, on the next - in the opposite direction, it is more reliable. Between spreading layers we take a break from 3 to 5 hours. After 6 hours, it will be too late to apply the next coat due to the polymerization of the composition. After covering the surface with the last layer of hydrophobic mastic, count down at least 48 hours before continuing.
In addition to accessibility, reliability and ease of use, liquid waterproofing is valued for environmental safety and incombustibility. But to cover concrete with a low waterproof grade, gypsum and lime plaster should not work. Another disadvantage is poor resistance to mechanical damage.
Desiccant plaster mixes
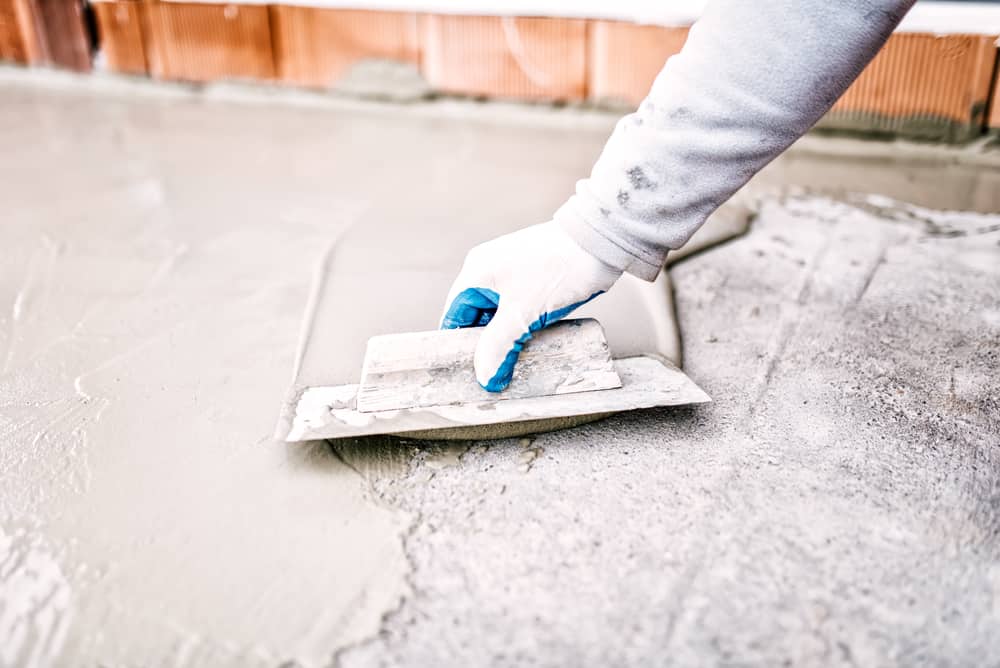
Dry mixtures of sand, concrete and special polymers began to be used for waterproofing floor screeds not so long ago. Ingredients that reduce the moisture absorption coefficient of such a coating, at the same time increase resistance and strength. Prepare the surface as described in the previous sections, there are no differences. Buy the mixture at the rate of 1.5 kg (+ -0.5 kg) per square meter and follow the instructions on the packaging, preparing an insulating solution. We will apply the resulting mixture to the surface with a spatula, as befits a plaster.
We smear the floor with a waterproofing compound by analogy with mastic, one layer - one direction, the next - the opposite. The difference will be in the period of drying the layer - such a solution is enough for a quarter of an hour on each layer, in total they are applied up to 4. Regularly moisten the surface of the stucco mixture for the first 24 hours, and a little more for a few days. The period of complete drying depends on the polymer additives and appears on the packaging of the mixture, the maximum period is 14 days. Avoid surface loads until final hardening.
Waterproofing under the screed with a plaster mixture does not require significant material costs, the experience of a master or an extensive set of tools, but it involves a margin of time for drying. If you have this resource - feel free to choose a dry insulating mixture, strength and reliability are guaranteed.
Penetrating waterproofing
Presented on the market in the form of dry mixes and liquids. Technologically superior to the above types. The peculiarity consists in changing the physical structure of the coated material. The components of the mixture during the reaction with concrete form insoluble crystalline elements, sealing the pores of the base. Moreover, the structure of the material is supplemented, but not damaged, so concrete does not lose any of its original properties.
We prepare the surface in the same way as in other cases, with the only change - after cleaning and eliminating defects, we moisten the base, soak in water. The liquid is already ready for use, we dilute the dry mixture in accordance with the manufacturer's instructions. We apply one layer of the composition, wait for the time indicated on the package, again wet the surface and apply the second. To slow down drying, it is recommended to moisten the applied layer for another two weeks, or simply cover with a plastic wrap.Improve the waterproofing of the screed by applying the solution not only to the base, but also to concrete subsequently poured.
Due to the popularity of the listed methods of waterproofing floor screed, this article was about them, although there are other types. Choose the appropriate method based on the time and means at your disposal. You can increase the reliability of waterproofing under the screed by combining different techniques. Do not neglect this useful layer of floor construction, which will protect against premature destruction and the leveling layer and the finish flooring.