We put the tiles in the bathroom: part 1 - preparing the wall for tiles

This article contains materials of a recommendatory nature on the interior decoration of the bathroom with ceramic tiles. It is intended for people who are faced with a similar task and decide to do all the work with their own hands. But, first things first, the first thing we will consider is preparing a wall for a tile.
The content of the article
Leveling preparation
Many of us like to freeze on TV at weekends, and enjoy plunging into the world of professional builders and designers watching such programs as “Housing Question”. We like how everything goes well and beautifully with them, and young, fit and shaved masters in perfectly clean work clothes make the hearts of fussy housewives beat faster.
But, unfortunately, faced with such global alterations of premises in life, you quickly realize that the magic of television crumbles with heavy cement dust on old flooring, which they nevertheless decided to leave in place, in the name of preserving the family budget. So.
First look
All repair work was carried out personally by the author of the article (with a partner). Therefore, the approach to the matter will be purely practical, without any watery-blurry reasoning.
Customers - ordinary people with a modest income, were asked to complete all the work with the highest quality, but at the same time, given their financial capabilities. Therefore, do not be surprised that the space behind the bathroom remains in its original form.

This bathroom is located in a multi-storey panel house - it was originally upholstered with plastic PVC panels, which were previously dismantled. After this, reinforced concrete partitions were exposed, partially painted with glossy enamel, partially containing traces of ancient wallpaper, and also, in places, puttied and plastered.

One of the walls was literally soaked with black mold. Is it worth recalling that the presence of such neighbors affects human health very negatively, since their spores constantly fly in the air you breathe, which causes allergies and various fungal infections of the mucous membranes. Therefore, we will not spare our strength and get rid of pests, but more on that later.

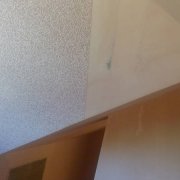
On the wall with the doorway there is gypsum plaster, which was applied directly to the lime whitewash, as a result of which it exfoliated. This fact is clearly visible in the photo above. It is impossible to leave such an artifact under any circumstances - otherwise you risk that in a couple of years all your repairs will have to start all over again.

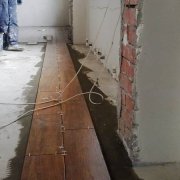
Another nuisance is the two through holes in the partition between the toilet and the bathroom, through which water pipes pass, so that you can’t do without alterations. The outlet for the washing machine is installed directly in front of the mixer. I don’t know what this technique is called for plumbers, but for tilers, you can’t call it “hack”.

Surface preparation for leveling
As a result, we got a kind of list of problems that everyone who will begin to repair the bathroom will encounter. Of course, it is far from complete, but you must catch the general line of thought correctly.
The preparation of the base of the wall for the tile will be done correctly only when you eliminate all of the above:
- The first thing we remove from the surface of the walls is paper wallpaper. In order to facilitate the task, it is recommended to moisten them with water or a special tool. In our case, we save and use the first option.
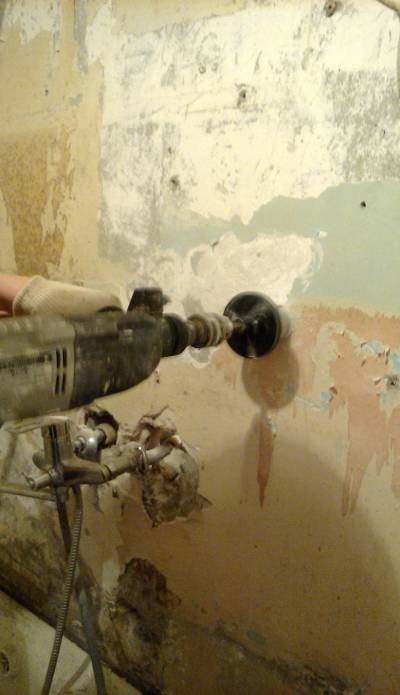
- Next, we begin to clean the putty, plaster and paint. It is best to use a hard putty knife, and in particularly difficult places you can use an electric drill. As a grinding nozzle, there is a diamond crown for drilling holes in ceramic tiles, the sting of which is removed inside so that it does not interfere with the surface treatment. In action, this technique can be seen in one of the photos below.
In this case, almost the entire putty was cleaned down to the base, but in some places it was absent. Taking a closer look, we found that the concrete in them was directly painted with enamel, which was impossible to remove.
We did not bother and decided to treat the entire surface with a quartz primer (concrete contact), which in the end should give an excellent surface for adhesion and increase surface adhesion.
-

- Remove the old putty with a power tool
-

- Removing fungus from walls
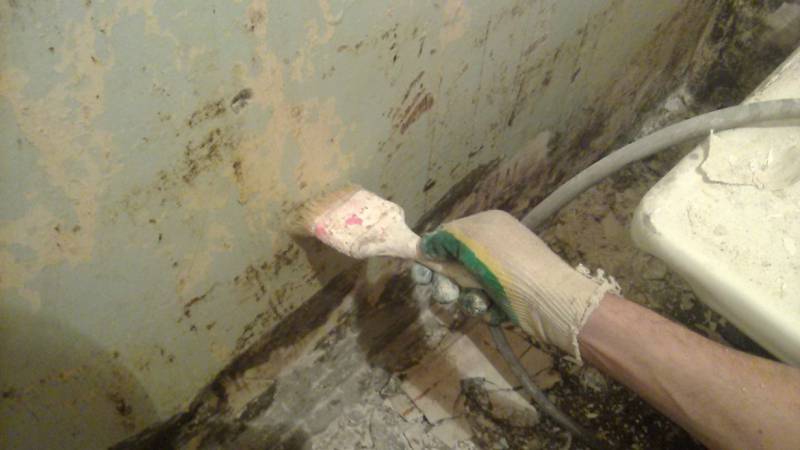
After removing traces of the old finish from the walls, the turn of antiseptic treatment begins. Mold is useless, so ordinary bleach was used (it is best to use a gel that stays on the wall for longer and does not drain). During this procedure, you must open all windows and use respiratory protection.
Advice! Do not forget that chlorine is a poisonous gas that kills not only microbes. It is heavier than air and settles in the lower part of the room, therefore, an influx of cold fresh air is required in order to weather it as quickly as possible.

Thanks to chlorine, the fungus dies instantly, so the wall, which was covered with mold, was unrecognizably transformed (see photo above). The black spots for the most part are gone, only the oldest ones that have eaten into the surface remain.
It is important to remember that mold is the most tenacious organism on the planet and it is 100% impossible to get rid of it. It is much easier to prevent its further appearance.
- The main reason for the appearance is excessive humidity, poor ventilation and high temperature in the room. Therefore, before starting the finish, pay a little attention to this problem.
- Open the door to your bathroom, take a thin strip of toilet paper and bring it to the outlet. If the air circulation is normal, then your "indicator" will begin to draw inward. Otherwise, call the housing office and call the chimney sweep.
- At its core, the bathroom is a closed room, devoid of free flow of fresh air. Therefore, it is not necessary to seal it, and when installing the door, make at least a centimeter gap from the bottom, which will provide better ventilation.
- If it seems to you that these measures are not enough, then as ventilation grates, it is recommended to install forced ventilation systems. Also, if possible, leave the bathroom door ajar.

Wall alignment
At this stage, preparation for further finishing is 95% complete. Next, you need to decide how we align the walls. In addition to plaster, plasterboard is very widely used today.
A flat false wall made of such material is perfect for the bathroom, the main thing to remember is that special grades are provided for these purposes, namely:
- GKLV - the sheet is moisture resistant, usually painted green, the average price is 250-300 rubles per sheet;
- GVLV - moisture-resistant gypsum fiber sheet is a more reliable solution, the cost of which is about 450-500 rubles apiece.

Using the second method is suitable when the difference in roughness exceeds 4-5 cm. Otherwise, you will lose precious space in an already cramped room. In the bathroom in question, the maximum difference did not exceed 2.5 cm, so we chose plaster.
Material selection

Before applying the plaster directly, it remains to apply concrete contact. For this, the ordinary brush of the mowl is best suited. Before applying, the composition must be thoroughly mixed in order to lift settled heavy elements from the bottom. The average drying time is one day, the instructions of the manufacturer you choose will tell more accurate information.
We give some tips on choosing the materials used:
- When buying a primer, you should not save much and opt for the cheapest option, due to the fact that their abrasive part is rather finely ground and is suitable only for puttying. In our case, the coarser and tougher the surface, the better. There are a lot of manufacturers on the market, so we’ll mention only a few of them whose quality is up to standard - these are Cerezit and Titan.
- The situation is similar when choosing plaster. Therefore, we dwell on two extremes - what suits us, and that we should not even try. At this facility, we had to work with a low-cost domestic production Habez Start, which sellers “paired” with our customers, instead of what we ordered. I did not have to swear much, as this is a pretty good budget solution, the only drawback of which is the short development time. He does not stand the stated 40 minutes and is close, in fact, this figure fluctuates around 20-25 minutes.
- Today, wherever you go, sellers and "experts" talk about the magnificent Volma mixes, arguing mainly that it is the most massive producer in Russia and its services are used, if not all the foremen of the country. But we all know how these comrades conduct their business, saving on everything in order to fill their pockets at the expense of customers. After all the stucco of this company successfully fell off the ceilings and walls at one object, in our close circle it was decided to stop all experiments with the products of this manufacturer.
- The Knauf and Cerezit firms offer a choice of an excellent assortment of high-quality mixtures, among which each customer will be able to choose the solution that is optimal for his budget.
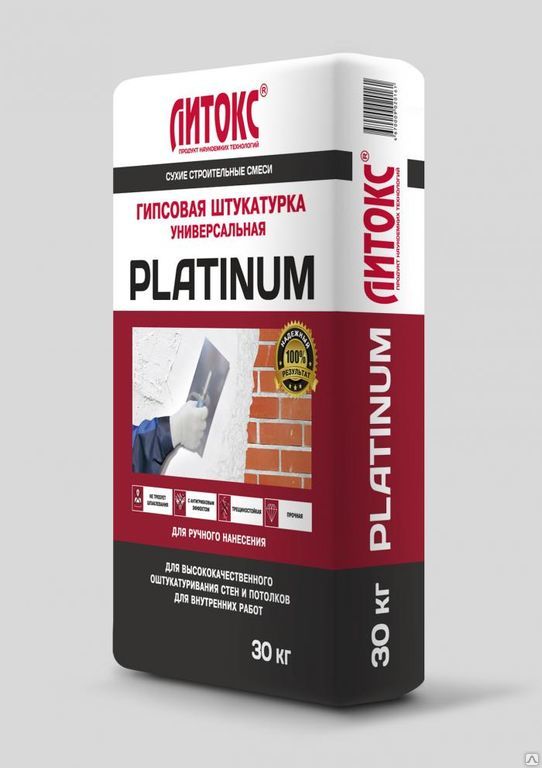
- The company "Litoks" hails from the Karachay-Cherkess Republic. It produces stucco compositions of excellent quality, which in their characteristics will not be inferior to, or even surpass, the above-mentioned well-known brands, but at the same time the prices of this manufacturer will pleasantly surprise you.
-

- Volma is the largest Russian manufacturer

-
- The best solution for budget repairs
Someone may disagree with the information presented above and object, but we will immediately answer that the entire list and its characteristics were not taken from the ceiling, and are based on personal observation of the author of the article. Of course, it is quite possible that we have wronged Volma’s company in vain, and at that ill-fated site, a fake lot simply got caught, but there is no desire to take any more risks. In the end, this is just a recommendation, and you will make the final decision yourself.

Beacon Installation
After the soil has dried, we proceed to the installation of lighthouses, along which the future wall plane will be formed. In the bathroom being repaired, the longest wall was 1 m 70 cm, so we installed 2 beacons on each of them at a distance of about 1 m from each other.

At this stage, it is worthwhile to show all its accuracy and meticulousness, because it is he who will determine the further evenness of the walls.
It is very important to form a right angle at the bathroom abutment:
- We outline the location and throw, along the entire height of the wall, the plaster with small bosses, the average distance between which should not exceed 20 cm. This will avoid bending and displacement of the lighthouse during fixation.
- Further, the lighthouse trimmed in height is glued on top of the plaster, and pressed in using the rule. Ideally, he should take a strictly vertical position, for which we use the construction level. For the best result, use a rule with a length as close as possible to the height of the room - this will allow you to adjust the entire structure at once.
- Do not be lazy to double-check and correct the deviations found, since at this stage it is easiest to do. After exposure, remove excess mixture and strengthen the lighthouse along the entire length. Be careful not to displace the structure.
Advice! It is much easier to set a level of a thicker beacon (10 mm). Therefore, if you took up this business for the first time, use this option.

Plastering the wall
One hour is enough to harden the plaster, so by the time you finish installing the beacons, you can already start applying the plaster. This process should not cause you any difficulties, so we list only the main points.

We dilute the diluted mixture with a spatula or fry on the wall, starting from the bottom, without leaving gaps. Do not forget to first sweep the floor, so as not to pull the trash along the wall, and not to waste unnecessary nerves on it. The corners of the room are also densely filled. Skip all hard-to-reach spots, it is easiest to fix them after the main part of the surface has dried.

After we take the rule and stretch the plaster from the bottom up. Distributing the bulk of the mixture, make the angle between the plane of the wall and the rule as sharp as possible - this will better fill all possible cavities. Do not try to stretch the whole mass at once - the rule will quickly fill up and you just get your hands dirty, or drop the mixture on the floor.
Do this in stages until you reach the lighthouse (it must be visible). When approaching it, make sure that the aforementioned angle approaches the straight line to avoid bending of the rule.

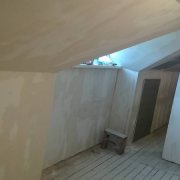
Do not worry if you can’t get a smooth, solid surface - in our case it’s even good, since the hitch with the tile will be better. As a result, you should get something similar to the photo below. In addition, we recommend that you familiarize yourself with the video in this article to present the entire process more clearly.

When the mixture begins to set, it is recommended to “trim” the wall. To do this, we again stretch the entire wall with a clean rule, holding it strictly perpendicular to the plane of the wall.
On this, the preparation of the base of the wall for the tile can be considered completed. We covered the most common questions that people face when tiling. In the next part of the article, we will proceed to the direct installation of tiles on our surface.
Read on in the article.Part 2 - laying tiles on the wall.