How to tile on a wall

Laying tiles on the walls is a rather complicated job. Here it is necessary to take into account the surface itself, to prepare it qualitatively and after that laying the tiles with their own hands on the walls is already done.
That is what we are going to tell you in detail today. Also on the video in this article and photo you can get a lot of useful and necessary information.
The content of the article
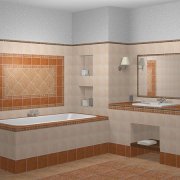
What is a tile on the wall
Preparatory work for installing tiles combines plastering the surface with the help of beacons (see Video instruction: plastering walls on lighthouses) and laying the soil.
We will consider these works as part of the article:
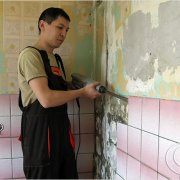
- If you need to make the wall lining, where the tile has already been laid, then the first thing we will have to remove it, inspect the old plastered surface.
- If there are irregularities of more than one cm, then it will be necessary to plaster the plane. If the bumps are less, then it will be completely possible to even everything out with tiles.
Attention: Properly prepared base of the walls is the key to obtaining a high-quality and smooth surface.
We will think that the walls are in perfect condition, and we can immediately start laying tile work without preliminary preparation. Note that at this time in the market there are a huge number of different types of such material and sometimes it is very difficult to make a competent purchase.
- The sellers in the building materials store can help you calculate the required number of material used. For that calculation, they need to provide information about the surface area, as well as the perimeter of the room where the repair will take place.
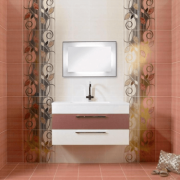
- However, if you have plans for laying tiles with patterns, then you must first know its dimensionsto make a competent choice.
- Also, first of all, you need to make a drawing or diagram of your room and calculate the required number of building material used in future repairs. We also advise you to buy tiles with a small margin to avoid problems in the future.
What you need to pay attention to when calculating the number of tiles
First of all, we must deal with the variations of the ceiling repair (if it is planned), the level of thickness of the joints and door slope trim (or frames, if they will also be produced).
Attention: If you want to make a suspended ceiling in the room with installed lights, then you need to lay the tiles not to the very top of the coating.
So:
- The level of the thickness of the seam must be attached with the help of crosses to the edges of plastic (they can be sold in the form of a rectangle or wedge). The wedge is not quite comfortable at work. The smaller the seam thickness, the more pleasant it is to look at the finish.
- If you do not have experience in the repair, do not use this method of work. We take crosses the size of two and a half - three millimeters. We also get wedges made of plastic. If you make a mistake, you can always make the necessary thickness of your seam, almost identical to the thickness of the cross.
- The technology of laying tiles on painted walls provides for the removal of this coating. After all, painting simply will not hold the tiles.
Attention: If you want to lay the tiles with your own hands without the involvement of third-party masters and specialists, it is better to use a special molding when doing the work.
What can be useful when laying tile molding
The use of molding can make small discrepancies at the joints of the walls almost invisible to the eye with a possible error and will allow you to close a gap of one and a half centimeters in size. Note that too narrow stripes of tiles at the corners do not look very aesthetically pleasing. Thus, when calculating the required number of tiles, you need to pay attention to all the subtleties of the room where we plan to lay this material.
In general, for these types of repairs we will need the following tools:
- Laser level;
- Roulette;
- A device for cutting tiles or a grinder with a circle around the stone ;;
- Marker;
- Screwdriver;
- Spatula with cloves.
In general, everything is relative and conditional. There are masters who use only the best and most expensive appliances in the repair process, and at home they use the same drill when cutting tiles, using a standard drill.
They begin to run the end of the drill on the tile, then break off the tile, simply inflicting a strong blow on the corner. If you do not have such skills and a large number of spare tiles, then it is better not to carry out such manipulations yourself.
Wall marking
Preparation of walls for laying tiles begins with the correct layout. After all, it is necessary to maintain the correct placement of the pattern and seams. First you need to determine the number of rows, you need to keep in mind the image on which we chose.

- We begin to lay the tiles, but we do not carry out the work from the bottom row, but it is best to start from the second. Sometimes, in rare cases, a certain amount of tile is necessary for the height of the material, hence we will be the last to do the work in the lower row. On the second row to the wall, you need to strengthen the wood rail, which is perfectly flat. It will be very good if we will use a metal profile PN 30 to 27 to perform these tasks.
- If we use a profile, and the base of the walls has small roughness and unevenness, then it must be strengthened in places of tight contact with the wall. Otherwise, you can bend. Sometimes in some cases, the profile will be better in that it has a more ideal surface and there are grooves of longitudinal section on the sides, with which it is possible to monitor the laying of tiles and walls.
- It is clear that you need to set our profile / rail clearly on the horizon. The laser level in this case is an excellent help. But sometimes it can be done in the usual way.
A properly made guide is another necessary moment for excellent laying of our building material. It is necessary to install guides on both walls in the corners, where we will start to make repairs.
In the corners of the walls it is possible to create vertical stripes with which we will be guided in the future. Having done all the work of marking, we begin the process of laying tiles.
Tile the walls
The sequence of laying tiles on the walls is determined depending on the picture. Some make a start from the center and move to the sides. Basically this option is selected if you have a drawing.
If there is no picture, then in principle it doesn’t matter from what angle you start. Now, how to lay tiles on the walls, we will consider in detail.

Attention: We make the solution in the form of thick sour cream. Also, the manufacturer's instructions should be studied before cooking. The whole mass should be homogeneous and without lumps.
So:
- We must apply glue evenly on the wall with the smooth part of the spatula, and then similarly put on the base no more than one square meter, since the glue does not lose its qualities and characteristics for about half an hour. The time period will depend on the type of surface and temperature, as well as the amount of moisture in the air
- A solution that has dried on the wall and which has already lost all its qualities, needs to be cleaned and put a new level. We select a spatula for work from the level of the profile depth from the back edge, as well as the dimensions of the tile itself. You need to follow the rule - the larger the tile, the spatula we choose with the teeth we need.
- For small tiles, you need to take a spatula with teeth in the form of the shape of the letter V, where the height level is determined in the amount of three to five millimeters, for larger tiles we use spatulas with teeth in the form of a square.
- High-level ridges, which are made by using a spatula with large teeth, perfectly cover the other part of the larger material and the tiles where the protrusions are located.
- To establish a competent choice of a spatula with teeth, you need to do a little testing. The adhesive solution is placed on the wall and carried out as if with a comb. After laying the glue on the wall, stripes of glue solution of the desired height level are formed. Next, we paste the tile itself.
- If we press the tile into the adhesive solution, then the ridges become flattened, then a layer of adhesive solution of equal thickness is obtained under the tile. Next, we remove the tile from the wall, flip it over and begin to observe how the adhesive covers the back of our material.
Attention: If the glue evenly lies on the surface, then we selected the spatula correctly. If the material has surfaces that have not been coated with a solution, you need to take another tool with a high level of teeth.
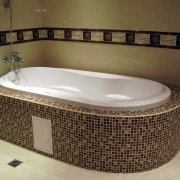
- Tiles made in manual mode with an uneven level of the back part, mosaic tiles fixed on sheets, and ceramic and stone tiles must be applied with another layer of glue using a trowel in the form of a rectangle. This is necessary for full contact between the material itself and the surface of the base of the wall. Putting glue on another part of the tile should be an optional measure and should not be a substitute for applying it to the surface. If we incorrectly applied glue in insufficient quantities, then our adhesion will weaken, as a result, cracks will turn out, grouting seams will form.
- Often, first of all, you need to lay a vertical row at the level of three to five tiles, then put the horizontal layer. The level is used to determine the verticality (in the other direction from the start of the cladding) for four to six tiles. Next, we lay the tiles with a ladder. However, such a number of claddings, although generally accepted, but in order for the seams to become the same level, you need to take crosses for distance work to work, pick them in width.
We apply the rule to determine the evenness of the tile:
- If necessary, put another layer of glue under the tile or otherwise lay it more tightly with a rubber material hammer. We cut and break the tiles with the help of a special aggregate-tile cutter.
- As soon as we laid our tiles, we simply press them with our hands, if the tiles are large, then again we take a special rubber hammer. Do not forget about the rule for determining the level of evenness. If necessary, a new tile can be hit with a rubber mallet or simply moved to another place, then when the glue dries, it will be much more difficult to make such manipulations. The adhesive solution retains all the characteristics and properties for half an hour. The excess layer of adhesive must be removed before it is dry. If you take a break in the repair, then you must remove the remnants of glue from the walls.
- We trim the tiles with special tools, remember that they are the right size. We paste the pieces of tiles separately, and already at the finishing stage of construction work. It is necessary to recall the calculation of the thickness of the seam itself. The whole process of work ends with the production of facing the seams. No need to lay the tiles against the walls or floor.In the future, precipitation of the property itself may occur, and the tile itself will begin to peel off. Sometimes it will be better at the places where the tile touches the walls, the floor covering will form a seam, it will unload a little and relieve the load on the walls.
- Sometimes in the process of repair hard-to-reach spots are formed (as an example, the surface behind the batteries). Putting glue there and working with a spatula is completely impossible. Hence the process itself and the mechanism changes. The adhesive solution is not placed on the wall, but on the tile itself, then it is made even with a spatula with teeth. To get to such places by hand is much easier and more convenient than the tool itself.
- It is necessary to make a hole around the pipes in the production of wall cladding. For this process we use a drill. However, having such tools is not necessary. Holes of this size can be made in tiles and with one drill. On the tile, a drawing of the required size is made and a hole is made using a small drill. Jumpers are eaten with pliers or another similar tool.
- When making holes in the tile, install any drill in the place of work and make punctures with light hammers. Further, it is possible to make a hole using a diamond drill. When working with a punch, it must be switched to the drilling mode without fail.
Attention: in no case do drilling a tile using a blow, in this case it will collapse. Put the icing first, and only then make the hole you need.
- At the end of the facing work of the walls, we smoothly carry out the rail so that the bottom row of tiles does not crumble and collapse. In the embodiment, when the adhesive solution is located under the rail, it must be carefully removed with a spatula. Next, we tear off the rail itself using a nail clipper.
- The final stage of all ceramic laying works is gluing the bottom row of material. Put glue on the base of the wall under the first sequence of tiles. With this work, the edges with irregularities will be closed by the tile base from the walls.
Seam filling process
Any laying of tiles on the wall with your own hands, the video will show you a plane with fully processed seams. Let's look at how this should be done.

So:
- A day after laying ceramic tiles, you need to start work on filling the joints, using a putty of the necessary color scheme. We transfer the entire volume of the solution in the dry version into containers with liquid and mix it manually and with the help of mechanical devices until a mixture of a uniform nature appears.
- Next, we wait five to ten minutes for the solution to become homogeneous, then we make another stirring. We fill the seams using a spatula made of rubber or a special grater, also of rubber material.
- We collect the remains of our solution and re-fill the joints. When the solution dries (about half an hour), wash our base, again raking the remains and cleaning the tiles. As soon as everything dries, we carry out a final cleaning. We use a rag from a flannel or a sponge of hard hairiness.
- Places where walls and flooring come into contact, where moisture and excess fluids (for example, in the toilet) can very often get in, must be filled with airtight materials. Silicone is ideal for such tasks. From it we squeeze out all its contents and put in large quantities on the seam itself, then spray it with water and soap solution. The remainder of the silicone material we collect using a standard spatula. The liquid wetting process protects the sizing of the silicone contents to the base of the ceramic material.
Attention: Laying tiles on the wall. The outer corners at the seams are filled in the same way as described above.
Laying on the painted wall of tiles after removing the dye is done in the same way. Do not trust the prepared advertised mixtures, which recommend fixing without removing the dye. Their price is high, but such coverage will not be maintained. Therefore, follow the technology and everything will be fine.