How to do the installation of ceramic tiles on the wall with your own hands

The technology of laying ceramic tiles on the wall is of interest to many. Such material is often used in interior design of a bathroom, kitchen, and other rooms with high humidity. The floor is also finished with tiles.
The article suggests getting to know what are the basics of laying ceramic tiles on a wall to obtain a high-quality surface coating.
The content of the article
Features of ceramic tiles
Before you know what technology of laying ceramic tiles on the wall, you need to get acquainted with the characteristics of the material and its types. Ceramic tile - This is a natural material for the production of which various grades of clay are used, fired at high temperature.
The advantages of tiles are:
- The absence of toxicity does not cause allergies. Even a very small amount of toxic substances, allergens contained in the raw materials are removed during its firing, which makes the material completely safe for a person suffering from allergies.
- Biologically passive. After firing at high temperature, bacteria and fungi will not accumulate on the surface of the ceramic tile, as occurs on a surface made of wood or stone. This material is often used in the decoration of walls in medical institutions and laboratories.
- Resistance to moisture and water. From their influence, ceramic tile does not change the appearance and its properties, which allows the material to be used in places where high humidity:
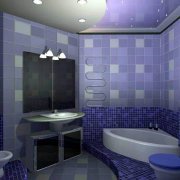
- in bathrooms (see Facing with ceramic tiles in the bathroom: a classic of the genre);
- on the kitchen;
- shower trays;
- bowls of pools (see Tiling the pool: finishing methods).
- Resistant to dirt and easy to clean. The layer of glaze covering the tile protects the surface from the accumulation of grease and dirt on it, from exposure to chemicals.
Tip: Due to its light cleanliness, it is good to use the material in places that are highly susceptible to contamination.
Tiles also do not accumulate dust and dirt. This is an excellent finishing material for homes with small children and pets.
- Durable With high-quality installation, a long period may not require repair.
- Abrasion resistantthat allows you to use the material in rooms with especially heavy traffic.
- High strength. This allows the use of tiles in places where large loads can occur, such as in garages.
- Fire safety. Ceramic tile does not burn, does not support combustion, does not contribute to the spread of fire. It can be laid out in the boiler room, placed next to the fireplace.
- Over time, does not change color. This allows the material to be used in highly illuminated places by the sun, such as:
- terrace;
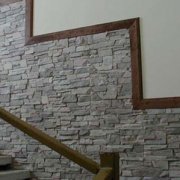
- stairs;
- building's facade.
- Ceramic tiles can be a real decoration for any home. Materials have a variety of colors and textures.
The disadvantages of tiles include:
- Fragility. Not too much resistance to blows with heavy and hard objects, and if improperly laid, it can simply crack.
- No elasticity. This limits the range of its use. The tile cannot be given an arbitrary shape, such as bending, it is difficult to lay on surfaces with curvature.
- Installation of the coating requires professionalism.
Tip: If necessary, find out how ceramic tiles are laid on the wall, a video lesson will tell you the main points of the work, which will allow you to do the whole process yourself.
What types of ceramic tiles exist
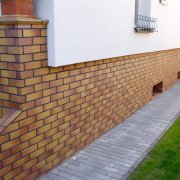
Laying ceramic tiles on a brick wall or other material should begin with an introduction to the types of tiles.
Tiles can be:
- Clinker. For its manufacture, natural, highly sintered clay is used. Her feature:
- the largest hardness of all ceramic materials;
- high mechanical strength;
- resistance to abrasion;
- resistance to chemicals.
It is applied for:
- devices of external and internal floors;
- stairs
- facing of pools.
Clinker traditional colors are all kinds of shades of red, from orange to dark brown. Glazes clinker tiles give other colors.
- Gres or ceramic granite are unglazed ceramic tiles. For its manufacture by pressing, the following are taken:
- kaolin clay;
- quartz;
- mica.
The hardness of the material approaches granite, has a high abrasion resistance. Homogeneous structure provides consistent color in places of chips and scratches. Water absorption of grace is not more than 0.5%, it is resistant to alkalis and acids. The material is stain resistant. This tile is used when installing floors that are subject to severe wear and require high frost resistance.
The front surface of the gras can be polished. In this case, it is less resistant to stains, due to the small opening of the pores during polishing.
- Majolica. Such ceramic tiles are extruded, double fired, and then coated with opaque glaze. This gives her:
- strength;
- water resistance;
- resistance to alkalis and acids.
It is most often used for facing internal walls.
- Terraglia. In the manufacture of double firing, the materials are expensive:
- clay;
- sands;
- fluxes.
The white color of the ceramic tile allows you to apply the picture directly to its surface, and then be covered with only one small layer of glass glaze. It is used for wall cladding inside buildings.
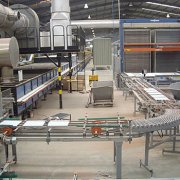
Laying ceramic tiles on uneven walls begins with the selection of the desired material. The diagram shows the manufacturing processes of different types of ceramic tiles:

In the diagram, the manufacturing processes:
- Left - unglazed tiles in a single firing.
- In the center - glazed tiles with double firing.
- On the right is glazed tile in single firing.
The characteristics of the tiles vary in:
- Relief. This indicator indicates the roughness of the surface, which can save a person from falling. This is especially important for laying floors in the bathroom or bath.
- The shape, size, color and presence of patterns. The presence of patterns and color affect the harmonious tiling and the existing design of the room and the home as a whole. Color can visually change the size of the room.
Tip: When choosing tiles of a certain shape, it should be borne in mind that in small rooms tiles of small sizes should be used.
- Abrasion resistance. The material is produced in five classes, where the highest is the fifth.
- Moisture absorption. This characteristic can be of four classes. When purchasing ceramic tiles, it should be borne in mind that for wet rooms should be used tiles with the lowest level of moisture absorption.
How to prepare a wall for laying tiles
For the fastest and highest quality laying of tiles, it is necessary to properly prepare the working wall, tools and materials. When installing elements, crosses should be used to help maintain the same size between them, as in the photo.

In addition, you need to prepare:
- Tile cutter.
- Electric drill with a diamond crown.
- Rubber mallet.
- Building level.
- Different sizes spatulas.
- Ax.
- Mixer.
- Primer
- Glue for a tile.
- Roulette.
- Pencil.
- Special grout for joints.
Wall preparation is carried out in the following sequence:
- The surface is cleaned of dirt and old finish.
- It is leveled by plaster (see. Alignment of walls with plaster according to all the rules) or gypsum-fiber moisture-resistant sheets, the price of the second is much higher.
Tip: To remove paint from the wall, you need to apply a lot of notches on the surface with a small hatchet, and then remove the paint.
- The working surface is treated with a coarse-grained primer, which will improve the adhesion of the tile to the wall.
- If there is ceramic tile on the wall, it must be dismantled. Do not lay new tiles on the old.
How can ceramic tiles be laid
Before installing the tile on the wall, you should determine the placement of horizontal and vertical rows of elements. This will reduce the amount of cutting to a minimum.
The number of horizontal rows is calculated from top to bottom, taking into account the thickness of the joints between the tiles, usually 2 millimeters. The calculation ends when there is free space for laying the whole part. At this point, the second row begins.

The first row is usually laid out from the scraps.
This is due to the fact that:
- The floors are very often not too smooth.
- The tile cut below is striking less than above.
The vertical rows of tiles are calculated in the same way. The number of whole ceramic tiles is determined from any angle, taking into account the thickness of the seam of three millimeters.
Tip: If the whole part does not become at the end of the row, you should displace the entire row so that tiles of the same size are laid on both sides. This will achieve the symmetry of the material laying.
If the symmetry of the tile laying is not of particular importance, you need:
- On the one hand lay the whole tile.
- On the contrary - circumcised.
The instruction for laying the material on the wall offers:
- The profile is taken and fixed with dowels in the places of placement of ceramic tiles. He will support the second row of details.
- The horizontal level of the profiles is checked by the construction level. If necessary, the row is leveled.
- After installing all the profiles in their place, the tile adhesive is prepared according to the manufacturer's instructions.

Tip: Tile glue can be replaced with ordinary cement-sand mortar. In this case, before work, soak the tile in water. This will allow the tile not to absorb moisture from the solution.
- A layer of the finished mixture is applied to the wall with a notched trowel, for no more than four tiles.
- The supporting row of tiles is laid.
- When assembling the elements, their verticality and horizontalness by the building level are constantly checked.
- Ensure one size between the parts follows the insertion of crosses which. cleaned until the adhesive mixture dries.
- The reference row is glued and checked by a building long level. To do this, the tool is turned on the edge and applied to the surface of the coating. In this case, there should not be any gaps between the level and the tiles. When bulging out part of the tile, it is gently knocked out with a rubber mallet.
- The following rows of tiles are glued in the same way to the ceiling.
- If there are pipes, sockets and other obstacles on the wall, the corresponding holes are cut out in the tile with a tubular drill or a diamond crown.
- The last row is the bottom row.
- The tile is cut to the desired size.
If various defects are detected during operation, they are eliminated.
For this:
- Outstanding against the background of neighboring tiles, you need to hit with a rubber hammer.
- "Drowning" tile, it is necessary to remove and increase the layer of adhesive mixture.
- If the joints are not joined, during the installation of ceramic tiles, the defect is erased, but if the deviations are not more than two millimeters.
- With large deviations, the tile is shifted.
- A serious drawback is the presence of voids under the tile. Such a tile needs to be removed and the voids filled with adhesive, otherwise the tile will disappear over time.
All the nuances of how ceramic tiles are laid on a wooden wall, the video in this article shows about the proper grouting.