Clapboard decoration inside the house: material advantages and installation steps

The choice of finishing materials is currently very diverse. There are universal ones that can be used for both indoor and outdoor work.
But, the interior wall paneling, which can be of several types, is in great demand.
The content of the article
Types and characteristics of lining
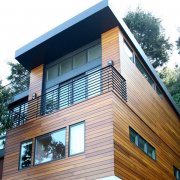
Lining today is called wooden siding. Home decoration siding or clapboard is quite popular.
Material can be made of:
- Plastic.
- Tree.
- Metal.
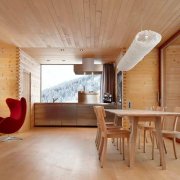
The photo shows examples of such finishing materials, each of the types has its own characteristics and advantages, they are due to the properties of the material from which they are made.
Plastic lining

What is good plastic lining for interior decoration? It has high strength, as it is made of high quality plastic. It is practical, reliable and durable.
Tip. If it is necessary to finish a room in which there is high humidity, then plastic lining is used.
Additional features:
- It is mounted on both wall and ceiling surfaces.
- There is nothing complicated in the process itself.
- For finishing work using a plastic lining, it will not be necessary to level the surface beforehand, as the material is able to hide significant irregularities.
- The plastic lining is frost-resistant and is able to withstand significant temperature extremes.
- It does not fade in direct sunlight.
- It has a wide selection of colors and sizes and it’s quite easy to choose the best option for decoration.
- It is worth considering that the price of such a finishing material is very affordable. But, it all depends on the quality and manufacturer of the plastic lining.
Surface mounted plastic lining
Home decoration clapboard made of plastic begins with the manufacture of a wooden frame on the surface.
For this you need:
- Wooden blocks and planks of the same diameter.
- Wood screws.
- Dowels.
- Screwdriver.
- Hammer drill.
- Level.
Stages:
- Bearing wooden planks are mounted on the surface of the wall or ceiling, which are fastened with dowels and a punch. Thus, the strength of the installation of the crate will be ensured.
Tip. It is not necessary to reinforce the surface with a reinforcing mesh or other device for mounting plastic, since it is very light.
- After that, the elements of the lathing are attached to these load-bearing beams. Used for this are wood screws with the required length of the legs and a screwdriver.
- Everything is checked and set according to the level. The width of the cells of the crate should be no more than 50 cm. This will allow to securely fix the material on it.
Tip. Very often, due to improper installation of the plastic lining, moisture collects under its surface, which adversely affects the state of the wooden crate. To avoid this, the crate should be treated with special primers and varnish-and-paint agents.
Once the crate on the surface is ready, you can proceed to the installation of the material itself.

For this you need:
- Starting strips for mounting a plastic lining.
- Corners (internal and external).
- Construction stapler.
- Staples necessary shade (depends on the color of the siding).
- Self-tapping screws with small caps.
- Screwdriver.
- Sealant.
- Level.
Installation:
- Initially, the starting strip is mounted on the crate using self-tapping screws and a screwdriver.
- It is set strictly according to the level so that all strips are qualitatively and evenly fixed to the surface.
- After this, a set of plastic lining for the crate begins.
- In such a process there is nothing complicated and you can do it yourself.
Tip. Each joint of the finishing elements is treated with sealant. It is especially important to perform such actions in rooms with high humidity.
For greater strength, the strip of plastic lining is attached to a wooden crate using a construction stapler. As soon as all the trim elements are already typed, the outer and inner corners of plastic are fixed, which will help to hide the ends of the strips.
To do this, use building glue or liquid nails.
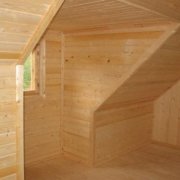
Wooden lining in the decoration of the room

Wood is an environmentally friendly material that does not harm human health.
Wooden lining has several advantages:
- Strength.
- Practicality.
- Reliability.
- Durability.
- Easy to install.
Tip. It is not recommended to use a wooden lining in rooms where there is high humidity and temperature extremes.
To be able to use it in any room, it is worth protecting the surface of a wooden lining by covering it with varnish or paint.
Types of wooden lining

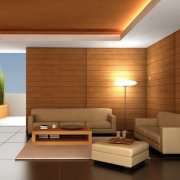
Decorating a house with clapboard has become popular over the past few years. Everything is due to the fact that the room, which is designed in this way, has an attractive appearance and a cozy atmosphere.
Lining for home interior decoration can be:
- Plain wooden lining.
- Eurolining.
- Block House (seeFinishing inside the house with a house block: material features and installation).
- Lining American.
By class, it is divided into:
- Extra class.
- AND.
- AT.
- WITH.
Let's take a closer look at the classes:
- The highest quality and durable material is considered an extra class wooden lining. It has a significant density and thickness.
It is suitable for both outdoor and indoor use. - The wood lining classes A and B are also durable, but to the same extent as the previous class. It can also be used in any finishing work.
As for the C-class, this is the cheapest and less durable material, but, despite this, it is very popular because of its pricing policy. - If we consider each species separately, then we can say that they differ in their technical characteristics from each other not too much. Their main difference will be the methods of fastening panels to each other and appearance.
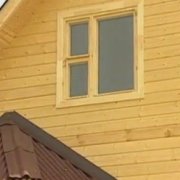
External features:
- An ordinary wooden lining resembles a panel of a plastic lining.
- Eurolining - the rounded bar.
- Block house - as well as eurolining.
- Lining American - the pro-thinned-out bar.
Note. The tree breathes and that is why it is necessary to make the room vapor barrier.
Installation of wooden lining and other related work

Finishing the house with a lining inside begins with the implementation of insulation and insulation work.
To do this, use:
- Styrofoam.
- Polyurethane foam.
- Solid mineral insulation.
Tip. It is not recommended to use mineral wool, as it is very easy and simple to absorb moisture.
To fix these materials on the surface, a crate is made, for which you will need:
- Wooden planks of the required size.
- Dowels.
- Wood screws.
- Screwdriver.
- Hammer drill.
- Primer (varnish or paint).
Work Stages:
- It should be noted that the size of wooden planks must exactly match the width of the insulation and insulation material.
- Bearing strips are mounted to the surface using a punch and dowels. All other elements are fixed with self-tapping screws.
- After that, the finished wooden crate is coated with a primer and, if necessary, varnish or paint.
- Then, layers of insulation or insulation material are inserted into its cells. It is necessary to clearly adjust their size so that they fit snugly into the crate, and they do not have to be fastened to construction or assembly glue.
- After that, a second similar one is mounted on the finished crate, only for this you can not use too large wooden planks.
- They can be smaller in diameter. The whole process is carried out with the help of wood screws with large legs and a screwdriver.
- The video shows an example of such work.
Tip. Such work is necessary for the reason that an air cushion is made between the surface and the wooden panel.
Installation of wooden lining

Instructions for such work do not exist, but you can follow the advice of professionals and their recommendations. Installation of wooden lining is carried out on any surface and before it does not need to be aligned.
It is also worth considering the choice of the main tool, which is more dependent on the fastening of the material itself. Typically, this mechanism is called a spike groove.
For work you will need:
- Screwdriver.
- Level.
- Wood screws with long legs (depends on the thickness of the material itself).
- Sealant.
Tip. A sealant is necessary in order to lubricate the joints of the material on the surface for greater tightness of the finish. But this can not be done if there is no high humidity in the room.
So:
- Since it is possible to mount a wooden lining both vertically and horizontally, it is necessary to expose each element of such material according to the level in a given direction.
- A wooden lining is attached to a wooden crate with the help of screws and a screwdriver. After that, the second strip is inserted into the grooves and "closes".
Its sides can also be fixed with self-tapping screws for greater strength. And such actions are performed with each element. - To hide the ends of the strips, it is necessary to use special decorative elements: the outer and inner corners of wood. They are also mounted with self-tapping screws.
In some cases, liquid nails are used, but this choice depends on the weight of the material.
After the interior decoration of the clapboard of the house is completed to protect the surface of such a material very often it is covered with varnish-and-paint means. To do this, you need varnish and brushes.
It is better not to use the roller for such works, since the surface of a wooden lining can be uneven (in the form of a rounded beam) and it is hardly possible to qualitatively cover the surface in this case.