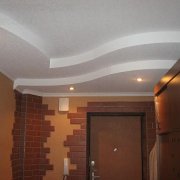
Ceiling putty according to all the rules

It is quite difficult to putty the ceiling with your own hands, but this is necessary to level the surface, which will improve the attractiveness of the room. Apartment owners often invite a team of professionals to carry out these works, but when they learn how much the coating process costs, many people prefer to do it all on their own.
Having become acquainted with the nuances of conducting the operations proposed in the article and carefully conducting each stage of the work, you can do everything yourself.
The content of the article
Why putty the ceiling
Over time, new defects inevitably appear on any surface, which requires repairs.
Reasons for deviations may be:
- Fluctuations in humidity and temperature in the room.
- The overall object that touched the ceiling was unsuccessfully transferred. This can lead to shedding of the plaster, the appearance of potholes and cracks on the surface.
Before painting (see How is puttying for painting the ceiling) It would be nice to align the surface above your head.

Tip: If in old houses the ceiling requires a lot of time and effort to level it for painting, it is easier to mount a suspended structure. It is unrealistic to remove with a plaster or putty the elevation difference between the floor panels over 10 centimeters.
For puttying the ceiling for painting in new buildings, there are two main reasons:
- After construction, the house shrinks for a certain time. It's connected with:
- thermal expansion;
- shrinkage of the foundation under the pressure of the walls on it;
- shrinkage of seams located between the panels.
Such processes become the causes of the appearance of new cracks.
- Stucco is a rough coating. Its basis is ordinary river sand. After coating, the surface is too rough.
Corn starting putty much less, and the final mixture has even less. In this case, after the putty, the graininess of the coating is practically absent, and the ceiling acquires maximum smoothness. Plasterboard suspended ceilings are also putty.
This is necessary because:
- During installation, the gypsum plasterboards are fitted tightly enough, but a small gap remains between them, which must be filled with putty (see How to putty drywall joints according to technology), performing the final decoration of the ceiling.
Tip: When finishing the surface, these seams must be glued with a reinforcing mesh-sickle. This will prevent cracking at the seams of the ceiling in the future.
- Due to the mounting method of curved surfaces, they remain slightly broken. When puttying and painting, these lines can turn out with smooth bends and a uniform surface.
- It is necessary to make inconspicuous before painting the grooves from the self-tapping screws.

Ceiling putty materials and tools
Before starting work, you need to purchase the right tools and materials.
The photo shows the tools:
- Several narrow and wide spatulas.
- The metal half.
- Roller for primer ceiling.
- Capacity for dilution of the composition.
- Construction mixer or electric drill with mixer nozzle.

In addition to preparing tools, it is very important to choose the right composition for puttying. To do this, carefully study the instructions for its use, located on the package. Putty can smooth out differences on the ceiling surface of not more than 5 centimeters.
Putty mixtures can be of two types:
- Ready to use, sold in special containers. Such puttying does not need to be diluted with water, which reduces the time for work, for this you will not need to purchase some tools, but the price of the material is higher than dry formulations.
- Dry mixtures, in the form of powders, are packaged in bags. Before puttying ceilings, mixtures are diluted with water to the desired consistency (see How to spread putty: instruction) At the same time, different proportions are chosen, which is indicated by the manufacturer on the package. The cost of puttying the ceiling per square meter is lower than the finished composition, but special tools are required to stir it.

Ceilings are decorated with mixtures such as:
- Coarse putty for roughing or applying the first coat. Such a mixture is pre-filled:
- potholes;
- cracks;
- other defects.
- Fine putty, used for finishing work or applying the last coat. The material is characterized by a higher coefficient of shrinkage, it fits perfectly and is evenly distributed on the surface, which guarantees an excellent result.
How to prepare the ceiling for putty
For different surfaces, there are different ways to prepare them for putty:
- In the absence of pronounced irregularities on the ceiling plates, it is enough just to remove the wallpaper or traces of the old whitewash. To do this, the ceiling is wetted with a sponge. When whitewashing or wallpaper is completely saturated with water, they are easily removed with a spatula.
Tip: Do not wet the entire ceiling at a time, so that the whitewash / wallpaper does not have time to dry. In this case, small areas are wetted and immediately cleaned.
- To remove the putty from the ceiling, the remaining from the previous repair is necessary:
- with strong retention of the coating, it is not necessary to remove it;
- tap the handle of the spatula over the entire surface of the ceiling. Where a dull sound is heard, the putty should be separated with a spatula - it began to exfoliate from the ceiling.

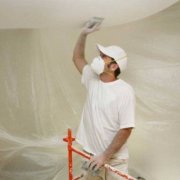
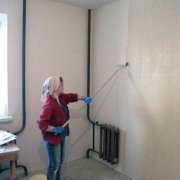
- The surface of the ceiling is covered with two layers of primer mixture (see How to primer the ceiling: we understand in stages) to increase the adhesion of the coating.
- the first is applied parallel to the window opening;
- the second is perpendicular to it.
The primer must be applied without residue from tool marks and smudges. When applying the primer with a brush, it should only touch the surface a little. The brush is held at an angle of about 60 degrees to the surface of the ceiling, and during operation it rotates around its axis. In this case, the tool will wear out evenly.
Tip: To get a better result, use a short pile roller.
- In the presence of significant level differences, before puttying, the surface is plastered to remove the most significant drawbacks.
How to putty the ceiling
The ceiling putty procedure is as follows:
- A solution from a dry mixture, in which there should be no lumps, is mixed using a special mixer.
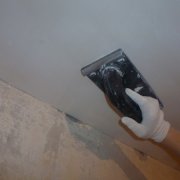
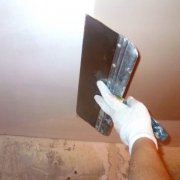
- The coating is applied to the ceiling. Moreover, the technology does not depend on the type of mixture. A small spatula scoops up some material from the container, which is evenly distributed on the surface of the second, wider spatula.
- The putty is evenly distributed on the ceiling. Residual material is removed back into the container. Thus, putty is applied to us the entire ceiling.
- After drying of the first layer, all irregularities are removed: the sagging is removed with a spatula or sandpaper. The use of a putty knife is more appropriate, while less dust is formed, which affects negatively the next coating layer.
- The number of layers depends on the roughness of the ceiling. The more defects on the surface, the more putty will need to be applied.Each time the material is applied, the ceiling should be aligned horizontally as much as possible. The mixture can be applied only after the previous layer has dried.
- The finishing layer of putty is thinner than all the rest. During application, the mixture should be applied quickly so that it does not have time to dry at the edges. The material is applied with a wide spatula in one motion. The second removes all unnecessary, the tool should be pressed tightly to the surface and located almost perpendicular to the ceiling. If the topcoat is applied correctly, you cannot skip the ceiling under the wallpaper.
- If the surface will be painted, it will need to be treated with a fine grain sandpaper, and all the deficiencies in the coating can be identified using a portable lamp.
How to properly putty the ceiling will tell the video in this article.