How to lay a tile beautifully and correctly on a wall

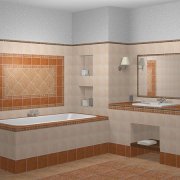
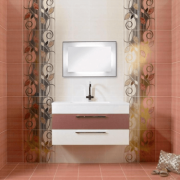
One of the most popular and popular coatings for rooms with high humidity for a long time remains ceramic tile. Such material allows you to realize any design ideas. But the cost of a good tile is quite high, and its laying can sometimes cost no less than the price of the material itself.
But having become acquainted with some stages of how to lay tiles on a wall, you can do all the work yourself, and the article will help in this.
The content of the article
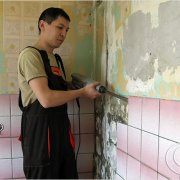
Surface preparation
Before laying the tiles on the old walls, it is necessary to prepare the base - remove the old coating. This can be done with a punch with a lance or a conventional chisel.
Tile removal sequence:
- Seams between parts are wetted with a sponge.
- The seams are cleaned from the grout mixture with a metal spatula.
- By inserting a chisel or sharp end of the peaks into the butt seam, the tile is removed from the wall.
- Dismantling parts is best done from top to bottom.

You can watch the video in this article to prepare the surface before laying the tile on the wooden walls, and many other details on removing any coating before laying the ceramic tile.
Cutting and styling tools

When choosing a tool, it is necessary to consider what operations are to be performed and the technology for their execution.
To work, you will need:
- Trowel.
- Master OK.
- Spatula with cloves.
- Rubber spatula.
- A set of building levels, for the convenience of work length: 300 - 400 millimeters; 600 - 800 millimeters.
- Plumb line.
- Rubber mallet.
- Capacity for solution.
If necessary, cutting and cutting parts will need:
- Devices for cutting tiles. They can be the devices shown in the photo:

- electric tile cutter;
- a circular saw attached to a drill;
- grinder with a diamond disk;
- manual tile cutter;
- hacksaw for metal;
- nippers or tongs;
- glass cutter;
- The file is large.
- Sandpaper.
Tile Laying Methods
Before how to lay tiles in the kitchen on the wall or floors, we suggest you get acquainted with the ways of the process.
The main ones are presented in the table:
| Styling methods | Features |
 Traditional |
|
 Diagonally |
When laying:
The subsequent rows are stacked in one of the ways:
|
 In a run |
|
 Herringbone |
There are two ways to stack:
To get a Christmas tree picture you need:
|
 Combination of methods | This method combines several types of laying ceramic tiles in one room, at its discretion |
 Modular | This is an ideal solution for laying tiles on the floor and in small rooms. Before carrying out work, it is necessary to make a drawing of the pattern, with the exact dimensions of the parts and seams. The easiest way to achieve a modular effect is to use tiles “under a modular grid” |
| How to put tiles on the wall is not worth it | |
 Stacking tiles | When laying ceramic tiles in a breakdown according to the pattern of the line, they look pretty rough |
 Checkerboard Chess | When laying tiles in a checkerboard pattern and placing them in a run-up, an optical effect will appear in which the walls and floor look curved |
Tip: In any case, choosing the option of laying tiles, you must rely on common sense and be sure to draw a drawing on paper beforehand.
After preparing the tools, materials and selecting the installation method, you can proceed to the process.
Technology of laying ceramic tiles
How to lay tile on the wall, the sequence of work is presented in the table:
| Process name | Installation instructions |
 Wall marking |
|
| |
 Glue application |
|
| |
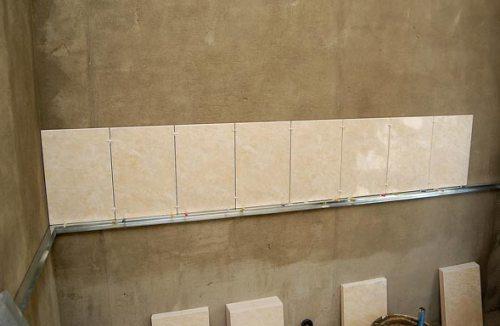 Laying tiles | The tile is slightly pressed onto the adhesive base, pressing it firmly to the floor. You can move it on the wall, for the correct location, until the glue has dried. |
 How to lay tiles on the walls |
|
 Tile filling openings |
|
| |
 Filling the gaps between the tiles |
|
 End of work |
|
When deciding to make repairs in the apartment, determine how to lay tile on the wall, it is necessary to choose the right pattern, its variant and dimensions depend on the size of the room, its shape and type of ceramic tile. In any case, everyone decides for himself which tile to buy for the wall, with which tools it will be more convenient to carry out work and the technology of laying the material on the wall.