How to putty the ceiling for painting correctly

How to putty the ceiling for painting, we will consider today in detail. After all, before the final surface finish, it is applied to the finish coatings, sometimes they are called finish coatings. Apply for leveling putty materials.
If the surface is to be wallpapered or painted in the future, then the plane should be perfectly smooth and even. It is with the help of putty that you can eliminate all the flaws on the surfaces.
The content of the article
Puttying rules
Preparation of the surface of the structure for painting can be different. It depends on her appearance. If it was already located on it: putty, whitewash, they must be removed. To putty the surface of the floor slab. All the work can be completely done with your own hands and there is nothing complicated, but there is its own technology. Instructions and will be offered below.
Attention: Please note that at the facilities of long-standing construction, the ceiling was made of clay. This design requires a different design. In addition, it can be made of drywall sheets. Each type of ceiling has its own technology for decoration. Which can not be broken.
Material selection
Putties are used for decoration:
- Oil-glue (see Oil-glue putty: what is it and what is it used for);
- From acrylic;
- Glue;
- From latex;
- Or shpakrilovye created on PVA.
Each - is intended for its type of work:
- Before surface treatment with putty, a primer is applied to it. Fillings can be starting or finishing. Starting - thick as sour cream, are used to seal holes on structures. For full alignment of differences or other flaws. The composition can be applied even more than once.
- Each layer should be well dried, only after that a subsequent layer is applied. When finishing, nets for reinforcement can be used. They will eliminate flaws in the future. Putty for the finish liquid, apply it after the start with a thin layer. Its purpose is to provide a perfect, smooth condition for the ceiling. By itself, it does not align, but gives the surface a finished finish.
Material and types of tools
Modern manufacturers of materials for finishers prepared putty, quality kits. Their composition includes primers made using homogeneous substrates. Putties are different: universal, for the finish, front, starting, others.
With the use of kits, the technology for finishing work has improved. They have become more perfect, comfortable. Now it’s not necessary for the masters to think about what exactly should be used in one or another case. Everything is already provided in the kit.
To execute, a tool is required:
- Mixers with nozzles;
- Drills;
- Graters or graters;
- Several spatulas, one should be narrow, the second - wide.
Attention: Each grater should have a felt with a length of about m. The primer should be applied with a brush or roller with different widths. These are very convenient devices.
Preparation of surfaces for puttying
Any work in the finishing process begins with the removal of materials already arranged once from the surface of the structure. To do this, the surface is qualitatively cleaned of traces of paint, whitewash, plaster.All spots of any kind that are on the structure are treated with special compounds.
- The origin of these spots is facilitated by the leakage of contents from sewers, water pipes, and heat pipelines. They can be extensive. If they are not completely removed and not dried, the future finish loses relevance. Dark spots will still be visible - this is dampness, mold, fungus, rust. Stains are tenacious, difficult to remove, but you still need to remove them from the ceiling!
- Difficulties will bring ceiling tiles. It will definitely have to be deleted. You can use any suitable tool for this. For example, a wide spatula. But if it is glued tightly, it hangs on the ceiling without gaps. You can not delete it. Just paint with water-based paint (see Do-it-yourself whitewashing of the ceiling with water-based paint) in the color you like. This is even a plus for work, less hassle.
- If it does not adhere tightly to the surface, it exfoliates. Shoot without regret. In places that are poorly moving away from the ceiling, you must gently knock with a hammer. She will fall off. If the tile has not been glued, remove everything from the ceiling: whitewash layers and other inclusions.
- Some wizards use the old grandfather method to remove old coatings. The previously applied water-based paint is impregnated with a solution of iodine. One vial is used on a bucket of water. The tile falls off, and the whitewash is washed off with water. Only this labor is difficult, there will be a lot of dirt, it is advisable to do without the iodine method.
- Now there are special washes, very convenient, it is very easy to remove old paint with their help. Its consumption is 0.5 liters per square meter. meter. You need to work with it with a brush or a wide roller, applying a wash to the ceiling. Leave the wash on the structure. And after 20-30 minutes, the paint is easily removed. She leaves without any problems. No dirt appears, everything is clean.
- Old putty from under the wallpaper is removed with a spatula. Provided that it begins to fall off or does not hold well. If you do not remove it, work on it further, then the putty after application will be peeling off. Let not immediately, but a little later, but - to peel off. For example, when ceiling painting. Then all the work in vain, it will be even more difficult. It will take a lot of time, deliver unnecessary chores. Time consuming.
- If there are cracks on the surface, then they should be expanded and then putty put on them. But before that they need to be cleaned, lengthened and deepened using a knife or spatulas. Then cover this place with a layer of primer, and wipe with putty.
- If there are protrusions on the structure or just bumps with dimensions greater than two cm, they must be knocked down using trojans, hammers, and perforators. If the surface is not even, it must be plastered. Overhangs of more than five cm will cause trouble. It is necessary to arrange plasterboard plates on the design.
Attention. Inspect all cracks and if there is a detachment of the old coating, they must be pre-plastered.
Priming surfaces
As soon as the surface of the ceiling is cleared, further work can be continued:
- First, check the level of application. To do this, the fishing line is simply pulled along the diagonals of the plane and immediately everything will be visible. Sometimes, for the purpose of correct measurement, a water level is used.
- If the measurements show that there is a slope of the ceiling, it is necessary to completely correct this drawback when performing priming work. And only then the ceiling is carefully covered with a primer. This is done to ensure strong adhesion of the material and the base. Since putty compounds cannot provide full reliability of adhesion. The primer is applied only to a neatly aligned surface.
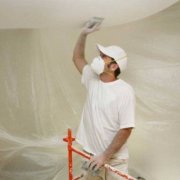
- If you want to do the work yourself, you need to watch the video in this article and the photo, it shows and talks about the proper placement of putty on the structure before painting. For drawing it is necessary to apply a primer of deep penetration.Do this using paint rollers.
- Sometimes telescopic handles are used instead. With a great length. The power of the master during application with such a tool is saved. For particularly problematic places, narrow brushes are used. Particular attention is paid to the corners, they are processed with high quality.
Primer - protection of the surface of the structure from mold, various fungi, stains. For this purpose, sometimes use an acrylic primer. All materials should be used as needed. Saving on them is not worth it.
Attention: The work performed depends on their quality of materials. With a small layer of primer, there is a risk of delamination of materials. As soon as the primer dries, its next layer is immediately applied, then the surface is well dried.
- After drying the primer, putty the seam and other flaws. There may be cracks, chips, they must be carefully processed. To get the best effect in the work, you can apply a grid. She will reinforce the seams. If it is properly arranged, then in the future no flaws will appear.
- After the layer is completely dry, the treated area is ground with a sandpaper, then coated with a primer. Sometimes not even once.
Surface treatment
After the primer dries, proceed to puttying. They do this by applying as a material, starting putty.
So:
- Capacity is required, it must be clean, spatulas with sizes from 40 to 450 mm, mixers, drills with nozzles. Nylon mesh, with cells about 2x2. It is intended for fixing putty. To give its layers integrity and against the occurrence of cracks. Work on the device can be performed easily. Even an amateur will cope with this.
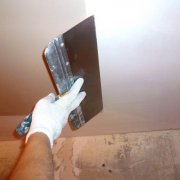
- Then we prepare the starting creamy putty. With a narrow spatula, fill holes, cracks, and other flaws on the surface of the structure. The composition of the material must be completely dry. Using a trowel, we cover the surface with starting putty.
- When preparing the volume for work, we take the mixer, lower it into the container and beat the contents to the state of softened oil. As soon as the composition is prepared, take a spatula of 100 mm. We only work so far, applying it. Then we take a spatula of 450 mm, put a putty on it with a thin layer. We process on the surface a strip equal in width to the grid.

- We prepare the mesh before this according to certain sizes and cut it. Cut and place in the right place. We heat the mesh into the putty already put in place. And we level using a wide spatula. We make sure that it is completely covered with putty.
- The composition should have a layer of about one cm. Then we should wait until the putty dries. The layer should be thin, so it dries faster. The thick layer dries for a long time, unevenly, the quality of the coating is reduced. During the process, it is necessary to monitor the evenness of the application of the material, it may be necessary in places to lubricate the putty again.
- We leave the strip about five cm wide not puttied. Then we cover this strip with the next row of grids. So we work further, each time leaving five cm under-putted, intended for covering with the next row of mesh.
- Under normal conditions, these layers dry in about eight hours. As soon as one of them dries, the other is applied. Its thickness is two mm. Then the grid should be carefully stretched. After which the place of work is almost resting. During this time, the putty is completely dried. This will take more than 24 hours.
- During the execution process, irregularities in the form of sagging, lumps may occur. They should be carefully removed using a sanding pad or sandpaper. If the work of the master seemed unsatisfactory, it is necessary to repeat the whole process of work. Together with drying and grinding. When performing work it is necessary to wear safety glasses, a respirator of gauze. So that dust during grinding of a structure does not get into a person’s eyes or lungs.
Puttying for the finish
According to the rules, finishing putty is applied over the starting one. It should be applied in a very thin layer.
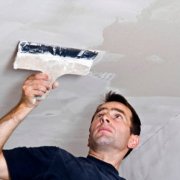
To obtain a thinner layer, a large spatula must be pressed firmly against the ceiling. The layer should be wide enough. On each package we carefully read the instructions of the instruction. And then we prepare the putty exactly in accordance with the instructions.

- Then we putty putty in a 100 mm spatula, apply it with a thin layer on a spatula of 250 mm in size. Working with a narrow spatula, we process space over pipelines and other inconvenient places. When performing the action, the spatula should be held at an angle of about 70 degrees.
Attention: It is necessary to ensure that the work of the tool is performed without stripes. Use a spatula to remove excess material. As soon as the putty dries, the treated area is sanded with abrasive material.
- After the first layer it is necessary to overlap to arrange the second layer. Do not forget to remove all residues from the surface, and align flaws, if any. They can be in the form of small scratches or roughness. If the ceiling is intended for smooth coloring, then it is treated with acrylic putty, which is already ready. It is not scarce, it is sold in construction markets, packaged in plastic buckets. It must be applied with a layer of not more than one mm.
- Now you need a spatula with a small angle, from about 70 to 80 degrees. From working with him there will be no lanes. You need to work very quickly so that the mixture that is on the edges does not dry out. If the next coat is required, it must be applied. But only the complete drying of the first layer. If everything is done correctly and neatly, the ceiling turns out to be perfectly flat, smooth, no grinding required.
- If gypsum boards are used, their surface is smooth, this must be taken into account and their surface treated accordingly. Very few are needed to process plasterboard putty boards. It is used only for joints of plates. As soon as the surface dries, it must be sanded. Then just apply the paint. Both types of work can be of high quality, but only with accurate execution. Any deviation from the rules entails negative results.
Surface grinding and primer before painting
As soon as the ceiling dries completely, it is polished. It is desirable that the room was darkened at this moment. It is created using curtains. If they are not at all, the work should be performed in the evening.

So:
- You need to take a table lamp, if you can, you can take a flashlight. If there is no one and the other, then you can attach a cartridge to a long rail, the light will be point. It is necessary that the device was comfortable to hold.
- Then, we direct a ray of light to the surface. Under such lighting, defects will be clearly visible. They are removed by grinding the surface. sandpaper. First we fix it on whetstones or a grater, we work. Such processing is subject to the entire surface of the structure. After polishing the dust, remove using a vacuum cleaner.
- Primer - the end of the work. The primer is now applied only when using a roller. brushes are used, but, for processing in particularly difficult areas. The rollers should have short fur. After the device of the first layer, the next one is placed in the perpendicular direction to the first.
- Regardless of the type of primer, each of its layers is located on the structure only after drying. It should be borne in mind that excess primer from this place can ruin all the work.
You now know how to putty the ceiling for painting and the price of the work will not be big if you do it yourself.


Personally, I had the experience of filling the ceiling only once and ended very sadly. I am not professional in this, but it turned out to putty the walls on my own pretty well, so I decided to do the ceiling myself. It didn’t work out. It turned out crookedly, in many places there were protrusions, bumps that you won’t erase with sandpaper. I had to knock down part of the starting putty, call a professional who corrected my “work”. My mistake was that I applied too thick a layer of starting putty, while it was advised not to be too zealous. In general, now I myself will not take up such work.